

Following on from our epic Agnadello clash in the summer Stuart visited this weekend for another set of wargames. This time we returned to our English and French forces, choosing an event during the 1523 English invasion of France upon which to base our games. The 1523 invasion achieved little but the assault upon the town of Bray was a notable clash which was recorded by both Elis Gruffydd, the Welsh soldier and chronicler who served in the campaign and recorded it in his, "An ill jurney for the Englishemen", and in the later, Hall's Chronicle, which we drew upon for our Venlo games earlier this year. I have quoted the two passages used in full below. Although the details of the events don't quite match up in these accounts, not an uncommon thing for sources of this period, they provided plenty of information from which we could write up some fun scenarios. For rules we used, as always, our heavily modified version of Lion Rampant. Stuart took command the Duke of Suffolk's English and I led (or at least tried to lead!) the French garrison of Bray.
 |
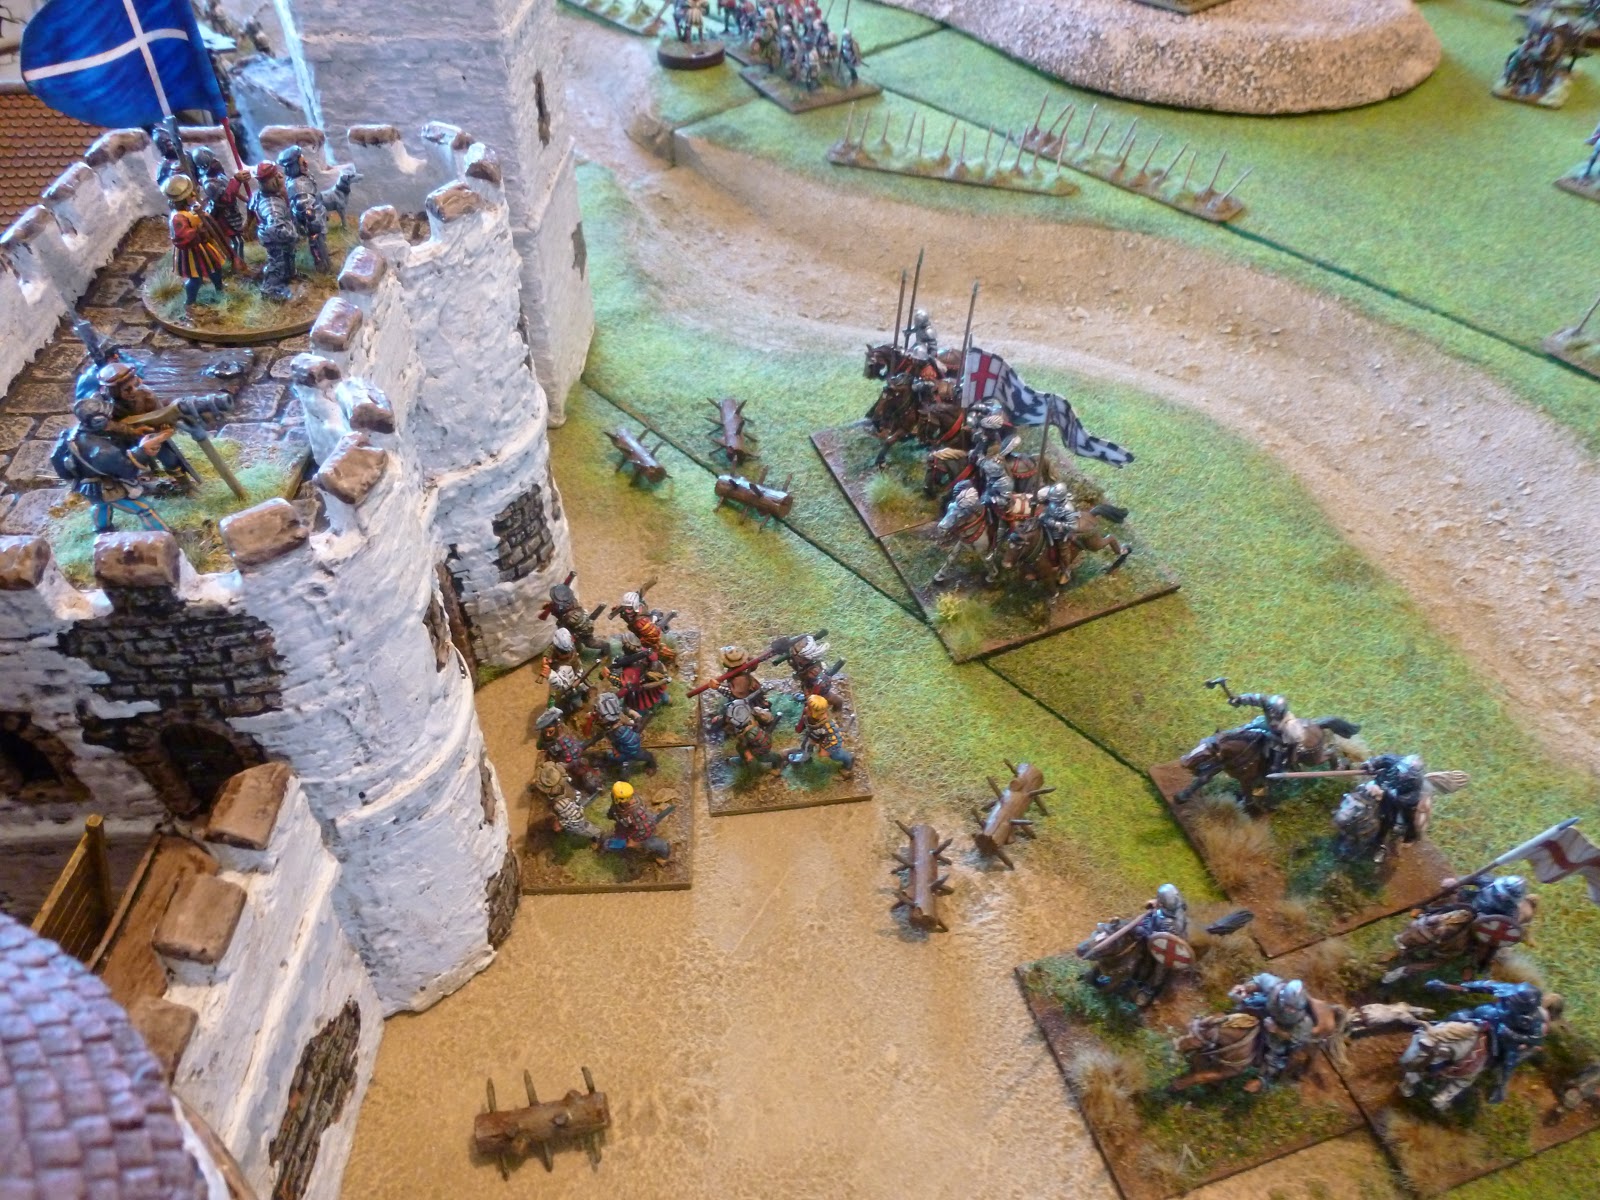
| The English and Imperial guns give the "fortress such a good day as to shatter gaps in the wall" |
 |
| Bray's northern gate "closed with earth and dung and stones". |
The Assault on Bray, 1523
Following his invasion of France in 1513, Henry VIII had returned to war with the French in 1522. Now allied to Maximilian's grandson, Charles V, he sent a much smaller army than that of 1513 under the Earl of Surrey. Surrey achieved little launching raids into Picardy and Artois before attempting a siege of Hesdin which failed due to a lack of artillery.
In August 1523 the Duke of Suffolk, Charles Brandon, took command with a larger army and Imperial reinforcements of 500 Heavy Cavalry and 3,000 Landsknecht under the Count of Egmont Buren. Late in the campaign season the army left the Calais Pale. On the 20th October they arrived before the French town of Bray. Let's hand over to Gruffydd and Hall to describe the assault and subsequent fighting:
Elis Gruffydd:
When night fell the Duke of Suffolk ordered some of his people , horse, foot and artillery to assault the town of Bray. These came to the fortress in the dead of night and planted certain great guns which gave the fortress such a good day as to shatter gaps in the wall so that men could scale them and assault the town, which the English soldiers did very gallantly. The men of the town did not stand an instant but gave up the struggle and fled after the rest of the people who were very hurriedly carrying their goods from the town and taking them across the river Somme, which flows on the south side of the town. As soon as the French heard that the Englishmen had entered the castle they set fire to the gate of the town and the street, which was very narrow, and began to break down the bridge so that the Englishmen would not be able to follow them any further. But before they had cut the bridge the Englishmen had won the town and had begun to bicker with them on the bridge which they had abandoned, and turned their backs on their enemies and took to their heels and fled fast along the great causeway of stone that stretched between two watery marshes, from the town towards France. This road was very narrow and the Englishmen pursued the Frenchmen very fast till they came to the further end of the causeway where there were two strong bailies of turf, one on each side of the road, in which were two brass serpents to guard it. But whether for lack of powder and shot or for fear of killing their own people they did not fire a single shot and the Englishmen kept the place.
By this time the Duke and all his host had arrived in front of the gate that lies to the north of the town which the men of the town had closed with earth and dung and stones. This the workmen had great trouble to clear in order to open it, and through it the horsemen and the artillery and the baggage passed and went across the river onto French ground.
Hall's Chronicle:
The xx day of this moneth the Duke commaunded al his great ordinaunce to be brought by iii. of the clocke in the morning before the toune of Bray, they that had the charge therof so manfully acquited them that notwithstadyyng all the damage that their enemies could do, brought the ordinaunce. before the toune at the houre appointed. Then eche part shot dredfully at other, but the Englishe gunners shot so wel, that the walles of the toune were beaten doune & rased with the ordinaunce, insomuche that by ix. of the clocke the toune was made assaultable. Then the duke caused to blow to thassault. Then the Englishmen & Flemynges & Burgonions lept furth quickely, and notwithstanding that the diches wer depe, yet they so coragiously entered by the good comfort of the lorde Sandes & other noble men that they got the ditches: The Frenchmen perceiuyng that the toune should be gotten, hastely made traynes of gunpouder from strete to strete & house to house, saiyng that the Englishmen after their entry into the toune would fal to pillage, & then sodainly sodain fyer should destroy them. This was the provision of the Frenchmen: by this time the Englishmen were enterying on the walles, and the Frenchmen stode yet: at defence with pikes, crosbowes, handgunnes & halberdes, but they were to weke, for on all partes entred thenglishmen and sodainly the Frenchmen fledde and the Englishmen folowed and killed and slew in euery part.
Nowe you must vnderstand that this toune of Bray standeth on the riuer of Somme whiche is there devided in divers braunches & betwene euery brauche is a marishe ground, where on the farside of the toune was fortified a Bulwarke ful of ordinaunce to kepe the passage over the water, & the Frenchmen had loosed the planckes of the bridge nere a myle aboue Bray, & the horsmen of Frauce passed by a myle which was to the French fotemen a great ayd, for thei stode & kept the passage till the fotemen wer come over the bridge, & then the plucked away the plankes of the bridge, so that no man shuld follow, but ever theenglishmen folowed & cast plankes on the bridge & passed over the bridge, in which passyng divers wer drowned, but with great travail all men passed, horsmen & fotemen, & fiersly assauted the Bulwarke and toke it with all the ordinaunce, & in it was taken capitaine Adrian and capitaine Ulterlew. The Englishe horsemen folowed the Frenchmen & divers of them wer slaine and taken, sir Robert Iernyngham brake a spere on the lorde Pountdormy. The lorde Leonard Gray did valiauntly that day. You must remember that when the Frenchmen issued out of the toune, they forgette not to lay a matche to the traine of gunnepouder whiche they had made, whiche in short space set the toune al on fyer, so that the thenglishmen returned again, al was on fyer, so that there they had little profite but wyne, whiche to them did great pleasure. This was the toune of Bray taken and destroyed the xx day of October.
We decided to break up the events described above into two scenarios. The first being the attack on the town itself and the second being the fighting for the bridge during the French retreat from the town.
 |
| The English and Imperial army prepares to assault the town. The landsknecht followed by the cavalry will make for the gate while the English infantry will head for the breach. |
 |
| There is panic inside the town as the garrison prepare to evacuate the livestock and townspeople. |
Scenario 1: The Assault on Bray
For this game the English had to deploy outside the town and assault it. The ditch and breach counted as rough terrain for movement and combat but gave a cover bonus as well. Mounted units could only move through the town gates, not the breach. The French could deploy anywhere in the town.
The game and victory conditions were subject to the following special rules:
The Town Gates:
Having been blocked up by the town's garrison the gates had to be opened. A unit of infantry had to be in contact with the earthworks in front of the gates to attempt this. Instead of an activation they could try to clear the gates. Initially they needed a 10+ on 2D6, then 9+, the 8+ and so on. If they failed the attempt it didn't not count as an activation fail for the army. More than one unit of infantry could attempt this in a turn but they still needed the same role as the other unit, so for example one turn two units may need an 8+ to clear the gates and then 7+ the next. Through the gates was the only way cavalry could enter the town.
The Artillery Duel:
To represent the artillery duel described by Hall at the start of the game both of us took 12 playing cards from a deck. For the first 5 turns we would both play a card at the start of the turn. The player playing the highest card won, if the cards drew we would play another. If the English player (Stuart) won the play they got a free move with D6 units while if the French player (myself) won the play I got to take a Mid Range Culverin shot at any unit within 24" of any of the Towers.
Burning Buildings:
The French player could secretly designate 4 buildings to be those that had gun powder in them and were ready to be set on fire when the English entered the town. The French player could declare at the start of his turn that a building was going to be set alight. On a D6 roll of a 4+ it burst into flame and all units within 2D6 inches of the building would take hits from 6 D6, each hitting on a 4+. The dice would be rolled separately for each unit affected. After the explosion the building was simply on fire and would cause no further damage.
Objectives:
Rather than this being a straight out fight the French had 6 objectives (we used bases of livestock) that had to be evacuated at the other end of the table. The objectives were all placed close to the breach and gate. Any unit could move an objective with them, if in contact with it, at a maximum of six inches per turn. The objectives could not be destroyed. The French could only start moving the objectives once the first English unit had entered the town via the gate or breach. The French won a point for every objective they removed while the English won a point for every objective not removed. The French units moving the objectives did not have to leave with them to evacuate them but had to move the objectives to the table edge. The number of objectives evacuated or captured would have a knock on effect in the second scenario around the bridge.
 |
| While most of the garrison are busy leading the evacuation, some archers are preparing to defend the breach. |
 |
| The rooftops of Bray. |
The retinues were as follows with the English having a larger assaulting force:
The Duke of Suffolk's English and Imperial Allies:
1 Unit of Demi Lancers (Sir Charles Brandon, Duke of Suffolk, retinue captain)
1 Unit of Burgundian Men at Arms
1 Unit of Border Horse
1 Unit of Foot Knights (lorde Sandes & other noble men)
1 Unit of Garrison Archers
1 Unit of Shire Archers
1 Unit of Shire Billmen (we used pikemen to represent them in the game as they carried Suffolk's banner)
1 Unit of Landsknecht Pike
1 Unit of Landsknecht Arquebusiers
The French Garrison of Bray:
1 Unit of Foot Knights (Garrison Captain)
2 Units of French Halberdiers
2 Units of Aventuriers
1 Unit of French Archers
 |
| Suffolk's troops clamber into the ditch to begin the attack. |
 |
| The landsknecht reach the blocked up gate and begin to clear it. Casualties to the English and landsknecht have been caused by the guns in and on the town walls. |
As always the best way to follow the action is from the captions under each photograph. The fight started fairly well for the garrison as out of the 5 card draws in the "Artillery Duel" the French won three and the English two. This meant that the landsknecht pike suffered losses from the guns of Bray while a whole unit of English archers fled from the combined effects of the town's guns and the arrows of the garrison's archers. As the landsknecht reached the blocked gate the English attempted the breach. The first English unit at the breach was repulsed by the defenders but behind them came Lord Sandes and his foot knights. They fought their way into Bray and pushed into the town square.
The entry of the English into the town was the signal for the garrison to attempt to flee with the livestock. As the French troops attempted to withdraw they were dismayed to find that it had not taken the landsknecht very long to clear the gates. The Imperialist infantry came crashing through the gate at the north of the town and into the Picard pikemen.
 |
| A view from above the town showing the English and Imperial attackers at the walls and the French garrison within the town preparing to meet them or escape if they can. |
 |
| Surrey's troops scale the breach and assault the town. The first unit in are thrown back by the French archers in confused fighting in the breach. |
 |
| English foot knights, "lorde Sandes & other noble men", are the first into Bray. They push the archers back into the town. |
 |
| Minutes later the landsknecht crash through the town gates having cleared them of the "earth and dung and stones". |
 |
| Outside Bray more English and Imperial forces prepare to enter the gates. |
The French had a nasty surprise instore for the landsknecht attackers. The defenders succesfully lit the trail of gunpowder that had been lain to the house by the gate. The building exploded as the trap was sprung and the landsknecht pikemen suffered casualties as they were engulfed in flames. The Picard pikemen counterattacked the landsknecht while they were still vulnerable and sent them running. By this time the English cavalry had made it through the gates and although the garrison's pikemen put up a fierce defence it was not long before they were overwhelmed.
Border horse galloped through the streets in an attempt to stop all of the French from getting away with their livestock. They were stopped by the garrisons crossbowmen which allowed them to get some of the livestock to safety. The border horsemen may have been defeated but yet more arrived outside the town returning from an early reconnaissance mission. The French needed to escape before even more English made it into Bray.
 |
| The French "lay a matche to the traine of gunnepouder whiche they had made" and cause casualties as well as panic amongst the landsknecht. |
 |
| The Duke of Suffolk's horsemen ride into the town. |
 |
| The Picard pikemen fight a brave delaying action against the Imperial landsknecht and English cavalry. |
 |
| As the English pour into the town the French are caught in the midst of the evacuation. |
 |
| English border horse race through the streets attempting to prevent any French from escaping. The garrison's crossbowmen see them off with an effective volley of bolts. |
 |
| Outside of Bray even more English arrive as reinforcements, border horse returning from a scouting mission. |
A fierce street fight broke out in the town's main street with English demi lancers and foot knights falling upon the garrison's halberdiers and crossbowmen as they desperately attempted to evacuate the town. In the chaos all of the remaining gunpowder traps set by the defenders failed to light and with the guns on the town walls long silenced there was nothing for the French to do but attempt to fight their way out.
While many of the garrison's men were cut down, the Duke of Suffolk himself pushed on into the streets only to be unhorsed by Bray's town captain. It had been a bitter and confused clash but the French had managed to get three of the six objectives safely out of the town. Both sides had taken heavy losses and the attack ended in a bloody draw.
 |
| Despite the chaos in the streets Bray's garrison manage to get some of the livestock to safety... |
 |
| ...but much of the garrison, and the town's livestock, is lost in the desperate street fighting. |
 |
| English archers move in to secure the town. |
 |
| The Duke of Surrey is unhorsed by the French garrison captain, giving the French troops valuable time to escape. |
 |
| A train of refugees flee the now burning town of Bray. |
Scenario 2: The contested crossing of the Somme
At the start of the game the only units that could be on the table were the ones hidden in the two bulwarks, if the French player had chosen to hide any units in them.
The French and English would enter the table from the same side, shown at the top of the photo below with the French entering first. Units could only enter on a successful move activation, they could not enter into combat. Once the first French unit had entered the French player would roll a D6. The result would mean the English were able to follow one turn later on a 1-2, two turns later on a 3-4 and three turns later on a 5-6. This could result in both sides bringing units on at the same time.
The game and victory conditions were subject to the following special rules:
The Bulwarks:
These gave plus 2 armour as cover to a unit within them. They could be fired from and counted as rough terrain for any combat within them. They did not impede movement when units moved in or out of them. The French could deploy a hidden infantry or artillery unit in each which would only be revealed if they shot, moved out of the bulwark or an enemy unit attacked them in the bulwark.
These gave plus 2 armour as cover to a unit within them. They could be fired from and counted as rough terrain for any combat within them. They did not impede movement when units moved in or out of them. The French could deploy a hidden infantry or artillery unit in each which would only be revealed if they shot, moved out of the bulwark or an enemy unit attacked them in the bulwark.
The Bridge:
The bridge was rough terrain to fight on, did not hinder movement and gave cover from other units shooting at the bridge who weren't on the bridge.
To break the bridge one unit on the bridge, mounted or infantry, could attempt this as an activation. They needed a 9+ on 2D6. Once broken the bridge could not be crossed but repair attempts could be made. The river was impassable.
To break the bridge one unit on the bridge, mounted or infantry, could attempt this as an activation. They needed a 9+ on 2D6. Once broken the bridge could not be crossed but repair attempts could be made. The river was impassable.
To repair the bridge one unit on the bridge, mounted or infantry, could attempt this as an activation. As with breaking the bridge they needed a 9+ on 2D6 to repair it. If repaired the bridge was again passable but could be broken again.
 |
| Bray is assumed to be at the top of this photo, with the bridge over the Somme and the earthern bulwarks in the centre. The French have infantry hidden in the bulwarks. Both the French and English will enter the table from the far end, on the causeway, at the top of the photo. |
Victory points were as follows:
The French:
2 points for every infantry unit that crossed the bridge and left the table at the far side. Any units in the bulwarks could only leave after all other infantry units had left or been destroyed.
1 point for every Cavalry unit that crossed the bridge and left at the far side of the table.
5 points if the bridge was destroyed at the point when all the French units had left the table.
3 Points if Lord Pountdormy defeated Sir Robert Jerningham in combat, by challenge or unit to unit combat.
The English:
3 Points if Sir Robert Jerningham defeated Lord Pountdormy by challenge or unit to unit combat.
5 points if the bridge was not destroyed when all the French had the left the table or been destroyed.
1 point for every French unit destroyed.
For the armies we chose our forces in secret for this game, each of us taking 29 points of troops with an additional 2 points per objective evacuated or captured in the first game. As this had been a draw with the French and English both securing three objective this meant we both had 35 points of troops to choose for our retinues. The retinues had to contain a mounted unit for the Leader - the English having Sir Robert Jerningham, a Calais Veteran and Captain of Newen Bridge, and the French having Lord Pountdormy.
The retinues chosen were as follows:
Sir Robert Jerningham's English Pursuers:
2 Units of Demi Lancers (one unit represents Sir Robert Jerningham, the retinue captain)
1 Unit of Burgundian Men at Arms
1 Unit of Border Horse
1 Unit of Mounted Archers
1 Unit of Foot Knights
1 Unit of Garrison Archers
Lord Pountdormy's retreating French:
1 Unit of French Ordonnance Archers armed with lances (Lord Pountdormy, retinue captain)
2 Units of Stradiots
1 Unit of Aventuriers
1 Unit of French Halberdiers
1 Unit of Picard Pikemen
and in the two bulwarks on the other side of the river:
1 Unit of Foot Knights
1 Unit of Aventuriers
 |
| The retreating French race towards the bridge, two groups of Stradiots being the first to arrive. |
 |
| The French forces have their first stroke of bad luck (the first of many!). The English arrive immediately on their heels and begin to chase the Stradiots down. |
As soon as the first French units raced onto the causeway in an attempt to reach the bridge the pursuing English cavalry were upon them. The Burgundian men at arms, who had held back from the assault on the town as it looked like they may have had to do some fighting were now the first into the action hoping for an easy victory. The Burgundian's suffered from the skirmishing actions of the stradiots at first but then managed to catch and disperse them.
Seeing more English than French banners heading towards the bridge the unit of crossbowmen defending it emerged from the safety of their earthern bulwark and delpoyed on the bridge. As the English and Imperial horsemen rushed towards them, scattering most of the stradiots they began to try and damage the bridge to prevent the English from crossing. Their comrades still on the wrong side of the Somme would have to fend for themselves!
 |
| French aventuriers have emerged from one of the bulwarks and guard the far end of of the bridge while the English secure the causeway. Any French arriving now will have to fight their way through. |
 |
| The retreating French infantry arrive only be set upon by the pursuing English cavalry. |
 |
| More retreating French troops arrive only to be set upon by the English. |
 |
| The last unit of stradiots attempts to cross the bridge but they are caught and defeated by the Burgundian men at arms. |
As more retreating French infantry units arrived they were quickly defeated by the pursuing English who had now deployed archers on foot and on horseback in an attempt to catch the fleeing garrison. One by one the garrison units were overwhelmed and scattered long before they could travel along the causeway and get anywhere near the bridge.
At the bridge itself the defending crossbowmen had more luck. The emboldened Burgundian heavy horse defeated the last of the stradiots and then attempted to clear the crossbowmen from their path. They had little choice as they would be sitting ducks if they stood and waited for the rest of the English and they had to try and stop the bridge from being broken. They attacked the French along the narrow bridge and were defeated in a quick but fierce melee in which both sides took casualties. With the Burgundian threat gone the crossbowmen once more attempted to break down the bridge but it was too late. As more English arrived on the opposite banks of the Somme they launched volleys of arrows at the already exhausted French and sent them running.
 |
| At the bridge the Burgundian men at arms face down the French crossbowmen. The crossbowmen desperatly attempt to break the bridge and prevent the English crossing the river. |
 |
| The arriving French infantry are surrounded by English cavalry and archers, they don't last long in the field! |
 |
| The Burgundians charge the aventuriers as they attempt to sabotage the bridge. |
 |
| The crossbowmen have the advantage of the fight as the narrow bridge makes it hard for the men at arms to charge effectively. The Burgundians are thrown back. |
 |
| Having lost the infantry he was attempting to escort to safety, Lord Pountdormy, the French Captain, races onto the field in an attempt to escape but... |
Up until now the encounter had all gone Sir Robert Jerningham's way. If the French could break the bridge and bring the English captain down then they could still have some success. To this end the foot knights who had been hiding in the other bulwark emerged to try and break the bridge down and Lord Pountdormy himself rode onto the field. He wanted to attempt to "brake a spere" on Jerningham. It was not to be. Arriving amidst the pursuing English, Pountdormy was attacked by the border horsemen, English archers and Jerningham's demi lancers. Pountdormy's troops routed before he could challenge Jerningham to a duel and although Jerningham did brake a spere on the lorde Pountdormy, the French cavalry managed to flee and escape his horsemen before they rode off along the banks of the river.
The foot knights arrived at the bridge too late. The English had already positioned archers on the opposite bank and under a volley of arrows they were unable to break down the bridge. They fought off the first unit of demi lancers that crossed to engage them but after that were overwhelmed and run down as they tried to flee the bridge. It was complete English victory, they had taken the bridge before the French could break it down and not a single French unit had escaped to safety!
 |
| ...he is caught by the English demi lancers. After loosing a brief melee he rides off along the banks of the Somme, being unable to cross the river. |
 |
| Depsite their victory over the men at arms the French crossbowmen flee. From the other earthwork a group of French foot knights emerge in a final attempt to break down the bridge. The pursuing English mass on the other side of the Somme. |
 |
| The foot knights succeed in fighting off one group of demi lancers but they are then overwhelmed and caught as they attempt to flee for safety. None of the French have escaped and the bridge still stands - a complete English victory! |
These were another great couple of games. It was great to play out the events taken from the sources and the special rules made the games very entertaining. If only more of those exploding buildings had worked in the first game and the English hadn't arrived so quickly in the second! I was really pleased with how my newly repainted fortifications looked, they fitted in well with our collections of buildings. Stuart was a great opponent as always and of course we had to have a few (too many) celebratory drinks. A picture of our own retreat from a chaotic town is shown below!
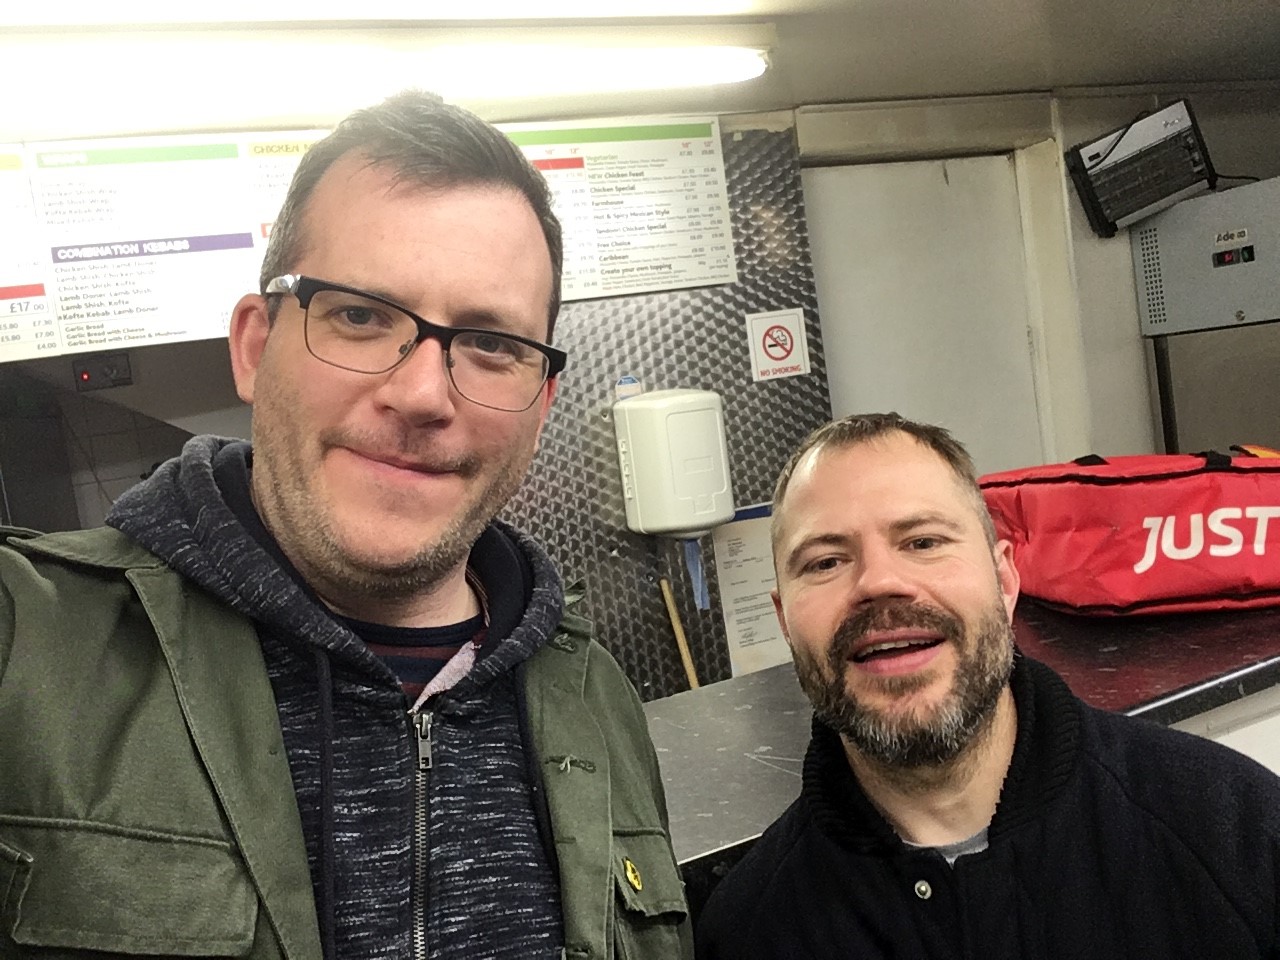 |
| The "Generals" looking a bit worse for wear having fled the town after a few too many drinks to seek refuge in a kebab shop! |
Another super looking pair of games. Love what you two get up to!
ReplyDeleteCheers Peter - they were fun games
DeleteSplendid stuff, I marvel at the great display of miniatures you both put on, and your investment in terrain shows, it looks fantastic when all laid out, and thanks for giving me a good giggle in the final ending of your report, hilarious!
ReplyDeleteCheers Chris, and I am glad you appreciated our kebab shop selfie!
DeleteAnother excellent narrative OLi, I particularly enjoyed how you weaved in the words of the contemporary accounts into the game report. Look at those photographs too ! the town and causeway looked great. That was an excellent mini-campaign, a testament to the time you put in researching it and putting it together. We'll have to scour the sources for some more Tudor Valois actions.
ReplyDeleteThere will indeed be more Tudor Valois actions - it is great fun going through the chronicles and turning the accounts into scenarios! I really enjoyd the games. Let's see what 2020 has in store.
DeleteSuch fantastic looking games. Lovely battle reports too.
ReplyDeleteThank you Carole, I am gald you enjoyed the write up.
DeleteI always admire your games! Bravo!
ReplyDeleteCheers Klingula, I am pleased you enjoyed them.
DeleteVery nice all round. I initially thought it was 'The Fracas at Bray' as in Wargames Tactics by Charles Grant, which was a medieval skirmish game. But I'm glad I still looked
ReplyDeleteThank you Khursu, I remember Charles Grant's books - I don't recall "The Fracas at Bray" though. I am glad you enjoyed the post.
Deleteas always an exciting Battle report. perfect setting.
ReplyDeleteCheers Ronin, the attack on Bray is a game or a set of games I have had in mind for a while.
DeleteFabulous looking pair of games and sounds like great fun too! No period headgear in the kebab shop?
ReplyDeleteBest Iain
Cheers Iain, I fear the retreat from town may have been even more rapid had we been in period headgear!
DeleteLate to the party here. Superb pair of linked scenarios. Great models. Inspiring stuff!
ReplyDelete