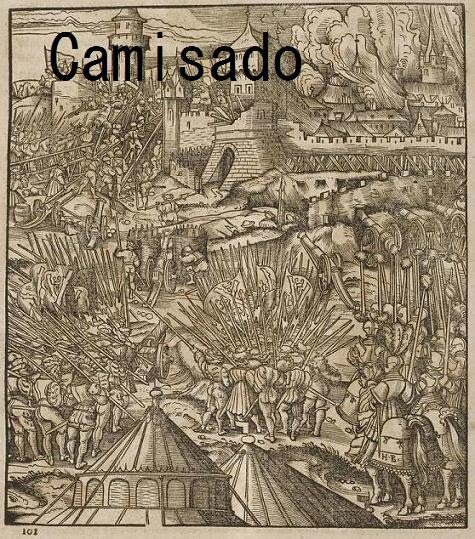
The Assault on Jedburgh, September 1523
In September 1523, while the Duke of Suffolk was invading France at the behest of his brother in law, Henry VIII, the Earl of Surrey, based in Newcastle, was once more instructed to cross the northern border with the aim of making a damaging raid into Scotland. This was his second raid that year, having already taken Cessford in an incursion in the spring. In this second attack he led 6,000 men in a vicious assault on the border town of Jedburgh.
Writing to Cardinal Wolsey a few days after the attack Surrey explained how he liaised with Lord Dacre and together their forces surrounded the town. Surrey describes how the Scots unthatched their houses "and laid it in the streets, and set fire on the same, so that the smoke was very noisome". The town was attacked simultaneously in three places with Sir Arthur Darcy (the letters state Dacy but I think Darcy is correct), Sir Marmaduke Constable and Sir Richard Tempest's son and brother leading the respective bodies of English troops.
The Scots put up a valiant defence with bitter hand to hand fighting taking place in the streets of the town. Eventually the town was taken with some of the defenders escaping through woods or down cliffs and others retreating to the abbey which the English could not take. Surrey described the town and events as such "The said town doth stand the most dangerfully to be entered that ever I saw any, environed with great steep cliffs and waters, so that none ordnance might be brought within the same; whereby the church, being vaulted roundabouts, and a strong steeple, could not be gotten; wherefore we were enforced to burn a great part of the same".
The Earl hoped that the abbey would fall but the defenders prevented him from blowing it up with powder barrels by filling its vaults with burning turf and straw which, while doing little harm to the abbey, made any attempt to place a barrel of powder within it very hazardous. As a counter measure to this Surrey had the powder barrels wrapped in salted hides and provided large pieces of timber so the barrels could be rolled down into the abbeys vaults "as wine doth into the cellar".
The Game
To represent the attack from various directions the English player commanded two smaller retinues against a larger Scots one. This gave the Scots the advantage of their one retinue being able to act after each of the English ones had their turn. As ever we used our constantly changing Renaissance Rampant adaptation of Lion Rampant with quite a few special rules for this game.
Defenders hidden in the buildings
At the start of the game the Scots player had the option to place any infantry units that weren't artillery or pike into any of the town's buildings. The English player did not know where the hidden units were. During the Scots turn a unit could exit the building it had been hidden in with a shooting, attack or move activation. The attack or move activation meant the unit left the building to carry out the action. If they made a ranged attack, they were also placed outside of the building facing in the direction in which they were shooting. This represented them emerging from cover to shoot. If a unit failed an activation whilst hidden in a building it was still placed outside of the building facing in the direction it would have acted. This represented the troops giving away their position but failing to act. Once out of a building a unit was commited to the fight and could not re-enter. A challenge could not be issued from the secret locations, such behaviour was deemed far to unchivalrous!
"so that the smoke was very noisome"
To represent the confusion caused by the smoke screen the defenders had attempted to create around the town if an English unit rolled a "Blunder" result for an activation the Scots player could decide if they wanted them to role on the "Blunder" table or instead the Scots player could move them a full move in the direction of their choice as they became lost in the smoke or, if they had a shooting attack, designate them to shoot at a friendly unit who they had mistaken as ambushing Scots in the smoke.
"we were enforced to burn a great part of the same"
Victory in this game centred around the English attempting to burn down four locations in the town and also attempting to blow up the vaults of the abbey (the abbey and four locations, labelled the guildhall, watermill, inn and almshouse, can be seen in the photo below).
To burn one of the four buildings the English player had to have at least one base from a unit in contact with it at the start of their activation phase. As an ordered activation, they could use that unit to try to set fire to the objective (instead of Moving, Attacking, or Shooting). If there were 7 or more models in the unit the fire started on a roll of 8+ on 2D6; if there were 6 or fewer models in the unit the fire was started on a roll of 9+ on 2D6.
If a Scots unit was hiding in a building that was set on fire they had to succesfully roll for a move activation. If this was failed then they were considered lost in the burning building!
"as wine doth into the cellar."
The English player assigned in secret a unit in each of his two retinues to carry the necessary timber and hide covered barrels to be able to attempt to blow up the abbey.
If the unit routed or was destroyed the demolition equipment would be revealed and another English unit could pick it up by moving into contact with it. A counter was used to represent the barrels. The Scots player would then know which unit had the barrels so the element of surprise would be lost. The Scots units could not pick up the barrels.
To attempt to blow up the abbey an English unit carrying the powder barrels had to be in base to base contact with any part of the building. Instead of an activation they could try and roll the barrels into the vaults. To do this they chose three numbers from 1-6 and rolled a D6. At the same time the Scots player would place a D6 under his palm showing a number he had chosen on the dice. If the English player rolled one of their 3 numbers the abbey vaults were considered blown up. If the Scots player's hidden number was rolled then the English unit was also blown up and removed from play regardless of whether the abbey was also destroyed!
Honour Points
Victory for this game was based on Honour points. Points were awarded as follows:
The English
2 Points for every one of the four buildings burnt.
8 points if they can blow up the vaults of the abbey.
The Scots
2 points for every one of the four buildings protected.
4 points if they can save the abbey from being blown up.
2 points for Sir Marmaduke Constable being killed or routed.
2 points for Sir Arthur Darcy being kiled or routed.
The Retinues
The retinues were as below. Stuart took command of the two English retinues whilst I took command of Jedburgh's defenders.
The English attackers
Sir Marmaduke Constable's Retinue
1 Unit of Foot Knights, Sir Marmaduke Constable and his retainers.
1 Unit of Foot Knights
1 Unit of Garrison Archers
1 Unit of Garrison Archers
1 Unit of Garrison Billmen
1 Unit of Shire Archers
Sir Arthur Darcy's Retinue
1 Unit of Foot Knights, Sir Arthur Darcy and his retainers.
1 Unit of Foot Knights
1 Unit of Garrison Billmen
1 Unit of Shire Billmen
2 Units of Shire Archers
The Valiant defenders of Jedburgh
1 Unit of Foot Knights - The Captain of the town and his Border Reiver bodyguards.
1 Unit of Foot Knights
2 Units of Shire Longbowmen
1 Unit of Border Pike
2 Units of Scots Pike
2 Units of Dismounted Borderers
1 Unit of Shire Bill
1 Organ Gun
These town clashes always turn out to be pretty chaotic but as always the photos are probably the best way to follow the action.
 |
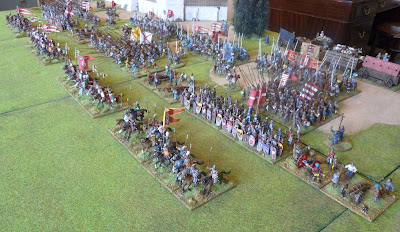
| Sir Arthur Darcy's retinue deployed to attack the town. |
 |
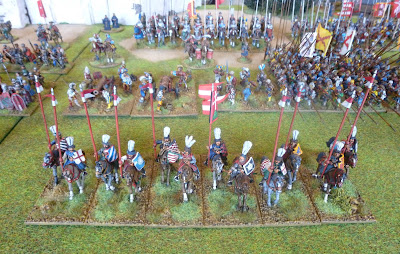
| Sir Marmeduke Constables retinue is deployed in a position to make straight for the abbey. |
 |
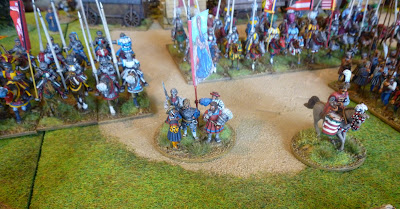
| Border pikemen along with some of Jedburgh's militia and an organ gun defend the abbey. |
 |
| In the town centre a unit of Scots pike stands on guard. |
As the English entered Jedburgh, attacking from two different directions, the men under Sir Marmeduke Constable were ambushed almost immediately with tough dismounted borderers charging out from one of the town houses and crashing into a unit of archers. The archers were trapped and defeated but the borderers were then in turn bested in a vicious melee with Constable himself and his armoured retainers. Constable's billmen and men at arms made straight for the abbey only to see more of the town's defenders emerge onto the streets, the Scots archers stalling the English attack.
Having advanced through a less dense part of the town Sir Arthur Darcy's men met with more success. There was an incident of "friendly fire" in the smoke as one group of archers accidentally shot some of their comrades but other than that all seemed well. Darcy himself made it to the town inn and set it alight. The Scots archers who had been hiding within it had no option but to bail out into the gardens behind the inn.
 |
| As the English enter the town fighting breaks out almost immediately as borderers who have been waiting in ambush attack some of Sir Marmeduke Constable's archers. |
 |
| Sir Marmeduke Constable and his retainers join the fray but it is too late for the English archers who flee. |
 |
| As a group of English men at arms and billmen make an attempt on the abbey the town's militia spring into action. |
 |
| A view of Sir Marmeduke Constable's troops as they make for the abbey. |
 |
| As Sir Arthur Darcy leads another of the pincers in the attack a unit of Scots archers attempt to stop him. |
 |
| A hardened band of border pikemen move into Jedburgh's streets. |
 |
| Sir Arthur Darcy's men at arms successfully set the town inn alight. |
More bad luck befell Sir Marmeduke Constable as his retainers clashed with the local borderers who were in charge of Jedburgh's defence. A duel with the Scots leader proved inconclusive but Constable's men at arms were downed and he soon followed, falling in the narrow streets. Sir Arthur Darcy's men pushed on from the other side of the town and drove back the pikemen holding the centre of Jedburgh. There were attempts to set some more of the buidlings alight but these were thwarted as defenders continued to charge from the buildings. The men at arms leading Darcy's retinue right into the heart of the town were attacked by borderers wielding jeddart staves, bills, spears and halberds while the supporting English archers were driven back as a group of Scots men at arms led an attack out of the church.
Despite the ferocious defence Darcy's forces proved too strong. The Scots men at arms and borderers eventually fled in all directions to make escapes to the abbey or through the surrounding woods. What remained of Sir Marmeduke Constable's force was trapped. Being unable to escape in the narrow streets they were surrounded and brought down by the border pikemen who were defending Jedburgh. Having defeated this part of the English attack these Scots then rushed to defend the abbey as Darcy's forces pushed towards it through the smoke filled town.
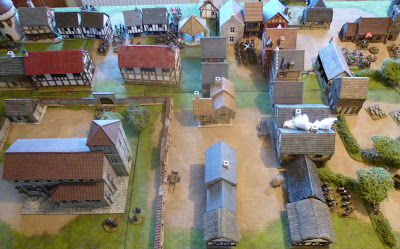 |
| A view of the town from above. Sir Mameduke Constable's men have attacked from the top left of the photo with Sir Arthur Darcy leading his men in from the top right. |
 |
| In the town centre English men at arms charge into the defending pikemen. |
 |
| More Scots borderers emerge from the buildings to attack the English knights and gentlemen. |
 |
| A band of Scots men at arms storm out of the church to the horror of the English archers who are advancing into Jedburgh. |
 |
| With their captain down Sir Marmeduke Constable's men fight on. |
 |
| A fierce melee has developed as the Scots men at arms attack the English archers. |
 |
| The archers flee leaving the billmen to finally bring down the Scots men at arms. |
 |
| Trapped in the streets the levied archers from Sir Marmeduke Constable's force fight a last stand against the surrounding Scots. |
 |
| Some of the towns defenders armed with bows follow the English at a distance in the smoke. |
 |
| The border pikemen have fallen back to defend the abbey but they are brought down in the street fighting with Darcy's billmen. |
By now most of the town's defenders had either been slain or fled. The border pikemen who had defeated what was left of Constable's retinue were themselves caught as they redeployed in defence of the abbey. Unable to get into formation and use their pikes a combination of English men at arms and billmen swiftly defeated them. Darcy and his men at arms picked up the powder barrels that had been dropped by Constable's retinue and made it to the abbey's smouldering vaults. The barrels were rolled in down the timbers and into the vaults as wine doth into the cellar. To Sir Arthur Darcy's horror the subsequent explosion was not from the below the abbey but rather from Jedburgh's organ gun which had been wheeled around the abbey as a final defence. As Darcy and his men were sent reeling by the gun the English attack had clearly come to an end.
This was a tense game with the additional rules really adding to the chaos. In game terms the Scots forces were weaker than the English but we found that the ability to hide units in the buildings which could launch instant attacks on passing units gave the Scots a big advantage. This advantage was compounded by the turn system we were using. It meant the Scots retinue would take a turn, then one of the English retinues, the Scots retinue again, and then the other English retinue. As the game played out this proved to make a big difference. Despite this it remained exciting and tense right up to Darcy's attempt to blow up the abbey. If the English had pulled this off and Darcy had managed to avoid that lurking organ gun it would been an English victory but the defenders of Jedburgh won the day.
