Over the festive period with some time off work my brother, Jeremy, and I thought it would be fun to get a load of figures on the table and have a wargame. We didn't want anything too complicated so chose a refight of the Italian Wars battle of La Motta as the event on which to base our game.
La Motta, 1513
Following the defeat of Louis II de la Trémoille's French army at Novara in June of 1513,
http://camisado1500s.blogspot.com/2022/06/novara-1513.html, their Venetian allies suddenly found themselves isolated. Formerly part of a "Holy League" established by the warrior pope Julius II in 1511 to throw the French out of Italy the Venetians had decided to ally with their former foes in March of 1513 when the Papacy sided with another league member, Maximilian I, over Imperial territory in northern Italy. Maximilian, supported by the Papacy, laid claim to most of Venice's mainland Italian territory of the Veneto.
Facing a hostile Spain, Papacy and Holy Roman Empire the Venetian forces were led by Bartolomeo d'Alviano (who had won a victory against Maximilian's forces in 1508 at Cadore,
http://camisado1500s.blogspot.com/2021/02/pieve-di-cadore-1508.html, and suffered catastrophic defeat at French hands at Agnadello in 1509,
http://camisado1500s.blogspot.com/2019/08/agnadello-1509.html). D'Alviano retreated to the safety of the Veneto. The Spanish Viceroy of Naples, Ramón de Cardona, joined with Imperial troops under Georg von Frundsberg, the Italian Condotierre Prospero Colonna and 200 Papal men at arms and after an abortive siege of Padua the combined forces swept through the area between Padua and Venice devastating as much Venetian territory as possible and deliberately targeting the villas of wealthy Venetians. This provocation worked and after being reinforced by local volunteers and angry Venetian nobles d'Alviano was forced to take the field against the Spanish, Papal and Imperialist forces (Spain and the Empire were yet to be unified under Charles V at this point).
As the Holy League force attempted to make its way to Vicenza and out of Venetian territory on 7 October 1513 they found their path blocked by d'Alviano. The allied Holy League forces consisted of around 7,000 infantry, 3,500 of these being landsknecht, and 1,000 horse whilst d'Alviano may have had as many as 10,000 poorer quality infantry and 3,000 cavalry. The Venetian general attempted to outflank the Spanish and Imperialist forces by placing heavy and light cavalry on his left flank with Gianpaolo Baglioni and further cavalry on the right. The Venetian centre was held by the Venetian militia drawn up in two squares on a hill. Facing them Cardona and Colonna took command of the allied cavalry whilst the landsknecht infantry under Frundsberg and Spanish infantry under Fernando d'Ávalos, Marquess of Pescara, formed in two separate contingents.
The Spanish and German infantry made straight for the Venetian infantry routing the two square formations. The landsknecht were particularly savage in their pursuit, taking revenge for the slaughter that had taken place a Cadore five years earlier. Although the allied cavalry had been outmatched by the Venetians this rout led to a general collapse of the Venetian forces and all of their banners and artillery were captured along with the cavalry commander Gianpaolo Baglioni. To make matters worse Teodoro Trivulzio, who held Vicenza for the Venice, refused to let the fleeing troops enter fearing the pursuing forces may enter with them. This meant that many of the Venetian cavalry drowned attempting to ford nearby rivers and escape. Vicenza did fall to the Spanish and German forces but the extent of the defeat was limited as winter closed in. The Spanish set up winter quarters in Polesine with the Germans stationing themselves in Verona.
 |
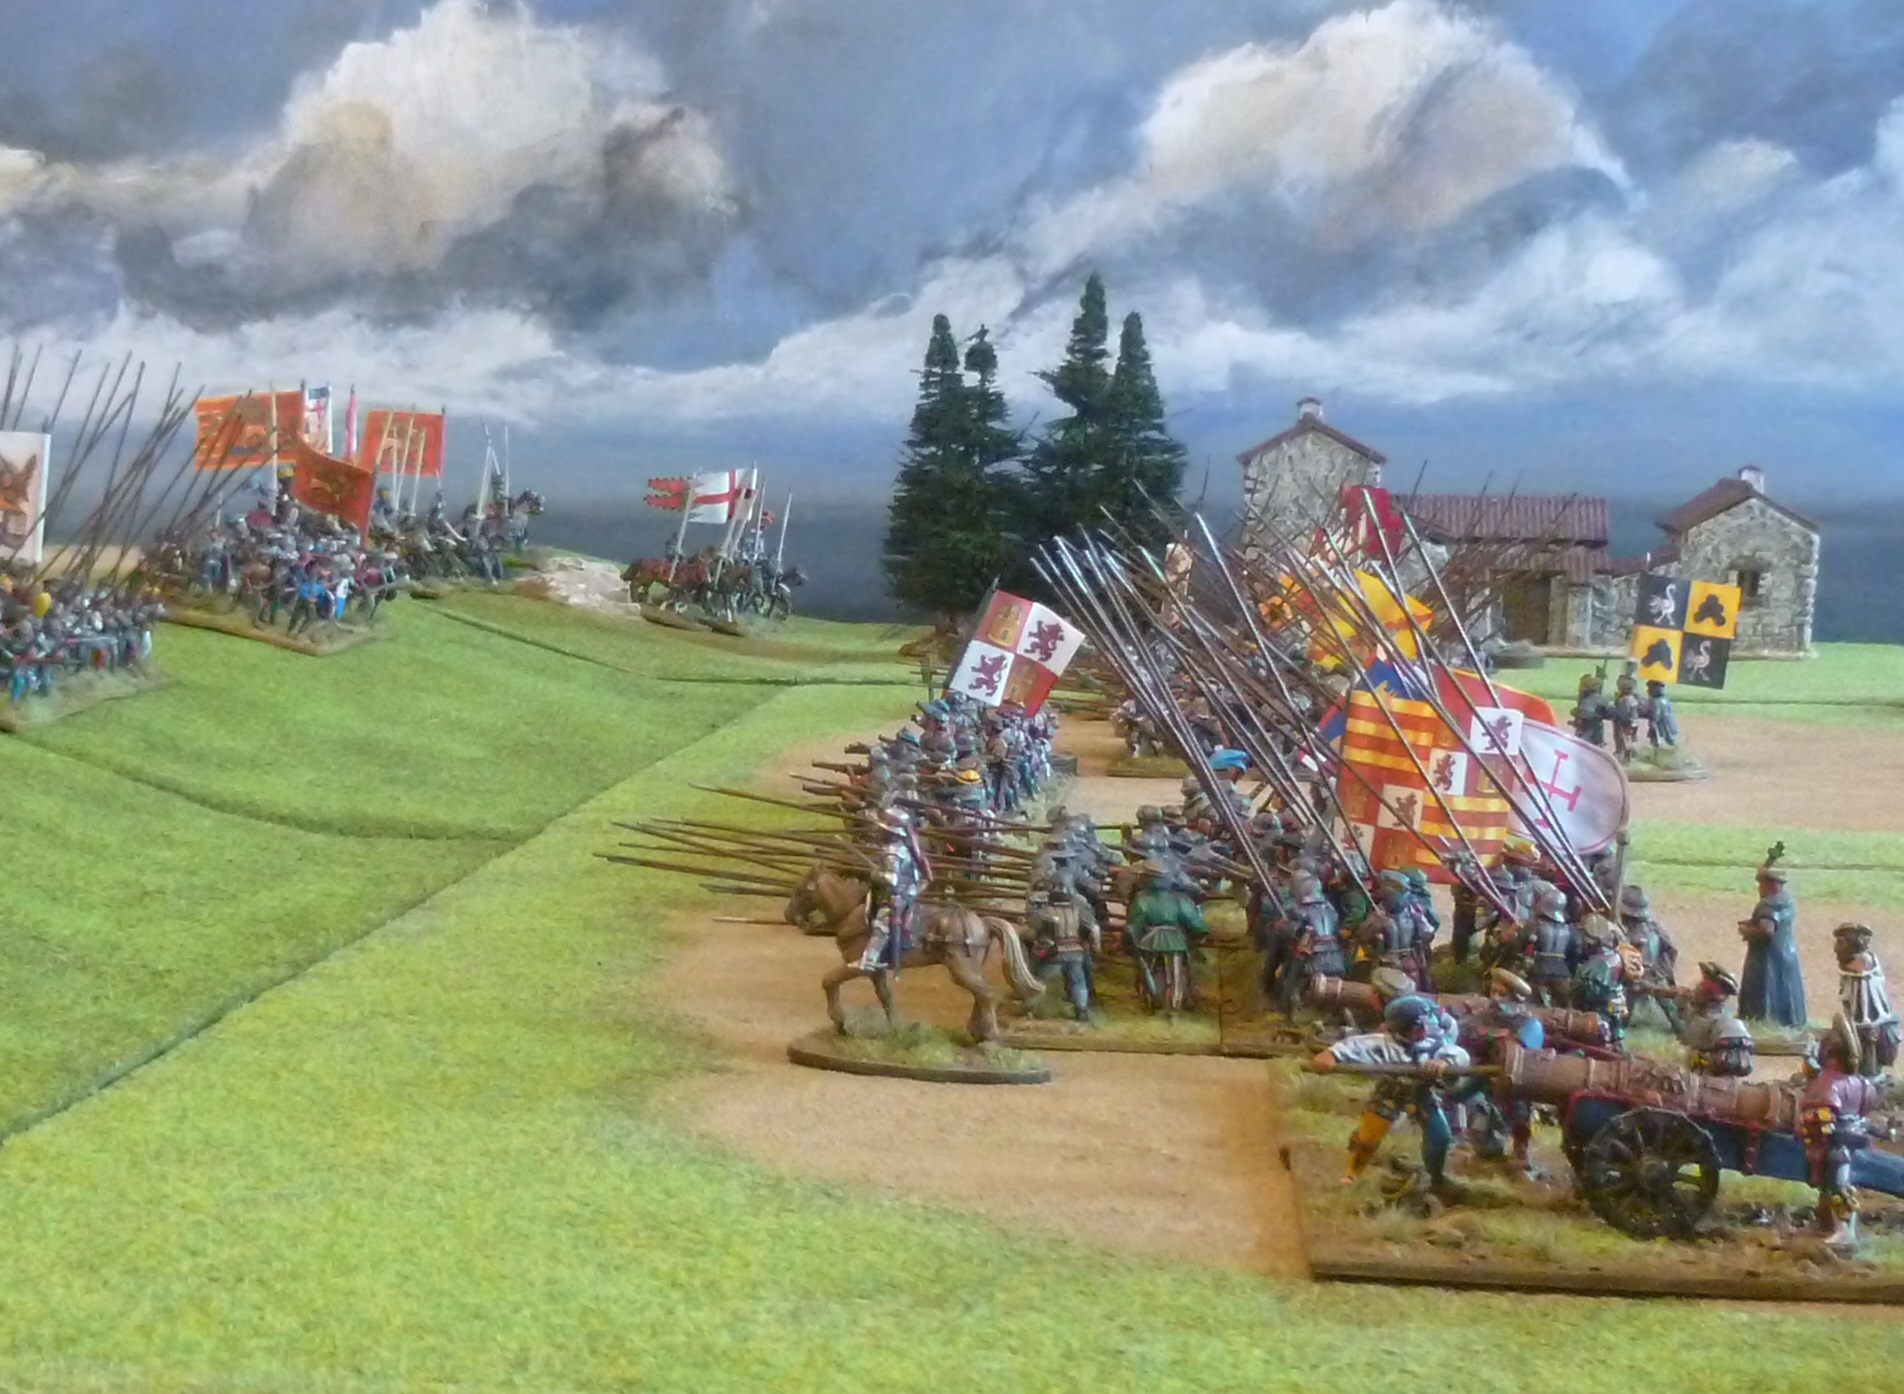
| The armies deployed. On the left of the photo the Venetians are arrayed with a large contingent of militia in the centre whilst heavy and light cavalry form two wings. On the right is the Holy League force with professional infantry in the centre and smaller bodies of horse on the wings. The Holy League army commander, Ramón de Cardona is on the League left flank whist the Venetian general, Bartolomeo d'Alviano in on the Venetian left flank. |
 |
| A view of the Holy League force from the other end of the table. In the foreground is Prospero Colonna with a unit of men at arms. Behind him are Frundsberg's landsknecht, whilst in the top left of the photo are Pescara's Spanish infantry and Ramón de Cardona with more men at arms. |
 |
| A view of the mass of Venetian levies formed up on a gentle ridge. |
 |
| Fernando d'Ávalos, Marquess of Pescara with the Spanish infantry and Holy League artillery. |
The Scenario
We wanted to keep the game simple so decided to fight it out as straight forward battle with victory going to whoever could rout or destroy the opposing force. Whilst we used lots of figures for the units the game was played with the simple Renaissance Rampant rules that I always use. This way it would look like a larger scale battle but we could play it through in a morning. To give the right feel of the battle of La Motta we included a couple of special rules.
Deployment
As per the original battle the Venetians had to deploy with the cavalry on the wings. At least one cavalry unit had to be on each flank whilst the infantry and culverin (represented by two artillery pieces) had to deploy in the centre.
For the Holy League force the Spanish and landsknecht had to deploy in two distinct bodies of infantry.
Revenge
Due to the battle of Cadore some years previously in 1508 the landsknecht pike and foot knights (representing Frundsberg) all had "wild charge" when faced with the Venetian infantry.
The Armies
The Venetians under Bartolomeo d'Alviano
1 Unit of Gendarmes (Bartolomeo d'Alviano, retinue leader)
1 Unit of Gendarmes (Gianpaolo Baglioni)
2 Units of Elmeti
2 Units of Stradiots
1 Unit of Mounted Crossbowmen
2 Units of Italian Pike
2 Units of Italian infantry
1 Unit of Italian Arquebusiers
1 Culverin
The Holy League force under Ramón de Cardona, Viceroy of Naples
1 Unit of Men at Arms (Ramón de Cardona, retinue leader)
1 Unit of Men at Arms (Prospero Colonna)
1 Unit of Men at Arms
Landsknecht:
1 Unit of Foot Knights (Georg von Frundsberg)
1 Unit of Landsknecht Arquebusiers
2 Units of Landsknecht Pike
Spanish:
1 Unit of Foot Knights (Fernando d'Ávalos, Marquess of Pescara)
1 Unit of Spanish Pike
2 Units of Spanish Arquebusiers
1 Culverin
Jeremy took command of d'Alviano's Venetians whilst I took command of the Holy League forces. The December light on the day of the game was quite poor so we didn't get loads of photos but enough to give a good idea of the action. A brief account of the game follows but as always the captions by the photos are a good way to track the game.
 |
| As some of the Venetian infantry begin a cautious advance down the ridge Pescara's Spanish arquebusiers move forward to disorder their formation. |
 |
| Fernando d'Ávalos, Marquess of Pescara, commands his Spanish infantry forward. |
 |
| The Venetian and Spanish arquebusiers fire on each other as the battle begins. |
 |
| A view across the battlefield as the armies move forward. Note the Venetian cavalry in the foreground attempting to outflank the League forces. |
 |
| Georg von Frundsberg orders his landsknecht forward to support the Spanish arquebusiers as they come under fire from the Venetian artillery. |
 |
| The Venetian infantry in the centre of d'Alviano's lines. |
The fighting began with the Venetian infantry on the ridge edging forward but not committing to a full advance. To face them Pescara's arquebusiers advanced forming a thin line of lighter troops in front of the Holy League pike blocks. As the Spanish opened fire on the Venetian infantry the Venetians countered with their artillery. Both sides took casualties as the fire fight developed but neither seemed ready to advance any further.
It was on the Holy League's right flank where the first hand to hand fighting broke out. A force of stradiots and mounted crossbowmen launched skirmish attacks on Prospero Colonna's men at arms. Supported by the landsknecht arquebusiers Colonna charged the stradiots managing to catch them before they could evade and causing them to flee the field. The mounted crossbowmen were temporarily driven back by shots from the landsknecht. Colonna's success was short lived as having charged the stradiots he was then charged by Venetian men at arms who disordered his horsemen and sent them back in flight. The shot from the landsknecht held off continued attacks on the Holy League's flank.
 |
| A cavalry melee ensues on the League right flank. Some of the Stradiots in Venetian employ are caught by Prospero Colonna's men at arms... |
 |
| ...though the Stradiots are defeated and flee, Colonna's horsemen are then counter charged by Venetian men at arms and forced back in disarray. |
 |
| The Holy League infantry are pushing forward. |
 |
| A view as the infantry forces close on one another. |
 |
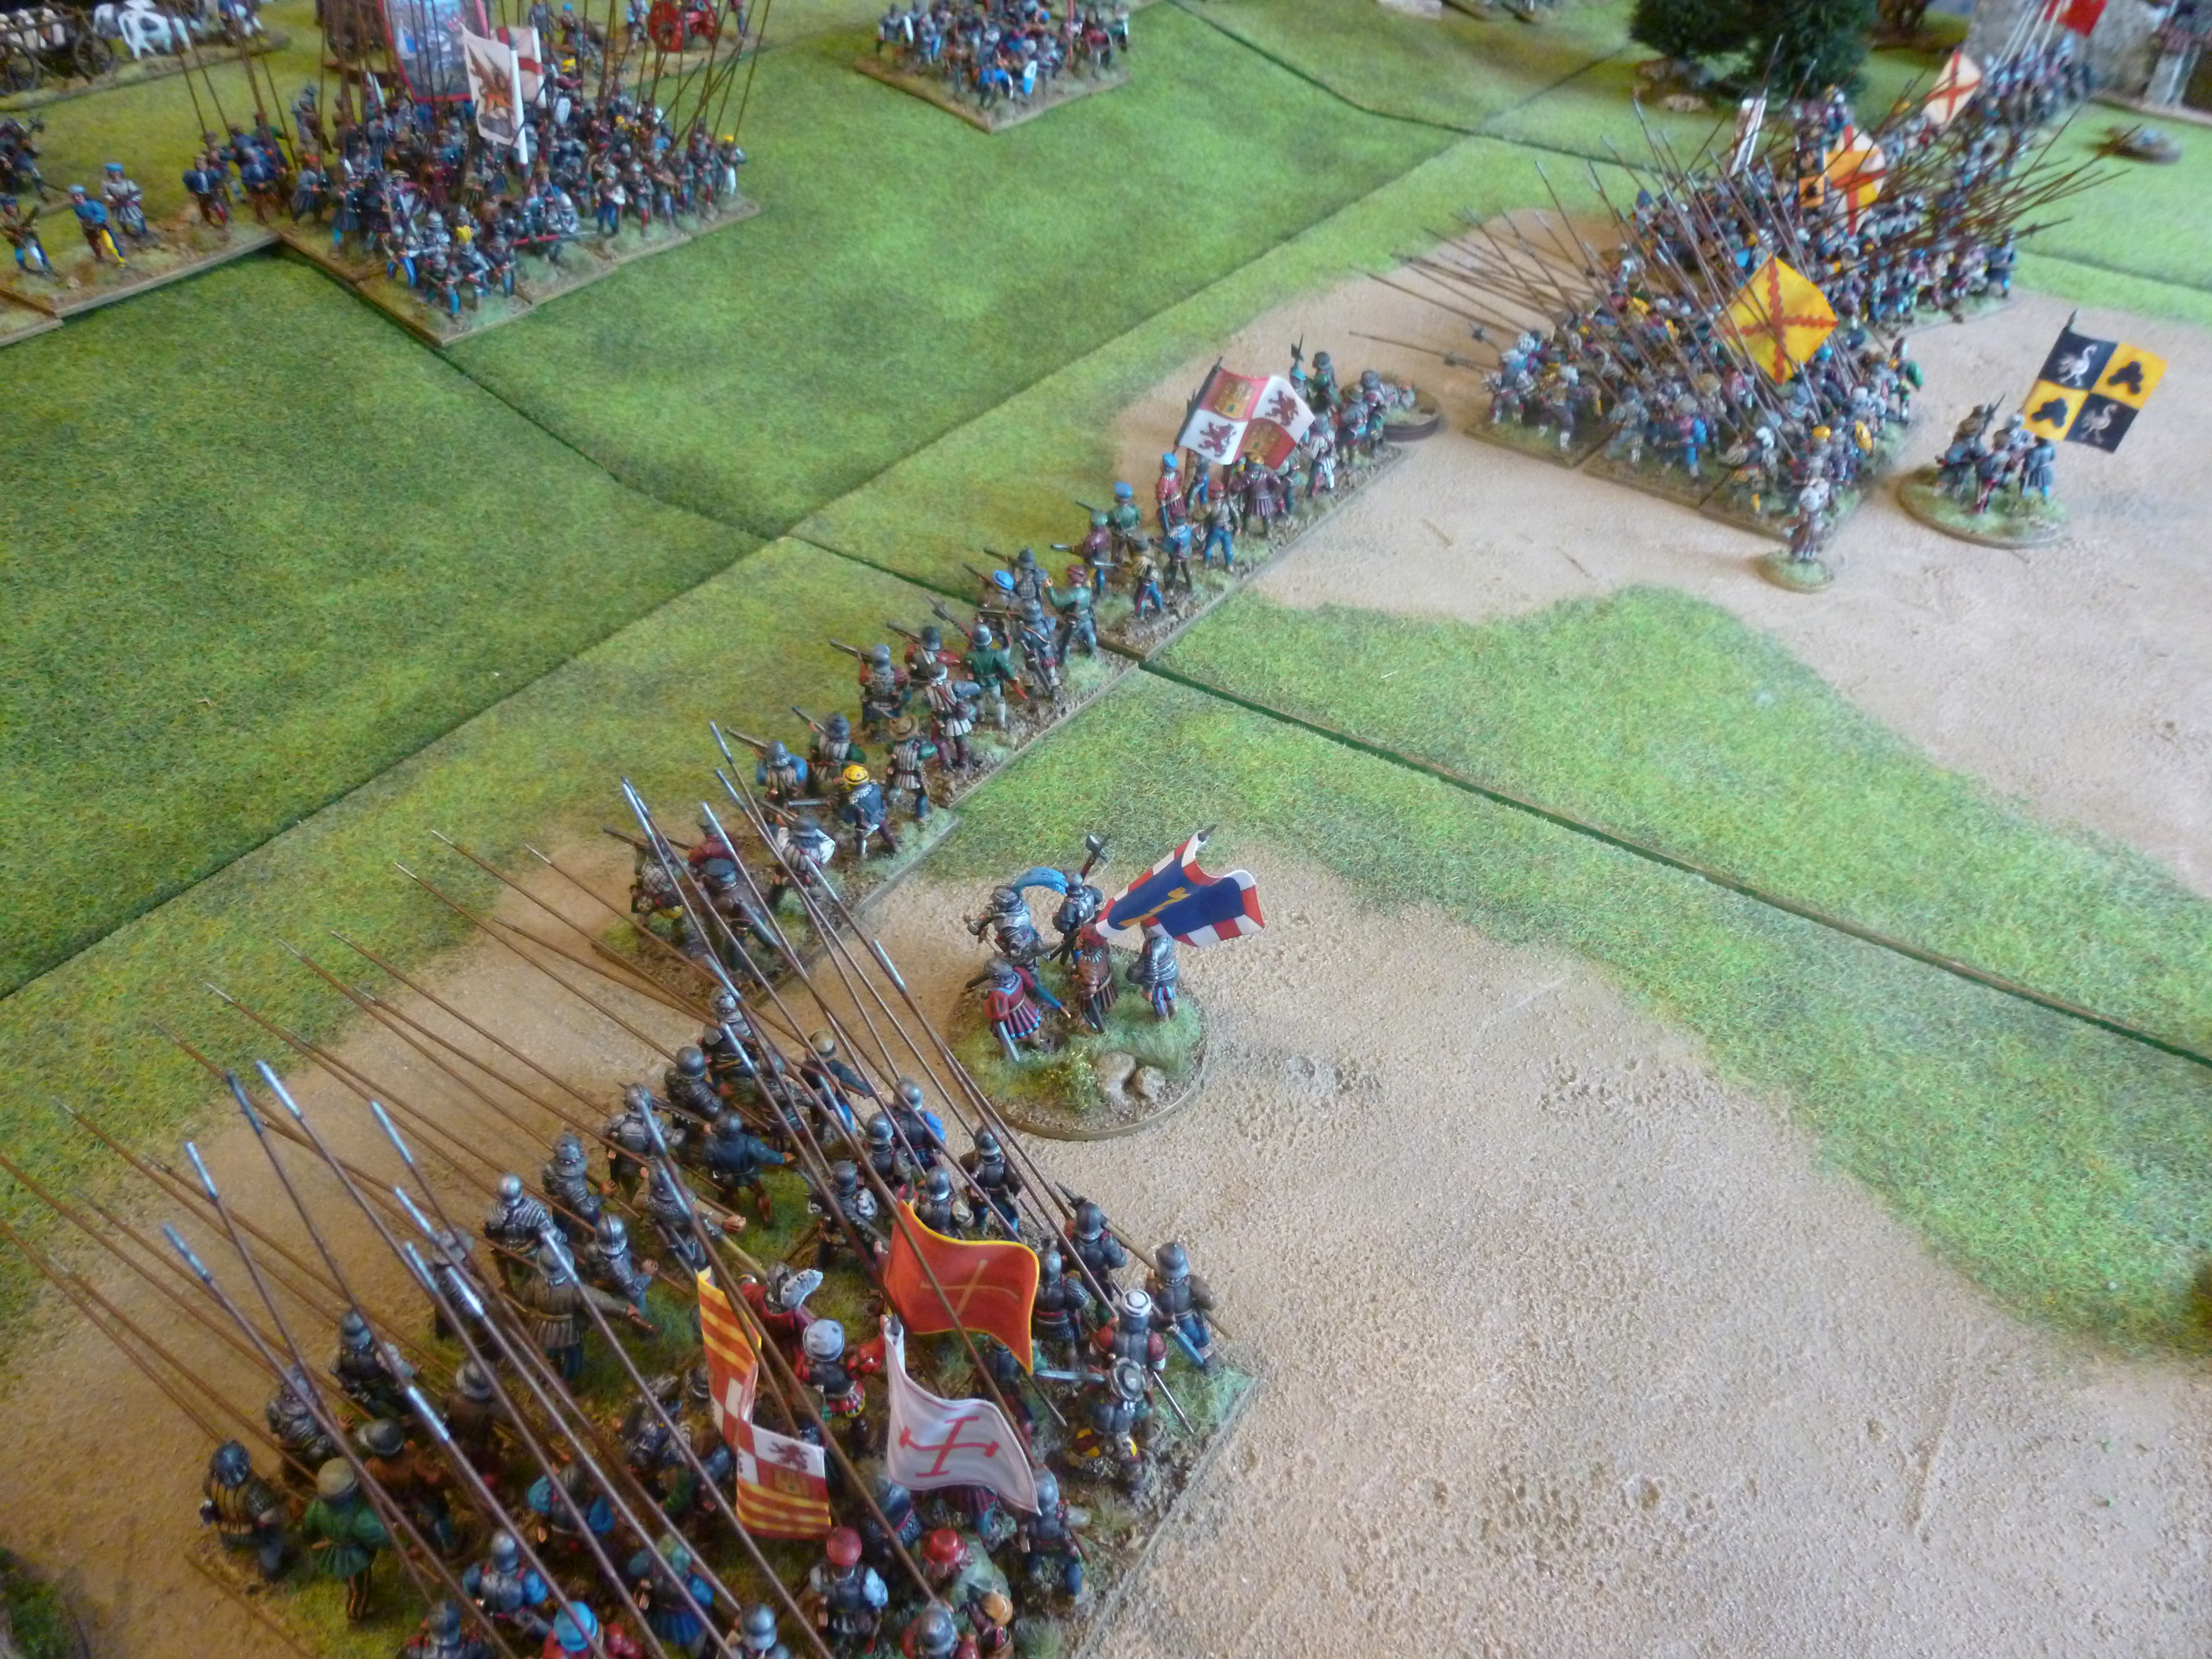
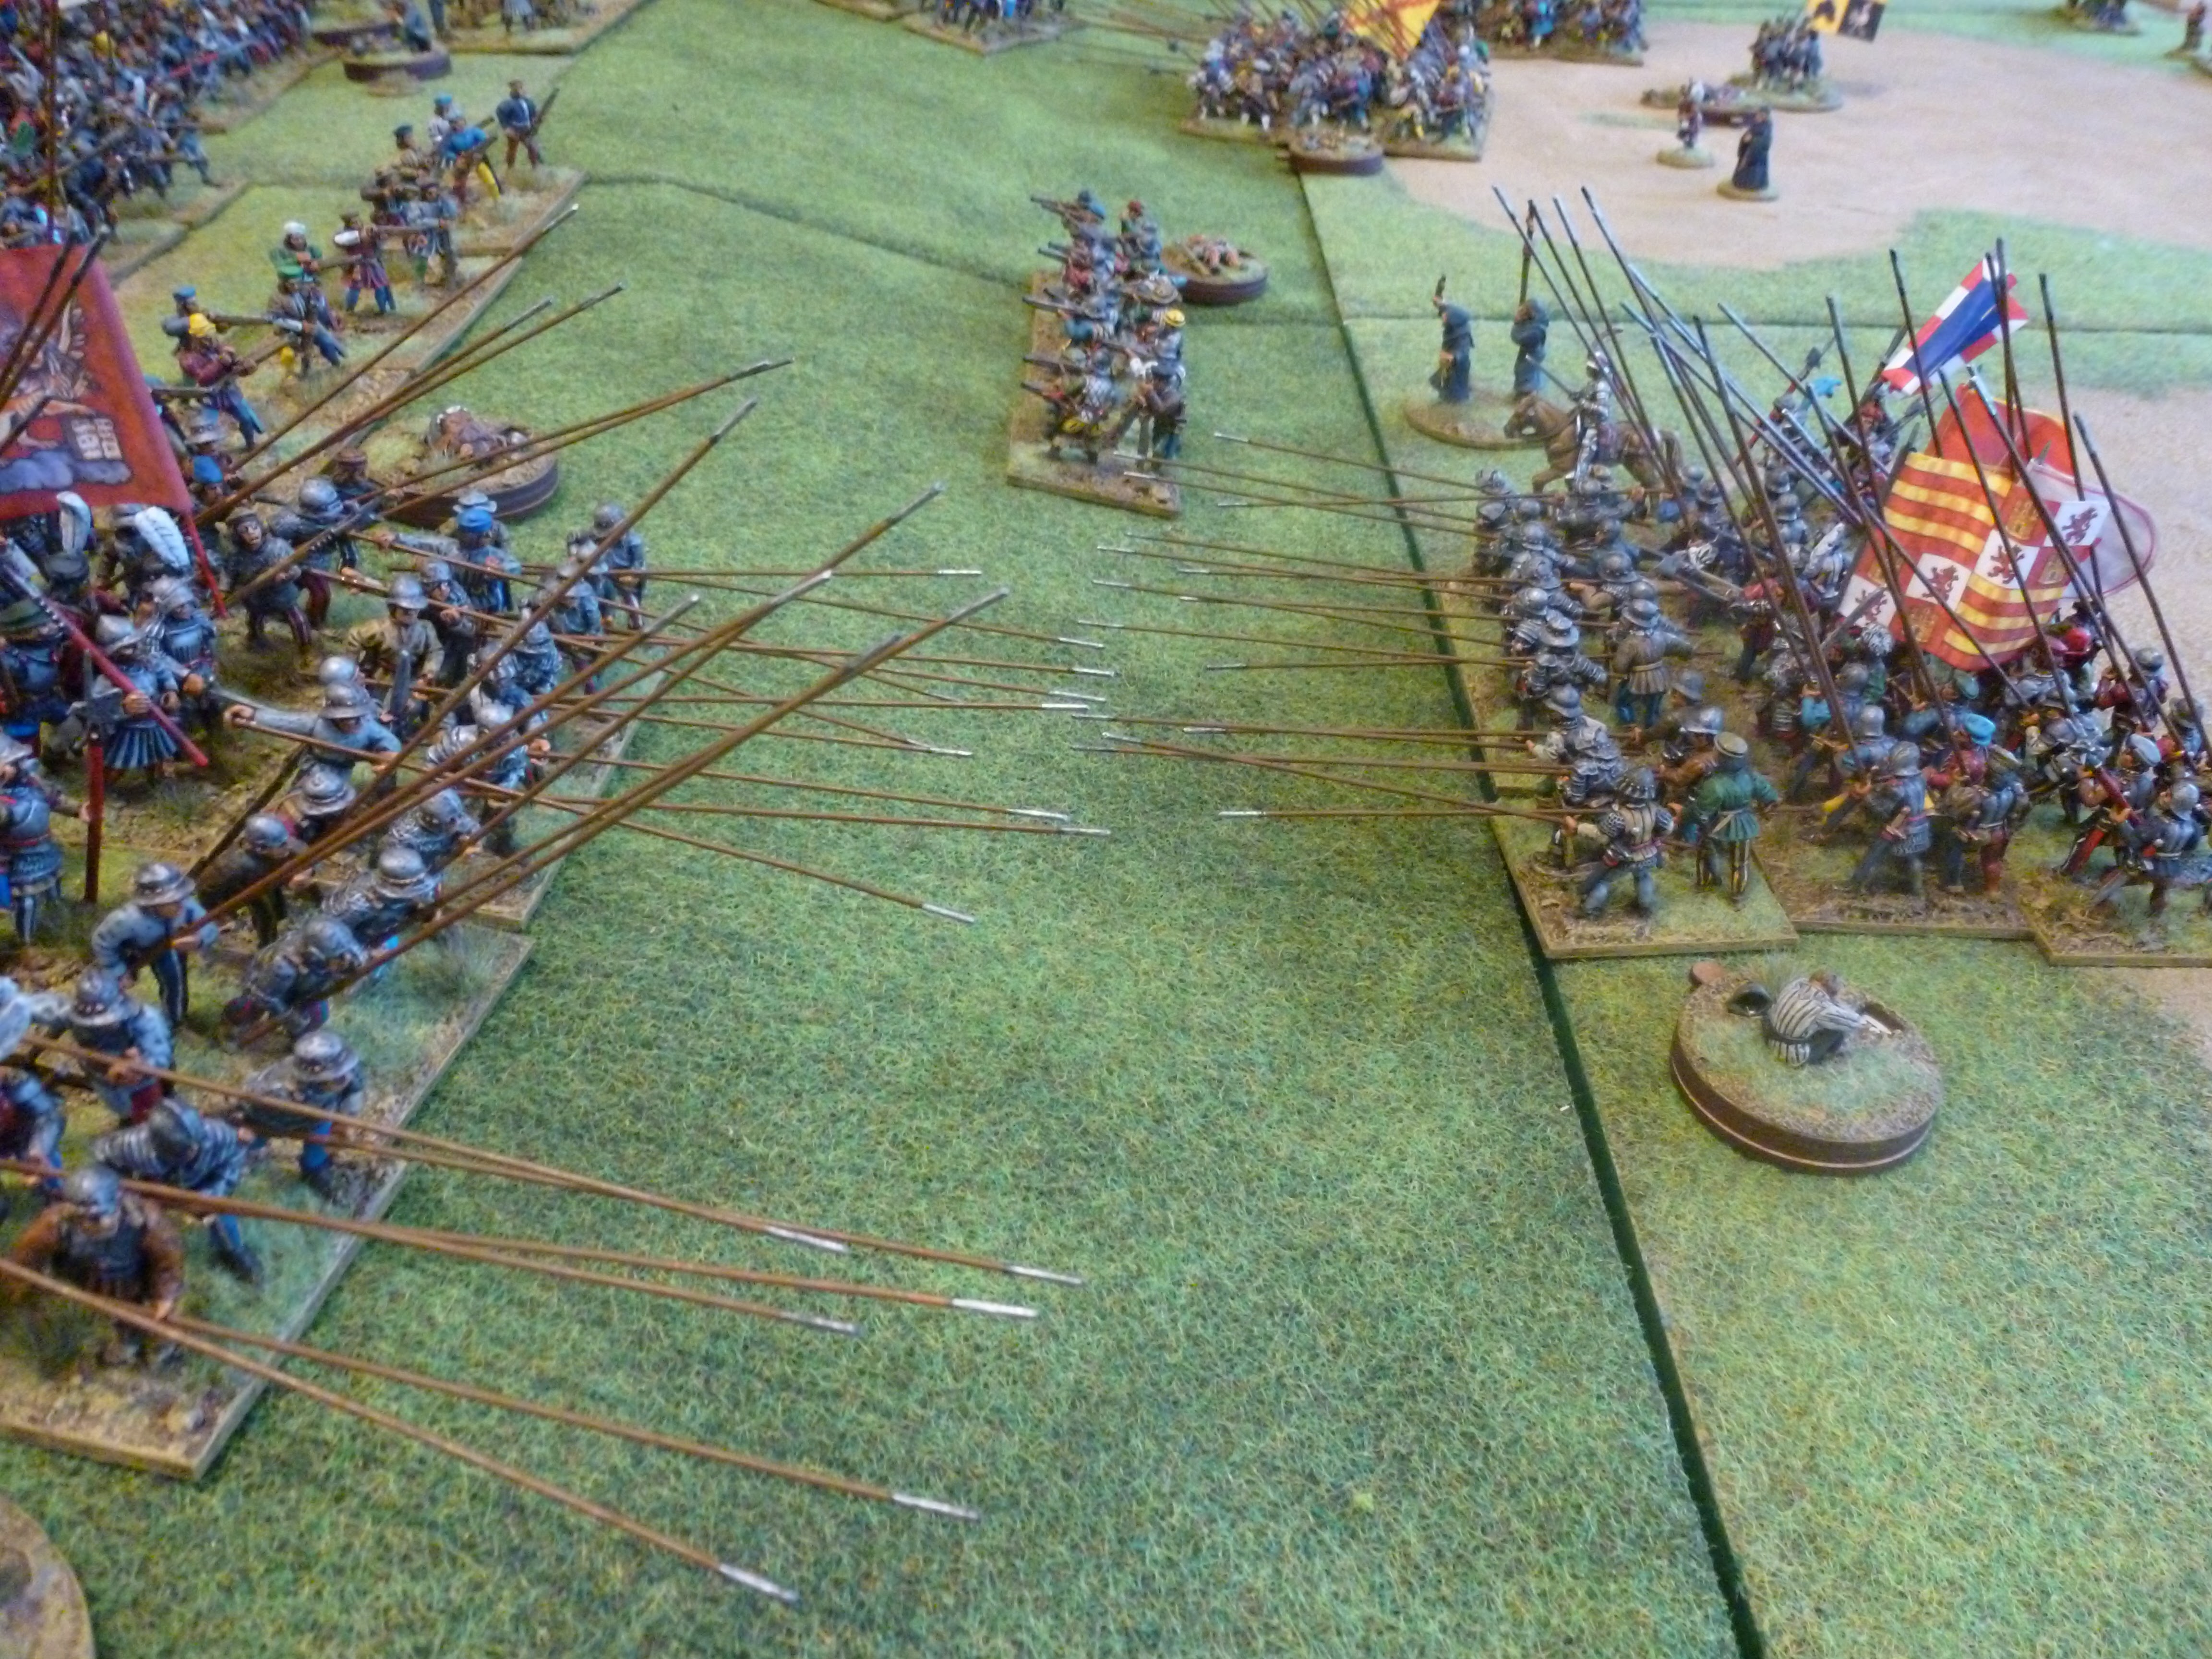
| The Holy League right flank is held by a force of arquebusiers who have successfully sent volleys of shot into the Venetian cavalry attempting to outflank them. In an attempt to break them d'Alviano leads his gendarmes in an attack on the landsknecht contingent... |
 |
| ...a fierce melee ensues in which the Venetian commander fights his way through to the personal retinue of Frundsberg, injuring the German captain. D'Alviano is then forced back by the landsknecht pike, his own heavy cavalry having taken casualties. |
 |
| The infantry forces are still to engage in the centre. For now the arquebusiers continue to exchange shots. |
 |
| A force of Italian infantry engages with the landsknecht pike following d'Alviano's charge. Both sides take casualties. |
To continue the pressure on the League's right
d'Alviano now led his heavily armoured cavalry into the landsknecht. The fighting was fierce and d'Alviano succeeded in wounding Frundsberg in the melee whilst the mounted crossbowmen and Venetian men at arms chased off the landsknecht arquebusiers. The Venetian heavy horse took casualties in the clash and d'Alviano was driven back by the pike blocks but his charge had been enough to disorder the landsknecht who then engaged in a bloody and inconclusive hand to hand with some of the Venetian infantry.
The Venetian infantry in the centre began to falter coming under a continuous hail of shot from Pescara's Spanish arquebusiers. The action now swung to the Holy League left flank where the Viceroy of Naples and commander of the League's army
Ramón de Cardona decided to deliver the death blow to the Venetian infantry. He led his Spanish men at arms into one of the dense Venetian pike blocks and was successful in driving them back and routing them. |
| Feeling the Venetian levies could break, the Holy League commander Ramón de Cardona leads his men at arms into one of the pike blocks but is driven back... |
 |
...temporarily disordered by their charge on the Venetian pike, Cardona's horse are then attacked by Gianpaolo Baglioni and his heavy barded cavalry. Cardona is unhorsed in the brief fight. The Holy League force have lost their commander.
|
Cardona may have been successful against the Venetian pike but as his men rode back from their charge they were caught by Gianpaolo Baglioni and his heavy barded cavalry. The Spanish cavalry were no match for the Italian condottiere's heavier horse and Cardona's unit were routed, with the Holy League Commander being caught by an arquebus shot as he fled and unhorsed! Flushed with victory Baglioni spurred his men on supported by a unit of stradiots. He quickly routed the remaining Papal men at arms before then crashing into the League's artillery and capturing the guns for the Serene Republic.
With the commander, Ramón de Cardona, fallen, both Colonna and Frundsberg out of the battle and the artillery lost Fernando d'Ávalos, Marquess of Pescara, decided the day was lost and retreated with the Spanish infantry, who were still in good order, and the remainder of the landsknecht. It had been a bloody day for the Holy League with the Venetians out matching their cavalry on the flanks and preventing their more professional infantry from charging down their militia.
 |
| The Holy League left flank is about to be overwhelmed as Baglioni's gendarmes supported by stradiots charge forward... |
 |
| ...they rout a force of Papal men at arms... |
 |
| ...and are then able to charge down the Holy League artillery. Having lost Cardona, Colonna and Frundsberg the Holy League force is in chaos. Pescara is able to retreat in good order with his Spanish infantry and some of the landsknecht but Bartolomeo d'Alviano and his Venetian force have won the day. |
This was great game which had the feel of a pitched battle and hung in the balance for a while. At one point it looked like the Venetian infantry in the centre would just crumble, as they did historically, but this was not to be. Whilst the fighting on the League's right flank had produced a bloody stalemate on the League's left the Venetians were able to sweep around and cause chaos. My brother Jeremy was a great opponent and it has been years since we played a tabletop wargame together. We both had a lot fun launching our units into the fray in an attempt to snatch victory from one another!
Happy New Year.