Following the epic of Agnadello in July I thought it would be interesting to play out another pitched battle using the heavily modified "Renaissance Rampant" rules. I was joined by my friend and Hundred Years War collector Tom and we decided to fight out the first battle of Seminara. This was a great opportunity for me to get out lots of my very early Italian Wars figures and use the card system that Stuart and myself trialled in our Agnadello game with a few changes.
Seminara 1495
Following the famed French invasion of Italy in 1494 and the fall of the Kingdom of Naples the Neapolitans were not left isolated in defeat. Sensing an opportunity the Spanish King, Ferdinand, agreed to help the young King of Naples, Ferrante, in return for the annexation of several Calabrian towns to Ferdinand's Kingdom of Sicily. Gonzalo de Cordoba, El Gran Capitan, sailed from Sicily with a small army of Granadan Veterans in an attempt to help Ferrante recover Naples, landing in Calabria in May 1495.
Ferrante handed the town of Reggio over to Spain, but this forced Cordoba to split his small army and leave some as a garrison force. The Allied army marched into territory occupied by the French and Seminara opended it's gates to the Neapolitan King. The French garrisons were under the leadership of Bérault Stuart d'Aubigny, a Scotsman who had fought for Henry Tudor at Bosworth ten years earlier. He was suffering badly from malaria but had under his command an effective mix of French gendarmes and Swiss infantry. He collected his forces and moved towards the King of Naples and his Spanish allies.
While Cordoba urged caution in taking on the French directly, Ferrante was eager for battle and against his better judgement El Gran Capitan led an army of Spanish and Calabrians against the French. On 21 June 1495* the forces met three miles outside Seminara with the allies attempting to block the French at a shallow stream. El Gran Capitan used his Jinetes to good effect attempting to stall the French advance but the hit and run tactics of the Spanish light horse alarmed the Calabrian infantry who thought the cavalry were retreating and fled themselves. The Spanish could not match the Swiss pike, needing more pikemen and arquebusiers in their ranks. Ferrante himself was targeted and was lucky to escape the field while Cordoba and his Spanish fought a delaying action as the Neapolitan King's forces fled.
*Mallet and Shaw, The Italian Wars 1494-1559, give the date as 21 June 1495 - but I have seen various dates in June for the battle.
 |
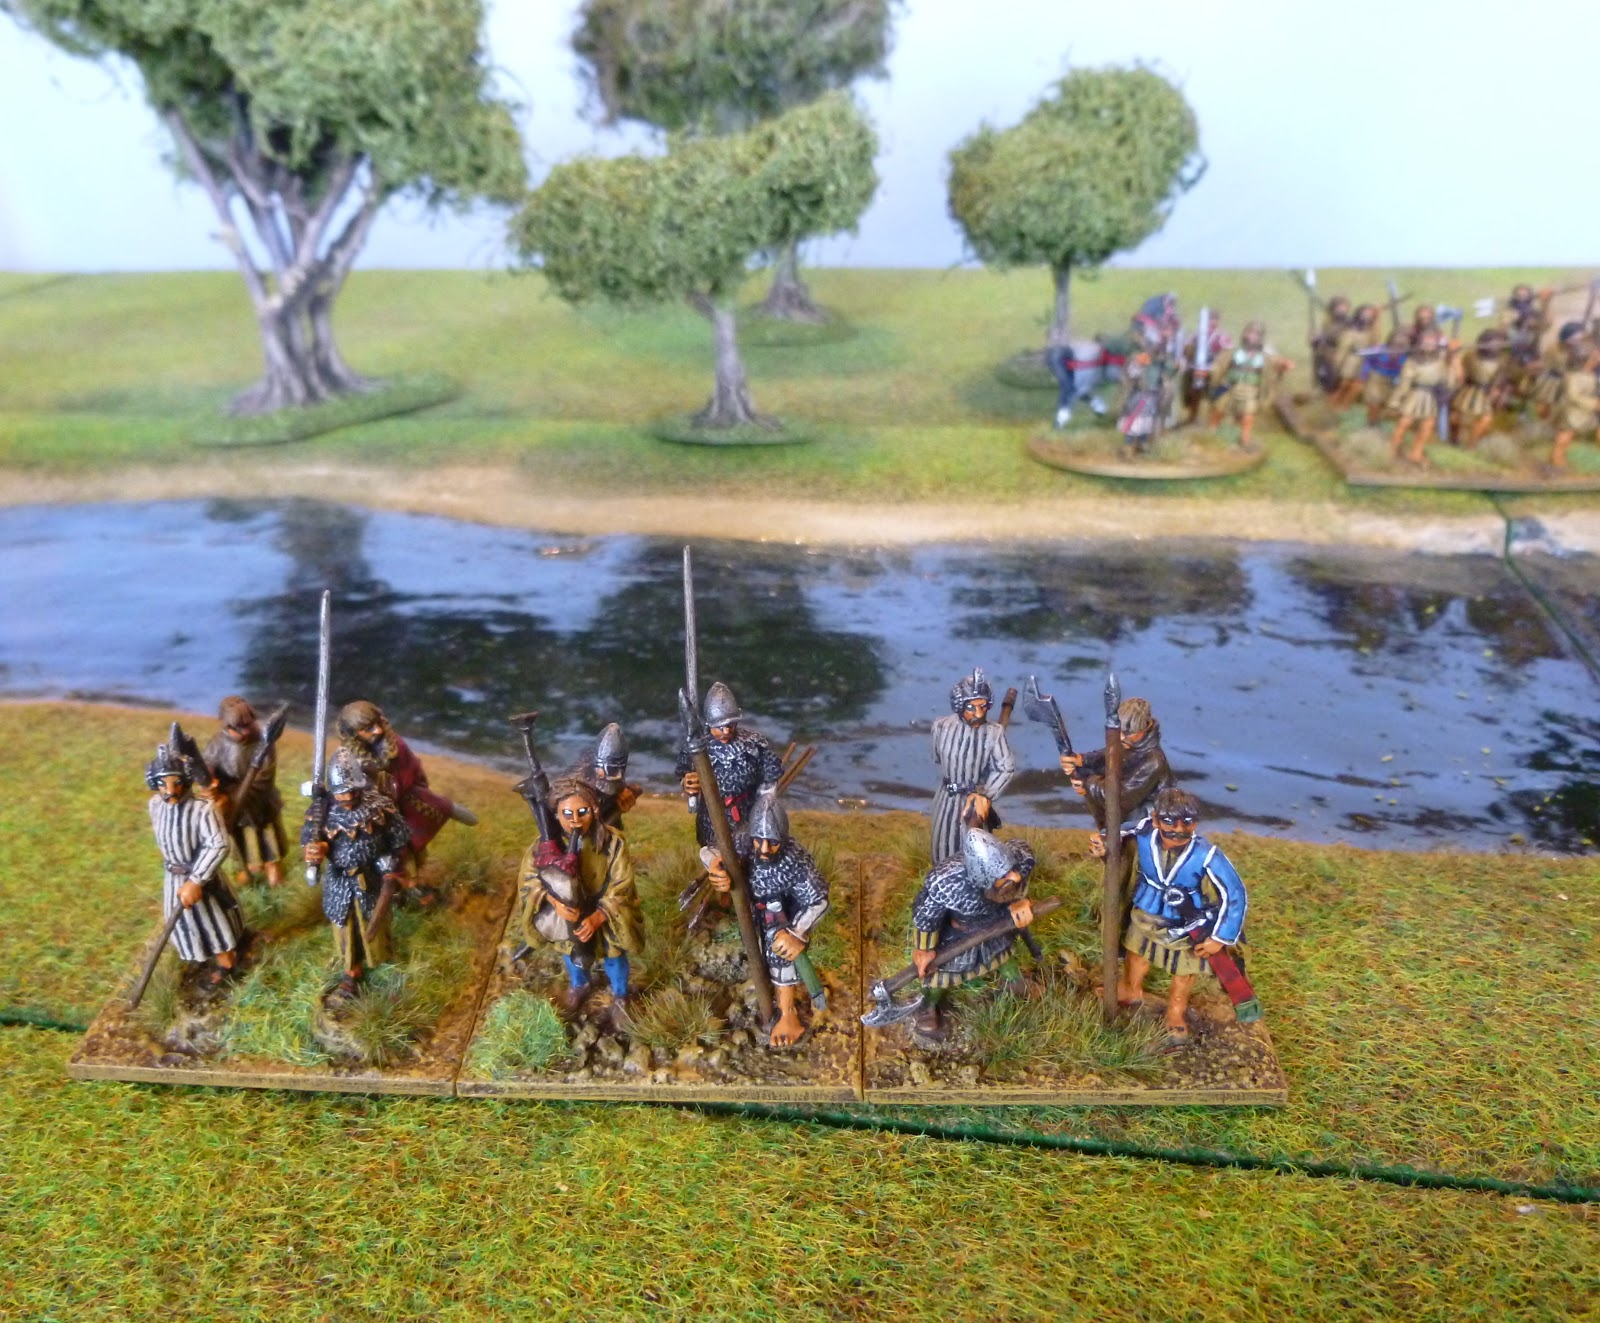
| The armies deployed. In the foreground are Ferrante's Calabrian troops while in the top left are Cordoba's Spanish. The French arrive on the other side of the stream. |
 |
| A closer view of the French lines. D'Aubigny can be seen behind a block of Swiss pike with his French cavalry and infantry to the left. |
Special Rules and Armies
This was not going to be as large a game as the Agnadello one, historically it wasn't as large a battle and was fought between relatively small forces. The big clash that was in the offing would take place at Fornovo a few weeks later when Charles VIII and the main French army would encounter an Italian army in northern Italy. I wanted to tweak the big battle rules a little and not allow as many activation rerolls as had been possible in the last game. I also wanted to create some special rules for the personalities involved in this battle. Tom chose to play as the French and I took the Spanish and Neapolitan allies.
Large Retinues and activation
For this game each army was divided up into two retinues. For each army each turn the player drew a card from a standard deck. The numbered cards (1-10) were halved rounding up to give that army that many rerolls for activations that turn. These rerolls could be used on either of the two retinues. This meant 1-5 rerolls per army per turn shared between the two retinues as the player saw fit. If a player rolled a double 1, a "Blunder" result, this did not end that retinues turn but meant they could not attempt to activate that unit again that turn after rolling on the "Blunder" chart.
If a jack, king or queen was taken the player continued to take cards until a number card was drawn but held onto the picture card or cards. These were kept for that army and played on a unit at any time. When played on a unit that unit would automatically activate and get a roll on the "Bonus" Chart .
Ferrante II, King of Naples
To represent Ferrante's impetuosity his unit of Elmeti had "Wild Charge". He also had to challenge any opposing retinue leader within 12" of him at the start of his turn.
Bérault Stuart d'Aubigny
To represent the fact that d'Aubigny had to command his troops from a litter towards the end of the battle at the start of his retinue's turn his player had to roll a D6. On a 1 his gendarmes became foot knights, any casualties already sustained remained the same.
Terrain
It seems that in the actual battle the terrain had very little effect on preventing the French from smashing the Spanish and Italian infantry. In the game the shallow stream was not a significant obstacle in terms of movement. It did have an effect on combat in the normal style of terrain and it did give cover against missile weapons but it did not impede movement in any way. We used the river tiles for the stream but added the "islands" of vegetation to help give the impression that it was a very shallow watercourse.
All of the photos are from the game and as always following the captions of the photos should give a good idea of how the action played out.
The Armies
The French
Bérault Stuart d'Aubigny
1 Unit of Gendarmes (Bérault Stuart d'Aubigny - see special rule)
1 Unit of Gendarmes
1 Unit of Men-At-Arms
1 Unit of Ordonnance Archers (Demi-lance)
1 Unit of Franc Archer Bowmen
2 Culverins
The Swiss and French Infantry
1 Unit of Foot Knights
2 Units of Swiss Pike
1 Unit of Swiss Shot
1 Unit of Aventuriers
1 Unit of French Pike
1 Unit of French Halberdiers
The Spanish and Neapolitans
Gonzalo de Cordoba, El Gran Capitan and the Spanish
1 Unit of Men-At-Arms (Gonzalo de Cordoba, El Gran Capitan)
1 Unit of Men-At-Arms
3 Units of Jinetes
2 Units of Rodeleros
1 Unit of Spanish Arquebusiers
1 Culverin
Ferrante II, King of Naples, and the Calabrians
1 Unit of Elmeti (Ferrante II, King of Naples - See special rules)
1 Unit of Elmeti
1 Unit of Mounted Crossbowmen
1 Unit of Italian Pike
2 Units of Italian Infantry
1 Unit of Italian Crossbowmen
1 Culverin
 |
| A view of the deployment from above, the only unit not shown here is a troop of French men-at-arms who deployed on the far right of the French lines, beyond the Swiss. They can be seen in the photo below. |
 |
| The armies prepare to engage. Note the build up of Spanish light cavalry to the right. |
 |
| Ferrante II, King of Naples, and his southern Italian troops. |
 |
| The battle begins with the Spanish Neapolitan allied force rushing forward in an attempt to make a stand at the stream, using it to disrupt the French assault. |
The battle started with the Spanish and Italians rushing forward to form a defensive line at the stream in an attempt to use the advantage of the cover as well as the disruption it would cause to the more combat effective French troops as they reached the Allied lines. Initially this worked really well for the allied force. The Spanish jinetes plagued the advancing French, harassing the Swiss pike and the French men-at-arms on the right flank of French army. When the Spanish arquebusiers, Italian mounted crossbowmen and the culverins joined the missile fight one of the Swiss pike blocks turned and fled before even reaching the water.
A unit of gendarmes in the French centre were tempted into attacking the rodeleros where they were defeated in a brief melee, the shallow rocky stream being enough to negate the gendarmes unstoppable charge. The men-at-arms holding the French right flank were put to flight finding it impossible to close with the units of jinetes that swarmed around them, hurling javelins at the more heavily armed French. It looked as if the d'Aubigny's men would loose all momentum before even fully engaging with the Spanish and Italians.
 |
| As d'Aubigny's Swiss mercenaries advance, Cordoba's Jinetes harass them |
 |
| The Allies have formed up at the stream while the elite Reisläufer in French pay push forward. |
 |
| The two Reisläufer pike blocks can be seen advancing. They face opposition from the Spanish light horse, mounted crossbowmen and Spanish arquebusiers in the stream. |
 |
| The unit of Swiss marching under the yellow and white banner are defeated by a combination of the Spanish arquebusiers and cannons. |
 |
| The French gendarmes charge forward, taking casualties as they near the Allied lines. |
 |
| The gendarmes reach the stream charging into the Spanish rodeleros. The Spanish swordsmen use the shallow water to their advantage and manage to send the cavalry back. |
 |
| The French attack is in full swing. |
 |
| A view from the French lines as they attempt to push the Spanish and Italians out of the stream. |
 |
| Ferrante's Calabrian infantry line the other side of the stream anticipating the French charge. |
 |
| The Spanish may have defeated one of the Swiss pike blocks before it reached them but the other Reisläufer block is dangerously near. |
 |
| The unit of French men-at-arms that held their right flank is lured into fruitless skirmishing with the jinetes and destroyed. |
 |
| D'Aubigny's health fails and he has to dismount and be carried in a litter by his personal retinue. |
Watching the assault from behind the front line d'Aubigny was forced to dismount as his health began to fail him. With his health failing his luck was turning. What the Allies had not noticed was the strength of the French left flank that was nearing the much weaker Allied right flank, held by Ferrante's Calabrians. French cavalry and pikemen, supported by their captain and his personal troops on foot, along with Swiss arquebusiers and a culverin, pushed across the stream and smashed into the Italian levies. The result was predictable with the Italians being rolled up and the French lancers pushing deep into their lines.
On the other side of the field the remaining Swiss took on the Spanish men-at-arms with Gonzalo de Cordoba personally leading a counter charge against them. The Swiss were defeated in a series of clashes but they had distracted Cordoba's Spanish contingent enough to allow the rest of the French to launch a full assault on the Italians. The shallow waters of the stream ran red as French infantry charged in, engaging the Italians holding the line. In response Ferrante himself charged his household troops into the marauding French cavalry in an attempt to save his army.
 |
| While the Spanish and Neapolitans have done a good job of holding the main front along the stream the French have attacked the Allies right with a concentration of troops; Swiss shot, French pike, Ordonnance lancers and the French infantry captain are all about to engage. |
 |
| The battle is in full swing. |
 |
| Ferrante's Italians attempt to hold the flank. |
 |
| On the other side of the field Gonzalo de Cordoba and his men-at-arms are charged by the Swiss. |
 |
| Combat erupts across the line with the French hitting Ferrante's troops hard. |
 |
| The King of Naples himself launches into the fray in an attempt to push the French back. |
 |
| The Calabrians are under real pressure at this end of the field. |
 |
| The French have broken into the Italian lines and wrought havoc. |
 |
| Heavy fighting takes place in the stream between French and Italian infantry. Both sides are taking casualties. |
 |
| One group of Italian infantry turns from the frontline to deal with the French horse who have got behind them. |
 |
| Having fought the Italians in the shallow waters the French infantry then engage with the rodeleros. |
The Spanish turned to engage some of the French as they crossed the stream and the Italians managed to see off the French lancers who had ridden into their lines. By now both armies had been heavily engaged and with the morale of both the French and Allies wavering the commanders grew desperate. Gonzalo de Cordoba, El Gran Capitan, personally engaged the ailing d'Aubigny in combat but was undable to bring him down and was forced to withdraw as d'Aubigny's French troops rallied to their captains defence. Feeling he had already lost enough of his small Spanish force Cordoba left the field taking what troops he had left with him in good order.
For Ferrante it was his kingdom at stake and so the King of Naples followed El Gran Capitan's example and tried one last strike at d'Aubigny. Despite his malaria yet again the French general survived the attack! That was it for Ferrante and with the French holding the field and the Spanish in the process of withdrawing the Neapolitan King quit the field. Little had survived of his Calabrian army that had been raised to rescue the kingdom. A bloodied and battered French army held the field and the day was theirs.
 |
| With the French rolling up their lines from the other side of the field Gonzalo de Cordoba makes a desperate attempt to push out from his defensive position and bring down d'Aubigny. |
 |
| He engages in a duel with the Scottish noble. Despite his ill health d'Aubigny is unharmed and Cordoba flees with his remaining cavalry. |
 |
| In a final desperate charge Ferrante II also heads straight for the French general. Again neither leader falls. The day is lost for the Allies, they have been driven from the field but at a high cost to the French in Naples. |
Tom and I had a really entertaining and closely fought game. It was great to try a different take on the larger battle rules using the deck of cards system. Experimenting with these rules has been the perfect opportunity to give the very early Italian Wars collection a couple of outings this summer, I even got to use my Kingdom of Naples flags in this game. Of course I still have dozens of ideas for other potential scenarios both large and small scale. I feel that the newly repainted fortifications are going to have to feature in a scenario soon.