Thursday 15 February 2024

16th Century Janissaries


Today's post sees a return to the Ottoman army with some more janissaries. The figures are from the excellent Warfare Miniatures Ottoman Turkish range. The range represents the janissaries of the 17th and 18th centuries but as these particular figures are armed with bows or swords and shields they also work well for the 16th century. I have tweaked some them a little to make them more suitable for the 1500s but there are no great changes to the miniatures. As discussed in my original post on the janissaries, https://camisado1500s.blogspot.com/2020/05/early-16th-century-janissaries.html, it is difficult to know how they looked on campaign during the first half of the sixteenth century. I have serious doubts as to how much of the "classic" janissary uniform would have been worn on campaign, included the famed "ak börk" or "bork" white caps, and how uniformed they would have been.

Further to this, having recently read a translation of Konstantin Mihailovic's account of the Ottoman army in the second half of the 15th century I thought it would be interesting to include his description of how the janissaries were organised in the post. Whether or not he was actually a janissary seems up for debate, he may have been some kind of Serbian auxiliary providing support to the janissary corps. Writing between 1490 and 1500 his chapter concerning the organisation of the Imperial court describes the janissaries as such:

"And at the court there are about four thousand Janissaries, and among them there is the following organisation. They have over them a senior hetman called an aga, a great lord. He receives ten gold pieces a day, and his steward, one gold piece a day. To each centurion they give a gold piece every two days, and to their stewards, a gold piece every four days. And all their sons who grow out of boyhood have a wage from the emperor. And no courtier who permits himself something will be punished by the honest ones by fine, but rather by death; they dare not however, punish any courtier publicly, but secretly, because of the other courtiers for they would revolt. And no Janissary nor any decurion of theirs dare ride a horse, save the hetman himself and the steward. And among them it is so arranged that some are archers who shoot bows, some are gunners who shoot mortars, others muskets, and still others, crossbows. And every day they must appear with their weapons before their hetmans. And he gives each one a gold piece per year for a bow, and in addition a tunic, a shirt, and large trousers made, as is their fashion, of three ells of cloth, and a shirt of eight ells. And this I myself distributed to them for two years from the imperial court."

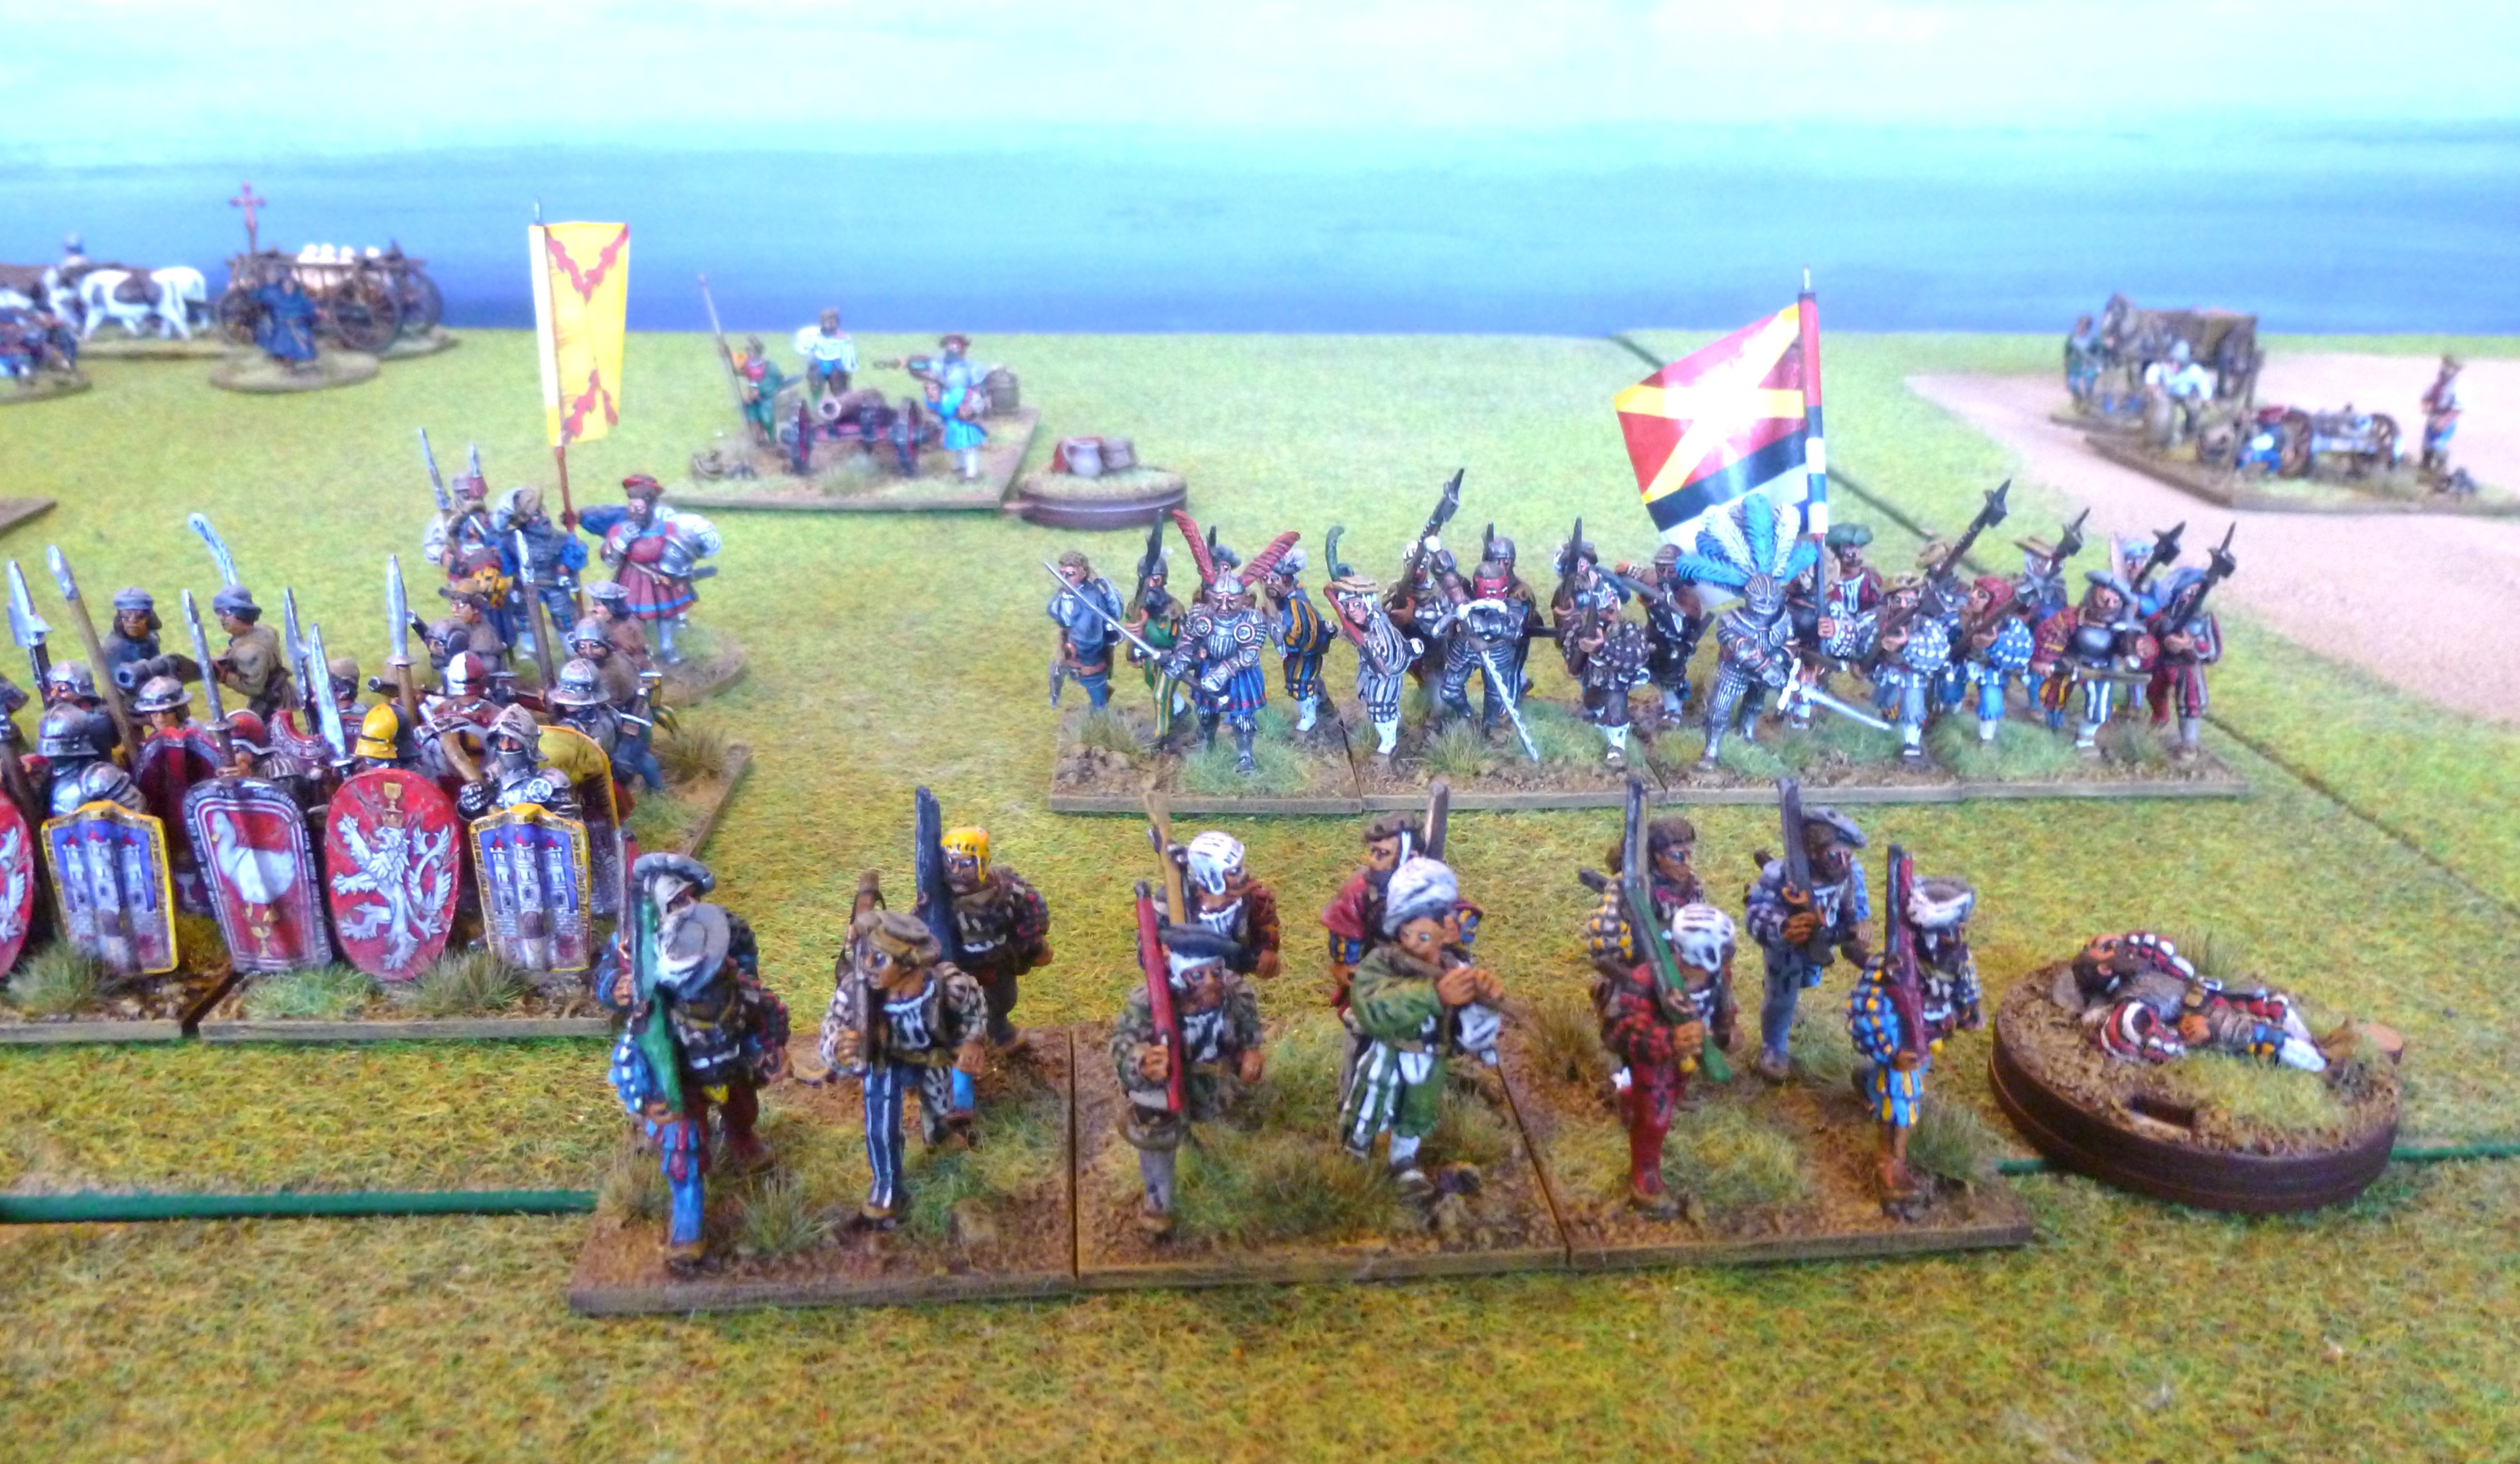
This extract from Mihailovic's memoirs provides evidence that the janissaries might have been in some kind of uniform as they were provided with their clothing each year. The addition of these figures dressed in blue means that I can still field the various units in the collection as uniformed or they can be mixed to provide even more colourful units of janissaries. The last few photos below show these new figures mixed in with those completed a few years ago, dressed in green and red. 

Attacking Janissaries - the figures are converted Warfare Miniatures Janissaries.

28mm Janissaries with bows from Warfare Miniatures.

Early 16th Century Janissaries.

One of the officers  is wearing an animal skin carrying a halberd. Perhaps he is a "centurion" or "steward" as described by Konstantin Mihailovic.

Early 16th Century Janissaries.

A mix of Old Glory, Assault Group, Essex Miniatures and Warfare Miniatures Janissaries. The flags are also all from Warfare Miniatures.

Janissaries for the first half of the 16th century. Note how two of them are mounted. These must be the "hetman himself and the steward" as, according to Mihailovic, no other janissary "dare ride a horse"!

Thursday 1 February 2024

Szina, 1528


In January my friend Tom visited and we started the wargaming year with a big set piece battle. Last year all of the games Tom and I played involved fortifications in some way so we thought it would be good to have a change and game the follow on clash from our 2021 Tarcal scenario, https://camisado1500s.blogspot.com/2021/08/tarcal-1527.html, the battle of Szina, 1528, which took place in modern day Slovakia. As this was a scenario from the civil war in the 1520s Kingdom of Hungary it also gave me the chance to field my newly completed voynuks as some of John Zápolya's eastern European mercenaries.

Szina, 1528

The Ottoman defeat of the Hungarian King, Louis II, at Mohacs in August 1526 led to civil war in Hungary. Louis II died without an heir and Ferdinand of Habsburg had a claim to the Hungarian crown, being Louis II's brother-in-law.  In December 1526 Ferdinand was elected by a faction of the Hungarian greater nobility and Catholic clergy. They hoped his family connections as a Habsburg would mean he could defend the kingdom against the Ottoman threat. Ferdinand's election ignored the fact that just a month previously much of the lesser nobility of Hungary had proclaimed John Zápolya, Voivode of Transylvania as their King.

On 27 September 1527 Ferdinand's army, commanded by Nicholas, Count of Salm, defeated Zápolya's smaller force at Tarcal (see the link to our refight of this above). Zápolya escaped the field returning to Transylvania. Here he raised an army of around 13,000 Transylvanian, Serbian and Polish troops and within 6 months was able to challenge Ferdinand's claim to the crown again. Zápolya advanced into Hungary being joined by perhaps as many as 2,000 Hungarian troops as he entered the kingdom. Initially things went well for him as his army pushed back the forces of one of Ferdinand's captains, Péter Perényi, and besieged the towns of Sárospatak and Sátoraljaújhely.

To combat Zápolya's invasion Johann von Katzianer, a veteran commander who had led much of Ferdinand's infantry at Tarcal, and Bálint Török, who had fought at Mohacs and Tarcal, headed towards the city of Kassa with an army of around 13,000 to 14,000 men. Their army was comprised Hungarian, Austrian and German troops including contingents of landsknecht. There was already discord in the ranks of John Zápolya's mercenary army as hostilities were breaking out between the Serbian and Polish troops. Despite this Zápolya advanced towards the Habsburg forces and the armies met at Szina, not far from Kassa, on 20 March 1528. 

Zápolya's army attacked but being comprised mainly of light cavalry it could do little to break the ranks of the disciplined landsknecht. It seems the most steadfast of his troops were the Polish infantry who put up a hard fight until their artillery was captured. This was the turning point of the battle being followed by a rout in which Zápolya himself was nearly captured. Around 300 of the Polish infantry were slain whilst several thousand of the other mercenaries were killed as the army broke and fled. The light horse of Bálint Török and Lajos Pekry pursued Zápolya's horsemen catching them on 25 March where they inflicted yet more casualties, effectively destroying the army. John Zápolya fled to Poland but Sigismund I, the Polish King, would not provide him with aid driving Zápolya into an alliance with the Ottoman Sultan Suleiman. A year later the Ottomans would strike back at the Habsburgs and besiege Vienna in September 1529.

A view of the table. On the left is the Habsburg army with the cavalry contingent at the top and the infantry in the fore. On the right is Zápolya's army with the Balkan cavalry on the bottom right and the mercenary infantry arrayed beyond the horsemen. 

A view down the line of Zápolya's army. The Polish infantry have deployed amongst the artillery in a defensive formation. 

Scenario

As with our previous refight of Tarcal it is hard to find much information on this battle in English. What details we did have we used to put together the following scenario. As always the game was played using an adapted version of Lion Rampant. Each player had a cavalry, infantry and artillery retinue.

The game was played out as a pitched battle with both forces deploying facing one another.

Victory

For the Habsburg forces to achieve victory they had to kill or rout John Zápolya. For Zápolya's army to achieve victory it had to rout or kill over half the points values of both the Habsburg cavalry and infantry retinues. If both of these objectives were achieved by the players in the same turn then the game would be considered a draw.

Activation Fails

Each turn each player took 5 cards from a deck. Any King, Queen or Jack cards from the 5 they took could be used to get a reroll on an activation fail for that turn for one of their retinues. At the end of the turn all unused cards were put in a discard pile. Once the deck ran out a fresh deck was used for the reroll cards.

As the discipline of the Habsburg troops was also a factor in their victory we also made it easier for the landsknecht arquebusiers to roll a "shoot" activation than is normally the case in our rules to represent this.

Artillery

This was a pitched battle in which the taking of Zápolya's artillery was a key moment. To represent this each player had a third retinue of 4 culverins. This retinue could attempt to activate at the start of each player's turn after which they could activate their other retinues. The artillery retinues did not have retinue leaders like a normal retinue.

Discord in the ranks

As Zápolya's mercenary army was suffering from discord in the ranks before the battle any unit in Zápolya's army that rolled a blunder result in an activation would shoot if missile armed or attack if melee armed the nearest friendly unit of a different type if this was possible rather than rolling on the blunder chart. For example a pavise infantry unit that rolled a blunder would not attack another pavise infantry unit within 4" of it but would attack a light cavalry unit 6" from it as the cavalry unit would be of a different type.

John Zápolya and his household guard are deployed behind the heavy guns and mercenary infantry.

Ferdinand of Habsburg's army under the command of Johann von Katzianer and Bálint Török. 

A view of the infantry contingent of the Habsburg army. The landsknecht and Hungarian infantry are deployed around the guns. Johann von Katzianer can be seen under the yellow Habsburg flag bearing the red saltire in the top right of the photo.

The Armies

We decided to dice to see who commanded which army in this game and the result was that Tom took command of the Habsburg forces whilst I took command of John Zápolya's mercenary army.

The Army of Ferdinand of Habsburg

The infantry under Johann von Katzianer

1 Unit of Foot Knights (Johann von Katzianer retinue leader)
4 Units of Landsknecht Pike
3 Units of Landsknecht Arquebusiers
1 Unit of Landsknecht Halberdiers
1 Unit of Pavise and Arquebus Infantry

The cavalry under Bálint Török 

1 Unit of Gendarmes (Bálint Török retinue leader)
2 Units of Gendarmes
2 Units of Hussars
2 Units of Hungarian Horse
1 Unit of Lancers

Artillery

4 Culverins

The Army of John Zápolya

The cavalry under John Zápolya

1 Unit of Gendarmes (John Zápolya retinue leader)
1 Unit of Gendarmes
2 Units of Hussars
5 Units of Balkan Cavalry

The mercenary infantry

1 Unit of Foot Knights (Polish Mercenary captain retinue leader)
3 Units of Pavise and Arquebus Infantry (The Polish infantry)
2 Units of Eastern Armoured infantry (The Serbian infantry)
1 Unit of Mercenary Shot
1 Unit of Levy Pike

Artillery

4 Culverins

The captions under the photos are a good way to follow the game but a brief write up also follows.

The battle commences with a long range artillery bombardment from the Habsburg army. Some of the gun crews in Zápolya's army take casualties.

Following the opening artillery salvos Johann von Katzianer orders a general advance of the Habsburg army.

Zápolya's mercenaries open fire on the advancing Hungarian and German horse.

Hungarian hussars and horse archers are joined by Imperial gendarmes for the attack.

An overview of the field as the Habsburg forces push forward.

The day started with the crack of cannon fire as Johann von Katzianer ordered his guns into action. Shots crashed into Zápolya's mercenary troops killing some of his artillery crews. As the guns opened fire the horns and drums of the Habsburg army sounded and a general advance on Zápolya's position began. The landsknecht marched grimly towards the rival Hungarian king's forces whilst the cavalry raced ahead to charge onto Zápolya's right flank.

Hungarian hussars and then Imperial gendarmes and lancers crashed into Zápolya's Serbian and Polish infantry. A series of fierce melees developed with both sides taking casualties. The mercenary infantry were driven back but Zápolya's lines held forcing the Habsburg cavalry to wheel about and regroup. There may have been ill discipline in Zápolya's army previously but in the heat of battle most of the troops held meaning Bálint Török and his cavalry were unable to sweep them away.

Battle is joined as a unit of hussars charges into a formation of Zápolya's Serbian mercenaries...

...the hussars are driven off by the Serbian infantry only for a unit of Imperial gendarmes to crash into them and send the Serbs fleeing from the field.

Zápolya's Polish mercenary infantry are the next to be engaged, charged by a detachment of Imperial lancers. The lancers are driven off but inflict high casualties on the infantry.

At the other end of the field Zápolya's mercenary cavalry, comprising mostly of Serbian and Transylvanian light horse, are yet to engage.

Zápolya's infantry and guns open fire on the advancing landsknecht causing terrible casualties.

Other than his own bodyguard John Zápolya has one unit of heavy horse. They charge into the advancing Habsburg infantry and a bloody hand to hand clash takes place...

...neither side shows any quarter and the horsemen are driven off.

In the centre of the field Johann von Katzianer's infantry advanced with caution against Zápolya's centre which was held by further detachments of mercenary infantry with Zápolya himself deployed behind them and surrounded by his mounted bodyguard of household men at arms. On Zápolya's left flank his mercenary cavalry, a motely assortment of Transylvanian and Serbian light horsemen, did not commit to the fight. Instead they watched the landsknecht pike and guns that Katzianer had deployed facing them. It was a stark comparison to the other end of the field with neither force being willing to make the first move.

Katzianer's infantry in the centre were met with devastating volleys of arquebus shot from Zápolya's mercenaries and grapeshot from his artillery. The landsknecht pike, advancing shoulder to shoulder, were killed in droves. This led a unit of heavy cavalry, that had joined Zápolya's army as he advanced into the kingdom, to break ranks and charge into the landsknecht. Having seen the landsknecht come under such heavy fire the charging men at arms thought they would be able to break them. The landsknecht held firm and drove Zápolya's men at arms back whilst a unit of Hungarian infantry fighting for the Habsburgs fired at close range into the disordered heavy cavalry sending them back in flight.

A view down the field. The Habsburg cavalry are continuing the attack on Zápolya's infantry.

Zápolya's infantry hold formation and the guns continue to fire...

...inflicting further casualties on the advancing landsknecht.

On Zápolya's right flank the Habsburg horse battle against his mercenary infantry.

The Habsburg infantry are reinforced by another artillery piece but they are suffering terribly as they attempt to break into the Polish infantry of Zápolya's army.

During a lull in the fighting Bálint Török reforms the cavalry in preparation for another attack...

...whilst John Zápolya remains sheltered behind his heavy guns and the pavises of the Polish mercenaries. 

Whilst there has been much bloodshed on Zápolya's right flank, on his left most of the cavalry are still yet to engage. Only the heavy cavalry and some hussars have been routed following a charge into the advancing landsknecht.  

Bálint Török leads his heavy cavalry into the infantry yet again. He is unhorsed in the melee, a blow to the morale of the Habsburg army.


Whilst Zápolya's left flank and the Habsburg right remained unengaged in the centre of the field it was now the turn of the landsknecht infantry to show ill discipline and many of them fled in the face of constant volleys of shot from Zápolya's mercenary infantry. The Habsburg attack on the centre had failed. As the landsknecht fled some of Zápolya's light cavalry finally joined the action riding out to chase them down.

 The fighting continued on Zápolya's right flank as Bálint Török led the Habsburg cavalry in further charges. The Polish mercenaries were pushed back and Zápolya's guns were over run but Zápolya's lines held. Bálint Török was brought down in an attack on the Polish mercenaries, a blow to the morale of the already exhausted cavalry. With the infantry routed and much of Zápolya's light horse remaining fresh the Habsburg cavalry sounded a retreat. For the Habsburg horse and Zápolya's Polish and Serbian infantry it had been a long and bloody fight. John Zápolya's army held the field and the remaining Habsburg commander, Johann von Katzianer, withdrew.

In this renewed attack on Zápolya's infantry all of his guns are captured and many of his Polish mercenaries slain...

...but the mercenary captains of Zápolya's army keep their men in formation and manage to drive the Habsburg cavalry off again.

The Habsburg cavalry attack stalls again. With the landsknecht infantry having sustained heavy losses in their attack on Zápolya's defensive formation and Zápolya's light horse contingent yet to really engage the Habsburgs retreat from the field.

 Another hard fought game. I think deployment was key in this one. To win Tom had to get to John Zápolya's unit and defeat it but Zápolya was positioned amidst a strong defensive formation of guns and pavise infantry which proved very difficult to break. The guns in Zápolya's army were effective when defending against the landsknecht at close range whilst those in the Habsburg army were firing at long range and achieved little. This had a big effect on the result.

I suppose this also shows that even in a chaotic game like Lion Rampant, or at least our amended version of it, if you follow some of the tried and tested defensive formations of history they can achieve results that would be expected. That being said there were moments when it did look like Tom's attack with the cavalry would prevail and sweep away my infantry. As we could play cards to counter activation fails this meant that the ill discipline rules for 
Zápolya's army didn't have an effect whilst, counter to history, it was the landsknecht infantry that suffered from terrible discipline in the game with a few of the units failing their morale and routing very quickly.

It was great to get so many different units on the table; landsknecht, gendarmes, hussars, balkan cavalry and eastern European infantry with pavises and heavy armour. This is definitely an area of gaming Tom and I will be revisiting and we are keen to get the Ottomans into another game later this year.