

This month started with a visit to Stuart's where we played two games set in early sixteenth century Ireland, based around the battles of Móin na mBrathar, in 1510, and Mourne Abbey, in 1520. Both of these resulted from the Geraldine Earls of Kildare and Desmond clashing with Gaelic Irish Chieftans as they sought to expand their power. On the morning of our second game, the Battle of Mourne Abbey, we visited the ruins of a fortified monastery, https://en.wikipedia.org/wiki/Ewenny_Priory, which helped to prepare us for the tabletop carnage that followed!
Battle of Móin na mBrathar or the “Battle of Shannon River”, 1510
Gerald FitzGerald, 8th Earl of Kildare's most famous victory was in 1504 on the field of Knockdoe where he led an alliance of Anglo-Irish and Gaelic forces to defeat Ulick Fionn Burke, Lord of Clanricarde, and his allies. Although Kildare's power was so great that he was known as the uncrowned king of Ireland he was not always as successful in his campaigns. Allied to Ulick Fionn Burke at Knockdoe was Turlough O'Brien, Lord of Thomond. O'Brien had been expanding his power in Limerick and Tiperrary and by 1506 had constructed a bridge over the Shannon River. Kildare petitioned the English King, Henry VII, for assistance against O'Brien and the Tudor King was briefly tempted to lead an expedition in person.
It was not until 1510 that the Earl of Kildare was ready to act and, as with the Knockdoe campaign he led a large army formed by an alliance of the English of Ireland and Gaelic chiefs. Within his host was the son of the 9th Earl of Desmond, James fitz Maurice FitzGerald as well as Hugh Dubh O'Donnell, the leader of the powerful O'Donnell dynasty of Tyrconnell in Ulster. Kildare destroyed the bridge and camped nearby but O'Brien raised a host which lay very close to Kildare's army that night. The following day as Kildare attempted to return to Limerick his troops were attacked by O'Brien's army with Kildare's force taking heavy losses. The Annals of the Four Masters recorded the events in Gaelic, heaping praise on Hugh O'Donnell as a Gaelic Lord in Kildare's army who fought bravely in the rearguard, a translation of which reads:
"They (Kildares Army) then mustered additional forces; and the Geraldines of Munster, under the conduct of James, son of the Earl of Desmond, and all the other English of Munster, and also Mac Carthy Reagh (Donnell, son of Dermot, who was son of Fineen), Cormac Oge, the son of Cormac, son of Teige, and the English and Irish of Meath and Leinster, then proceeded to Limerick. Turlough, the son of Teige O'Brien, Lord of Thomond, with all his forces, and Mac Namara, the Sil-Aedha, and the Clanrickard, mustered another numerous army to oppose them. The Earl (Kildare) marched with his army through Bealach-na-Fadbaighe and Bealach-na-nGamhna, until he arrived at a wooden bridge, which O'Brien had constructed over the Shannon; and he broke down the bridge, and encamped for the night in the country. O'Brien encamped so near them that they used to hear one another's voices and conversation during the night. On the morrow the Lord Justice (Kildare) marshalled his army, placing the English and Irish of Munster in the van, and the English of Meath and Dublin in the rear. O'Donnell and his small body of troops joined the English of Meath and Dublin in the rear; and they all took the short cut through Moin na m-brathar to Limerick. O'Brien's army attacked the English, and slew the Baron Kent and Barnwall Kircustown, with many other men of distinction not enumerated. The English army escaped by flight, and the army of the O'Briens returned in triumph with great spoils. There was not in either army on that day a man who won more fame for bravery and prowess than O'Donnell, in leading off the rear of the English army."
The O Brien's rebuilt the bridge but it was again destroyed in the 1530s during one of Leonard Grey's campaigns (see http://camisado1500s.blogspot.com/2022/08/belahoe-1539.html for more detail on these). Again it was rebuilt and a bridge still exists at the site today by the aptly named village of O'Brien's Bridge, https://en.wikipedia.org/wiki/O%27Brien%27s_Bridge.
 |
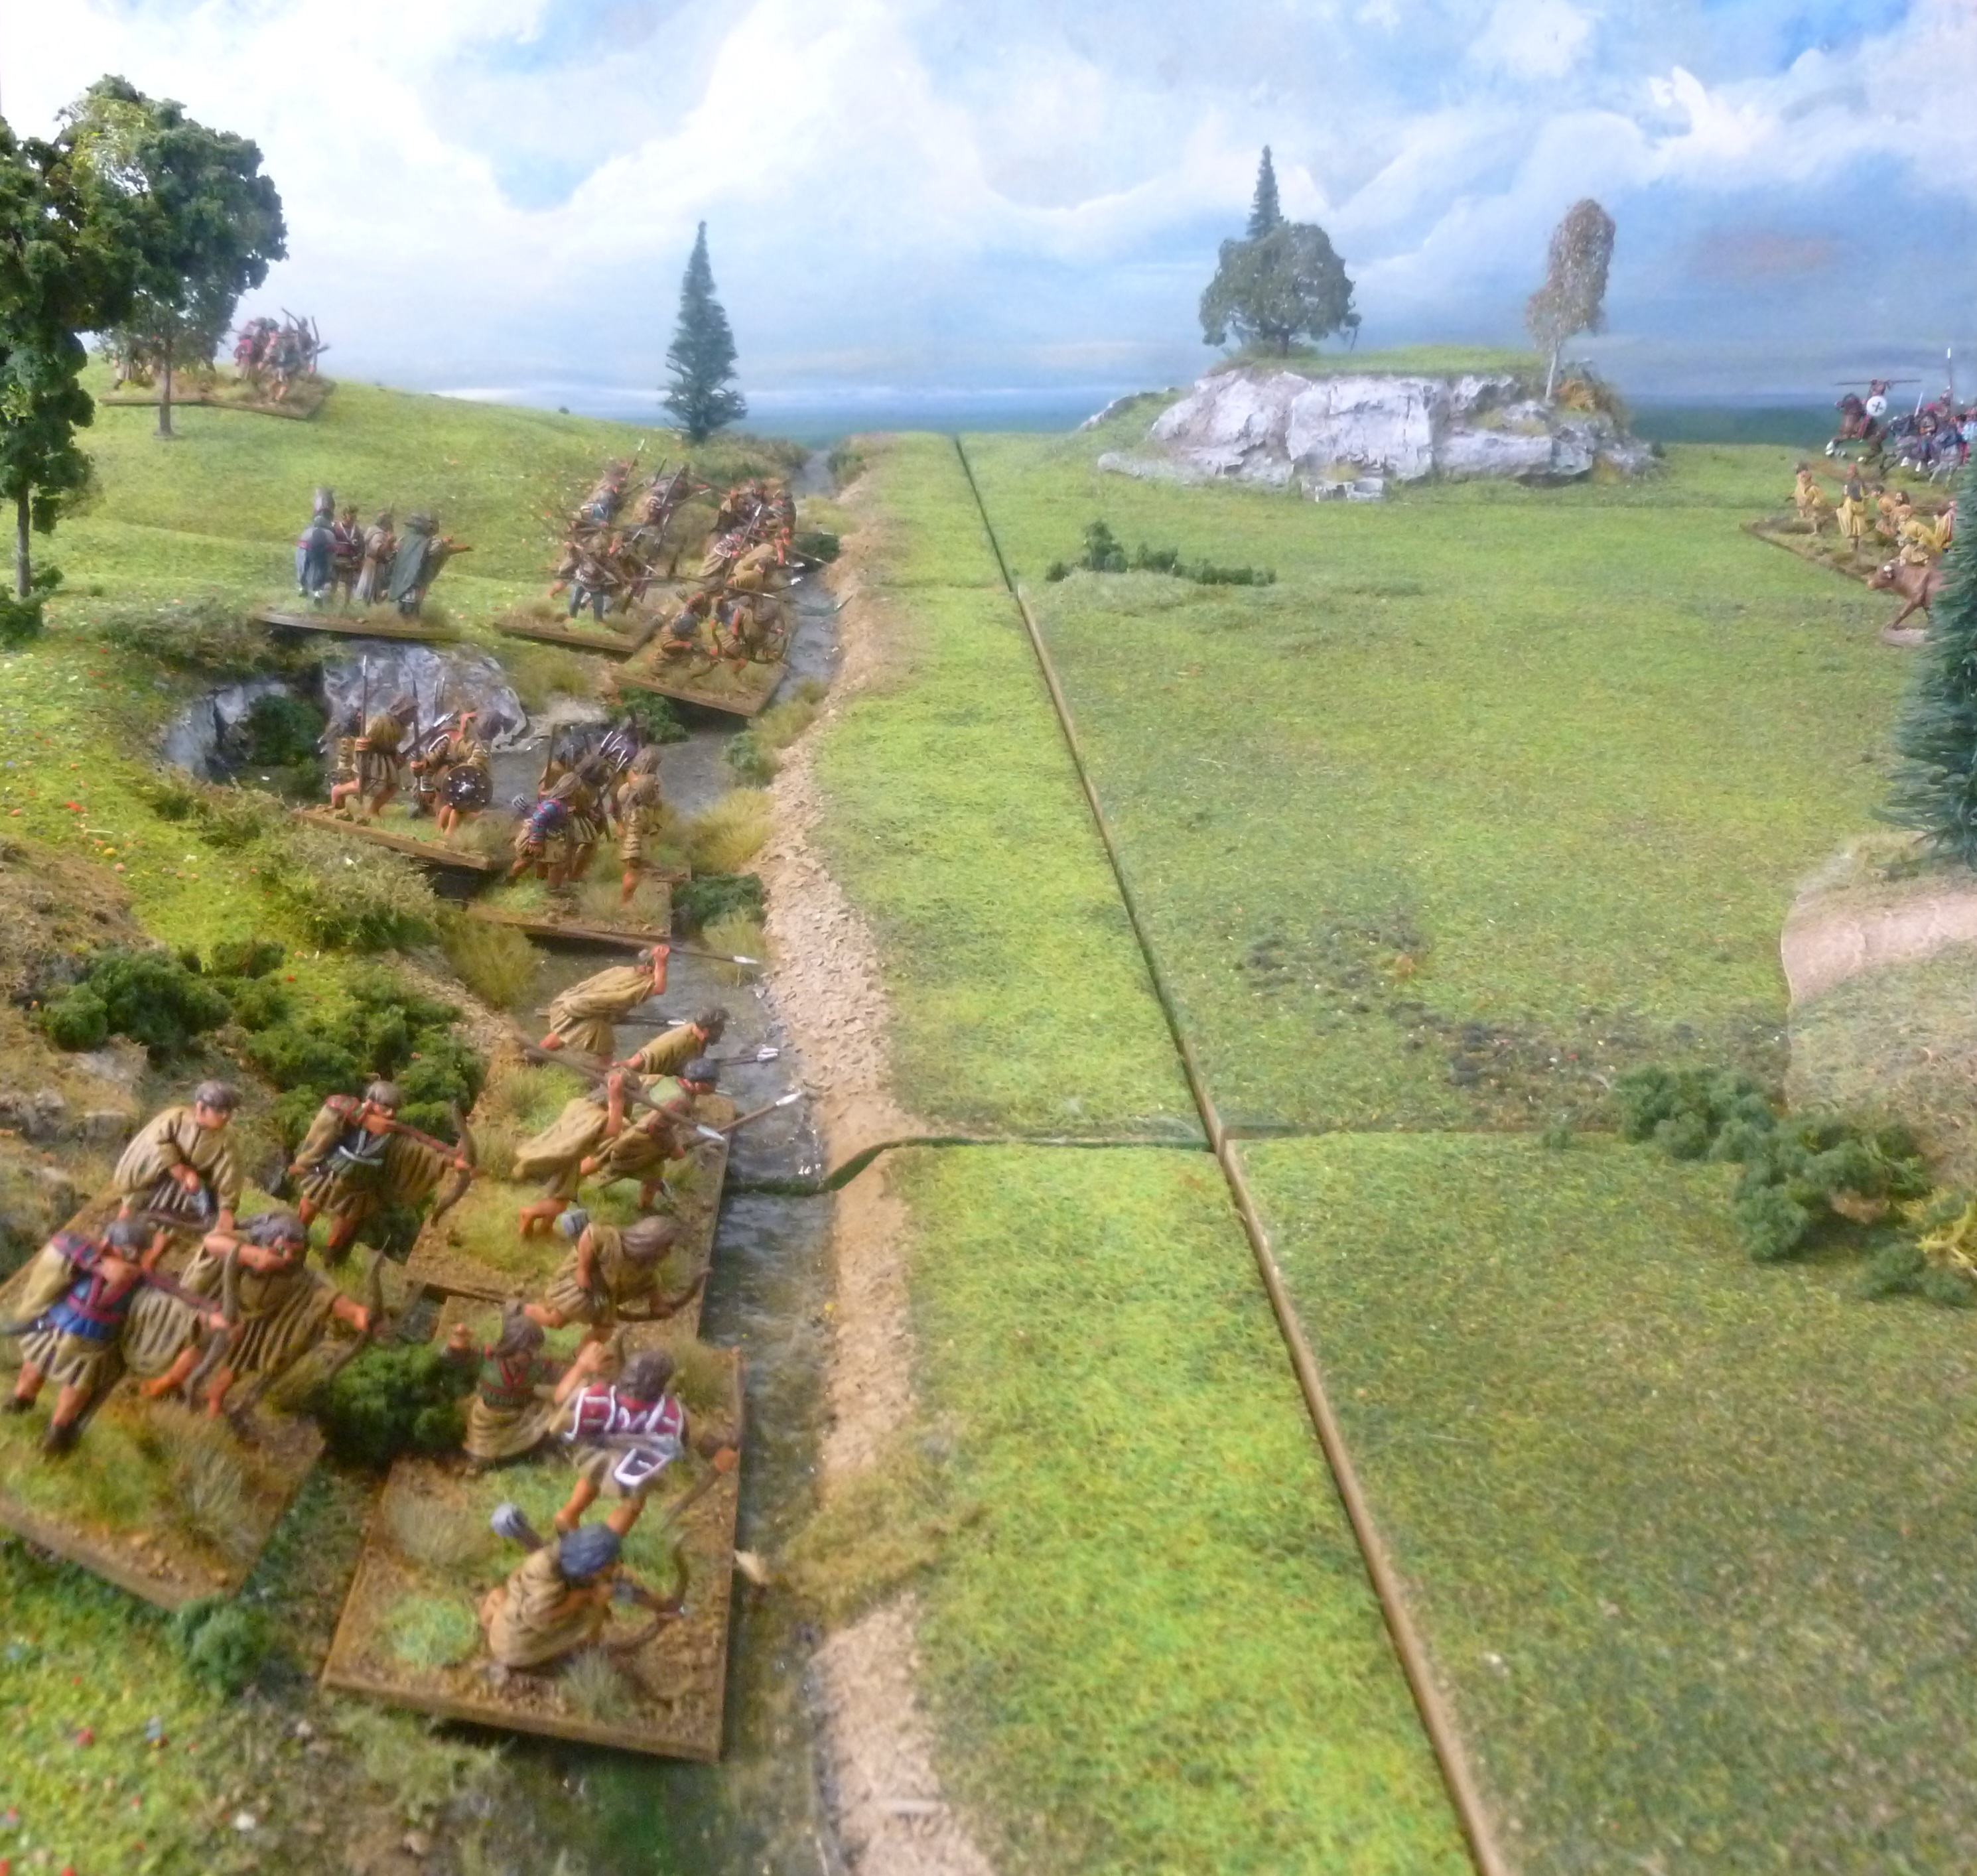
| A view of the table. The FitzGerald army will attempt to travel to the other side, crossing small tributaries of the River Shannon, and reach the safety of Limerick. |
.jpg) |
| The Earl of Kildare's army is slowed by loot and livestock that have been take during his campaign against the O'Brien. |
 |
| The Geraldine army, comprised of both Anglo-Irish and Gaelic troops. |
Scenario
As always both of our games were played using our adapted Lion Rampant rules. For this scenario each army was broken down into two separate retinues. The FitzGerald retinues started on the table up to 20" from one table edge as if the army was marching towards Limerick. The two retinues had to be placed in two blocks. The Vanguard had to be placed in front of the rearguard which would be closer to the rear edge of the table. Each retinue had two livestock/wagon counters.
The O'Brien player wrote down which of his units was arriving from which table edge at the start of the game. The units could then arrive from the table edge they had been allocated. Units arriving in front or behind the FitzGerald army could arrive via move activations only whilst units arriving on the flanks could attack, shoot or skirmish as well as move. If an attacking, shooting or skirmishing unit failed its activation it was placed at the table edge at the point it would have acted from.
The two retinue leaders in the O'Brien army had to be amongst the the first six units to arrive on the table for the O'Briens.
The Livestock and Wagon counters
The FitzGerald army was carrying loot from its raid in the form of livestock and wagons. At the start of the game these were allotted to four units, two counters in each retinue. These units could move a maximum of 6" per turn and would loose the counter if they were defeated in combat or battered. They could not attack or skirmish but could shoot whilst they had the counter. Units could pick up the "lost" counters by moving into base to base contact with the item. They were then considered to have picked up the counter and could move with it. The counters could be picked up by both FitzGerald or O'Brien units. If a FitzGerald unit reached the edge of the table it was headed for it could either leave the counter, removing it from play, and return to the battle or leave with the counter.
If lost the wagon counters would not move but the livestock would move 2D6 inches in a random direction at the start of every turn.
Darts and arrows
Every time a ranged unit shot or skirmished if rolling 12 dice and 5 1s were rolled the unit was out of darts or arrows and couldn't shoot anymore. If 6 dice were rolled and 3 1s were rolled then the unit ran out of darts or arrows. An arrow marker was placed by the unit to denote it had ran out.
If a unit that had ran out of darts or arrows could move into base to base contact with a unit of horseboys or the wagons it was considered resupplied and could shoot or skirmish again although it could still run out of ranged weapons again.
Victory Conditions
The aim of the FitzGerald army was to escape the field with their loot whilst the O'Briens had to attempt to stop them. The victory points awarded during the game were based on these objectives.
The FitzGerald Army
4 points for every livestock/wagon counter that was taken to the other end of the table and escaped
2 points for every unit that escaped (not named characters)
4 points if the Earl of Kildare escaped
3 points if Hugh Dubh O'Donnell escaped
3 points if James fitz Maurice FitzGerald escaped
3 points if Turlough O'Brien was slain or routed
The O'Brien Army
1 point for every enemy unit (not named characters) destroyed or routed
3 points for every livestock/wagon counter that was held by O'Brien's army when the game ended
4 points if the Earl of Kildare was slain or routed
2 points if James fitz Maurice FitzGerald or Hugh Dubh O'Donnell were slain or routed
.jpg) |
| The Earl of Kildare is supported by the son of the 9th Earl of Desmond, James fitz Maurice FitzGerald, who would later be defeated at the Battle of Mourne Abbey in 1520 and... |
.jpg) |
| ...Hugh Dubh O'Donnell, the leader of the powerful O'Donnell dynasty of Tyrconnell in Ulster. |
The Armies
For this game Stuart took control of the FitzGeralds whilst I plotted the ambush as the O'Briens.
Gerald FitzGerald, 8th Earl of Kildare's army
For this game Stuart took control of the FitzGeralds whilst I plotted the ambush as the O'Briens.
Gerald FitzGerald, 8th Earl of Kildare's army
Gerald FitzGerald, 8th Earl of Kildare's retinue and the vanguard
1 Unit of Foot Knights (Gerald FitzGerald, Earl of Kildare - retinue leader)
1 Unit of Galloglass (Unit contains James fitz Maurice FitzGerald)
1 Unit of Shire Billmen
1 Unit of Shire Archers
1 Unit of Kern Shot
2 Units of Anglo Irish Horse (same as Border Horse)
2 Units of Kern
Hugh Dubh O'Donnell's retinue and the rearguard
1 Unit of Galloglass (Hugh Dubh O'Donnell - retinue leader)
1 Unit of Galloglass
1 Unit of Shire Archers
1 Unit of Kern Shot
1 Unit of Horseboys
1 Unit of Household Kern
1 Unit of Kern
2 Units of Irish Noble Cavalry
The O'Brien's
Turlough O'Brien, Lord of Thomond's retinue
1 Unit of Foot Knights (Turlough O'Brien, Lord of Thomond - retinue leader)
3 Units of Galloglass
2 Units of Irish Noble Cavalry
1 Unit of Horseboys
2 Units of Kern
The Macnamara & Claricarde retinue
1 Irish Chieftan - (sames as Galloglass - retinue leader)
2 Units of Galloglass
2 Units of Irish Noble Cavalry
2 Units of Household Kern
3 Units of Kern
The captions under the photos tell the tale of the games but a brief write up also follows.
 |
| The FitzGerald army begins to move... |
 |
| ...but is soon attacked from O'Brien, MacNamara and Clanricarde troops. |
 |
| Galloglass in the employ of O'Brien attempt to ambush some of Kildare's kern but they manage to evade the attack. |
 |
| Kildare's Anglo-Irish cavalry suffer heavy losses as they guard the flanks of his army. |
.jpg) |
| In the centre of the FitzGerald host the creaghts of cattle are driven forward. |
.jpg) |
| So far the FitzGerald army has been attacked on the flanks but it looks as if O'Brien kern are also blocking the army's path. |
As the Earl of Kildare broke camp his army was on high alert. Throughout the night there had been rumours the voices of O'Brien's men could be heard and his scouts reported that a large enemy host was close. The first attacks came as the FitzGerald army began to move through Móin na mBrathar. Initially it looked as though the O'Briens were simply going to harass Kildare's forces as they marched back to Limerick. Groups of kern appeared on his left flank and skirmished with his horsemen whilst a unit of galloglass charged his right flank to be swiftly dealt with by his vanguard.
It was as the FitzGerald's pushed forward that the true extent of the ambush became apparent. Ahead of them a much larger force of kern could be seen blocking the route to Limerick. On Kildare's left flank the sound of pipes joined with O'Brien, MacNamara and Clanricarde war cries and indicated that a much larger attack was about to take place. The army's kern pushed the cattle herds or creaghts forward but the wagons full of loot were already falling behind as they struggled over the terrain.
.jpg) |
| The Earl of Kildare and James fitz Maurice FitzGerald debate how to proceed as it is clear they are facing a formidable foe. |
 |
| O'Brien, MacNamara and Clanricarde kern block the Earl of Kildare's path. |
.jpg) |
| The Earl of Kildare himself has come under attack from the skirmishing kern. |
 |
| Fighting develops as the Kildare's vanguard attempts to push through the ambush. |
 |
| A path is cleared by a devastating volley from some of Kildare's arquebusiers. |
 |
| Turlough O'Brien, Lord of Thomond, leads a force of galloglass and kern into the battle. |
 |
| A view of the field as O'Brien leads his men forward. He has committed the strongest part of his army to an attack on Kildare's left flank. |
 |
| The rearguard has suffered during the ambush and O'Brien kern seize some of the FitzGerald loot. |
 |
| Surrounded on all sides both the Earl of Kildare and James fitz Maurice FitzGerald flee as the vanguard disintegrates. |
Skirmishes developed all around the FitzGerald army as MacNamara horsemen attacked from the rear and the Lord of Thomond, Turlough O'Brien, arrived on Kildare's left flank with a powerful contingent of galloglass. Panic set in and the wagons were abandoned whilst Kildare and James fitz Maurice FitzGerald both fell back under attack from O'Brien's kern. Some of the FitzGerald troops fought back successfully, especially the Earl's arquebusiers who fired on the kern blocking the route to Limerick and sent them reeling back.
It was Hugh Dubh O'Donnell who was the most effective. Both Kildare and then James fitz Maurice FitzGerald fled in panic. O'Donnell, in command of the rearguard, rallied the remaining FitzGerald and O'Donnell troops and pushed forward against the force blockading them. The line of kern O'Brien had deployed to prevent the FitzGerald army from escaping had already suffered at the hands of the arquebusiers and was now completely routed by O'Donnell's men.
The O'Donnell kern skirmished with O'Brien's galloglass on the left flank and, whilst they did suffer from some surprise attacks on the right, they managed to halt the main thrust of the O'Brien attack for long enough to get the first herd of cattle safely through Móin na mBrathar. The celebrations of the O'Briens that had recaptured the wagons were cut short as O'Donnell's men came back to retrieve them. It was a perfectly executed rearguard action. In the face of the ambushing O'Briens, MacNamara's and men of Clanricarde, O'Donnell not only led the remaining FitzGerald and O'Donnell troops to safety but also got all of the cattle and loot through! Turlough O'Brien had not had the great victory he was hoping for. "There was not in either army on that day a man who won more fame for bravery and prowess than O'Donnell, in leading off the rear of the English army."
 |
| Attacks are being launched on the FitzGerald army from all sides. |
 |
| But the path forward is being cleared by troops under the command of Hugh Dubh O'Donnell. |
 |
| As the O'Brien army attacks Hugh Dubh O'Donnell defends the cattle with the rearguard. |
 |
| The O'Donnell kern escape the ambush with some of the cattle. |
 |
| Hugh Dubh O'Donnell sends kern back to recapture the loot lost in the fighting... |
 |
| ...O'Donnell's kern are successful and... |
 |
| ...with the aid of the horseboys they manage to get all the loot and livestock through the ambush and safely on to Limerick. |

Battle of Mourne or Mourne Abbey, 1520
Having been present at the defeat of the Earl of Kildare's army in 1510 James fitz Maurice FitzGerald, became the 10th Earl of Desmond on his father Maurice's death in 1520. The new Earl of Desmond soon faced an alliance of Cormac Oge MacCarthy, Lord of Muskerry, his uncle Thomas FitzGerald, also known as Thomas the Bald, and another powerful MacCarthy chieftan, Donal MacCarthy Reagh, Prince of Carbery, whose son Cormac MacCarthy Reagh led troops on his father's behalf. Throughout the 15th and into the 16th century the MacCarthys had been enemies of the Earls of Desmond as the MacCarthys sought to claim tribute from parts of Munster over which the Earls ruled. The internecine fighting between the Desmond FitzGeralds meant that James's uncle Thomas found common cause with the MacCarthys allying with them to oppose his nephew.
The Earl of Desmond had a powerful army. In 1490 his father's forces were estimated at 400 horse, eight battles of galloglass (a battle being between 60 to 80 galloglass each with two attendants), one battle of crossbowmen and gunners and 3,000 kern. In 1520 he led his men into Muskerry in an attack on the MacCarthys who called their own troops to arms and met the Earl at Mourne. Different sources have the Battle of Mourne or Mourne Abbey, also known as Cluhar, taking place in 1520, 1521 and 1524 though the evidence seems clear that it took place in September 1520. At this time Thomas Howard, Earl of Surrey, was Lord Deputy of Ireland (see the second scenario here: https://camisado1500s.blogspot.com/2021/06/this-was-chaunce-of-warre-lord-maxwells.html) and he wrote on 25 September 1520 to Henry VIII saying a message had come from the Earl of Ormond, that on Friday last the Earl of Desmond was defeated by Cormock Oge, "It is no great hurt that he is punished, for he has leaned much of late to the counsel of Irishmen, and broken the arrangements lately made at Waterford by my lord of Dublin". The state papers of Henry VIII recorded Desmond's losses as "18 banners of galoglas, which bee comonly in every banner 80 men, and the substance of 24 banners of horsmen, which be 20 under every baner, at the leest, and under some, 30 ,40 and 50" as well as reporting that amongst the dead were "his kinsman Sir John Fitzgerald, and Sir John of Desmond taken, and his son slain".
Details of what happened during the battle are scant but a 17th century history of the Earls of Desmond entitled "The Rise, Increase, and Exit of the Geraldines, Earls of Desmond, and Persecution After Their Fall" includes a brief account which attributes the victory to a charge led by Desmond's uncle Thomas: "Thomas the Bald, who was captain of the horse, made a furious charge, which disordered the array of his (Desmond's) footmen and thus opened the way for his foes to triumph; whereupon the earl, after having done prodigies of valour against the serried hosts of his enemies, was obliged to abandon the field". As this is from a book about the Earls of Desmond, and Thomas would indeed go on to become the 11th Earl following the death of his nephew in 1529, this is probably more an attempt to glorify them but, who knows, it may reflect what took place. What is clear is that the Earl of Desmond was heavily defeated.
 |
| A view of the field of battle. At the top of the photo is the Earl of Desmond's army whilst Cormac Oge MacCarthy's army is at the bottom of the photo. |
.jpg) |
| James fitz Maurice FitzGerald, 10th Earl of Desmond, and his troops. |
Scenario
This game was fought as a pitched battle with both sides deploying opposite one another. The cavalry from each army had to be placed on one or both flanks. The game was be based on victory points and ended either when all the retinues reached half or less points or when all the retinue leaders were killed or routed.
Thomas FitzGerald, also known as Thomas the Bald
Thomas FitzGerald, later to become 11th Earl of Desmond was famed for winning 9 battles. To represent his prowess his Anglo-Irish cavalry unit, which had the same rules as our Border Horse, had armour 3 and "ferocious charge" for the game.
Darts and arrows
The same ammunition rules as in the first game also applied in this.
Victory Points
Victory points would be awarded as follows:
Victory points would be awarded as follows:
The Desmond FitzGerald Army
1 point for every enemy unit (not a named character) killed or routed
4 points if Cormac Oge MacCarthy, Lord of Muskerry was killed or routed
3 points if Thomas the Bald was killed or routed
2 points if Cormac MacCarthy Reagh was killed or routed
The MacCarthy Army
1 point for every enemy unit (not a named character) killed or routed
4 points if James fitz Maurice FitzGerald, Earl of Desmond was killed or routed
3 points if Sir John FitzGerald was killed or routed
 |
| The Desmond army deployed next to Mourne Abbey. |
 |
| The MacCarthy army with Thomas FitzGerald, also known as Thomas the Bald, commanding a powerful wing of cavalry against his nephew the Earl of Desmond. |
The Armies
For this game Stuart took command of Cormac Oge MacCarthy, the Lord of Muskerry's army whilst I played as the 10th Earl of Desmond.
For this game Stuart took command of Cormac Oge MacCarthy, the Lord of Muskerry's army whilst I played as the 10th Earl of Desmond.
James fitz Maurice FitzGerald, 10th Earl of Desmond's Army
James fitz Maurice FitzGerald, 10th Earl of Desmond
1 Unit of Foot Knights (James fitz Maurice FitzGerald, Earl of Desmond - retinue leader)
1 Unit of Shire Archers
2 Units of Kern Shot
2 Units of Galloglass
1 Unit of Horseboys
2 Units of Kern 4 pts
Sir John FitzGerald "his kinsman"
1 Unit of Garrison Bill (Sir John FitzGerald - retinue leader)
2 Units of Galloglass
2 Units of Irish Noble Cavalry
4 Units of Kern
Cormac Oge MacCarthy, Lord of Muskerry's army
Cormac Oge MacCarthy, Lord of Muskerry
1 Unit of Foot Knights (Cormac Oge MacCarthy, Lord of Muskerry - retinue leader)
4 Units of Galloglass (One unit of Galloglass includes Cormac MacCarthy Reagh)
1 Unit of Horseboys
3 Units of Kern
Thomas FitzGerald, also known as Thomas the Bald
1 Unit of Anglo-Irish Horse (Border Horse - unit includes Thomas the Bald - retinue leader* see special rules above)
1 Unit of Anglo-Irish Horse (Border Horse)
4 Units of Irish Noble Cavalry
1 Unit of Shire Archers
1 Unit of Kern
A brief description of the action follows.
.jpg) |
| Kern and cavalry clash in fierce skirmishes as the battle begins. |
.jpg) |
| Arrows, darts and insults fly between the two armies. |
 |
| A view of the battle as the two forces skirmish with one another. |
 |
| Cormac Oge MacCarthy's army is pushing forward. |
 |
| Thomas FitzGerald, the Bald, commands the cavalry wing of the MacCarthy army and is heavily involved in the fighting. |
.jpg) |
| The Desmond war cry of "Shanid Aboo" rises from the Earl's kern. |
.jpg) |
| Some of the Earl of Desmond's Anglo-Irish archers engage with the MacCarthy kern. |
As the two armies faced one another in the shadow of Mourne Abbey the cry of "Shanid Aboo" rose from the Earl of Desmond's army. Kern from both sides rushed forward hurling javelins and insults whilst Thomas the Bald, in command of a large force of Gaelic and Anglo-Irish horsemen led an attack on the Earl of Desmond's right wing. The skirmishes between the lines caused many casualties. Thomas the Bald's cavalry charge drove back the Desmond cavalry and kern but he was soon forced to wheel and withdraw his horsemen as galloglass and billmen under the command of Sir John FitzGerald advanced.
Whilst his cavalry evaded the Desmond counter attack Thomas the Bald was challenged by Sir John FitzGerald and the two FitzGeralds briefly dueled with one another. As they fought Sir John called Thomas a traitor for siding with the MacCarthy's in the conflict. The duel was inconclusive but Sir John FitzGerald was struck down by an arrow moments later. Thomas could not rally his cavalry force as it fled the charging Desmond infantry and he joined them in the rout abandoning the field.
 |
| The Earl of Desmond looks on as his men battle with the troops of MacCarthy and his uncle. |
.jpg) |
| Cormac Oge MacCarthy's Irish cavalry under the command of Thomas the Bald manage to evade some of Desmond's galloglass. |
 |
| Two FitzGerald's meet hand to hand as Desmond's kinsman, Sir John FitzGerald, takes on Thomas the Bald in personal combat but neither of the two men can land a killing blow and they become separated as the fighting swirls around them. Moments later Sir John is slain by an arrow. |
 |
| The skirmishing has ended and the galloglass of both armies prepare to earn their pay. |
 |
| Cormac MacCarthy Reagh leads his men into a bloody melee. |
 |
| A view of the field as the final clashes take place. |
 |
| The Earl of Desmond's galloglass put Thomas the Bald's Anglo-Irish archers to flight... |
 |
| ...whilst the troops of his kinsman, Sir John FitzGerald also fight bravely, despite the fact Sir John FitzGerald has been slain in the chaos. |
With the cavalry engagement over it was now time for the galloglass of each army to"cometh to handy blowes". A fierce battle developed as they joined the melee. Cormac MacCarthy Reagh, son of the Prince of Carbery, fought bravely finding himself in the thick of the battle as both the Earl of Desmond and the MacCarthy Lord of Muskerry watched the fight from behind their lines.
Amidst his father's galloglass Cormac MacCarthy Reagh was slain and the two armies broke apart. The day had been a bloody draw with both the Desmond FitzGerald's and the MacCarthy's loosing many men. James fitz Maurice FitzGerald, Earl of Desmond, had the satisfaction of knowing he had sent his uncle, Thomas, fleeing from the battle, but he had lost his kinsmen Sir John FitzGerald and his enemy Cormac Oge MacCarthy, Lord of Muskerry, had not been defeated.
Amidst his father's galloglass Cormac MacCarthy Reagh was slain and the two armies broke apart. The day had been a bloody draw with both the Desmond FitzGerald's and the MacCarthy's loosing many men. James fitz Maurice FitzGerald, Earl of Desmond, had the satisfaction of knowing he had sent his uncle, Thomas, fleeing from the battle, but he had lost his kinsmen Sir John FitzGerald and his enemy Cormac Oge MacCarthy, Lord of Muskerry, had not been defeated.
 |
| The Earl of Desmond, on the left, looks on as the galloglass "cometh to handy blowes". |
 |
| In the final stages of the fighting Cormac MacCarthy Reagh, son of the Prince of Carbery, is slain. The battle is over and it has been an inconclusive and very bloody fight. |
We really enjoyed these two games. The first was filled with drama. Initially it looked as if my O'Brien ambush was going to quickly overwhelm Stuart's FitzGerald force but far from this happening his second retinue, under the redoubtable Hugh Dubh O'Donnell, came back and won a resounding victory. The praise heaped upon O'Donnell in "The Annals of the Four Masters" was obviously justified! The game ended with 16 victory points to O'Brien and 31 to the Earl of Kildare.
The second game turned out to be a very bloody affair with both sides causing heavy casualties on one another. It started with lots of skirmishing between the kern and cavalry before finally being decided, or perhaps more accurately undecided, by the galloglass. Stuart scored 1 more victory point than me so it was a very slight MacCarthy victory! It was great to be able to explore these little known battles between the English of Ireland and the Gaelic Irish and provided a very different style of 16th century wargame. We will certainly be gaming more battles and skirmishes set in early 16th century Ireland in the future, Knockdoe, 1504, and Knockavoe, 1522, immediately spring to mind.
The second game turned out to be a very bloody affair with both sides causing heavy casualties on one another. It started with lots of skirmishing between the kern and cavalry before finally being decided, or perhaps more accurately undecided, by the galloglass. Stuart scored 1 more victory point than me so it was a very slight MacCarthy victory! It was great to be able to explore these little known battles between the English of Ireland and the Gaelic Irish and provided a very different style of 16th century wargame. We will certainly be gaming more battles and skirmishes set in early 16th century Ireland in the future, Knockdoe, 1504, and Knockavoe, 1522, immediately spring to mind.
Both games looked superb, really enjoyed seeing all those lovely miniatures on the table, great read too, lot's of interesting background information which is always welcome. Two interesting results, the first one really looked heading one way but turned on it's head and second one being a real slog, great stuff!
ReplyDeleteCheers Donnie, after the first few turns of the first game I thought it was going to be a walk over for the O'Briens - but how wrong I was. In our rules the Irish armies can be very brittle and my army really suffered from the skirmishing attacks of Stuart's FitzGerald army.
DeleteGreat work Oli, these two games look simply superb. It's always intriguing what little corners of history can be bought to life with war-gaming, and you certainly shined a light on these two ecounters!
ReplyDeleteThanks Tom - I really enjoyed being able to cover two clashes that have been lost to history!
DeleteTwo fantastic looking battles, excellent historical background, very inspiring!
ReplyDeleteThank you Cyrus, I am pleased you enjoyed the write up.
DeleteTwo very wild and wooly fights brought to the table with beautiful troops & scenery. Interesting background really lent interest to following the game. Thank you, visiting here is always a pleasure.
ReplyDeleteThank you pancerni, the background really added to the games - the Battle of Mourne Abbey was very "Game of Thrones" with James Earl of Desmond facing his uncle Thomas the Bald
DeleteAs always in your games with Stuart, Oli, the figures and terrain are both outstanding, and the battles themselves were full of drama!
ReplyDeleteThanks Keith, we deliberately try to do scenarios that will make for great photos and be fun to play. It is always fun to reflect elements from the historical accounts in the special rules for the games.
Delete