

The battles on the border continue. Following our games based around Dacre's assault on Ferniehurst, this weekend Stuart, https://stuartsworkbench.blogspot.com/, and I played another couple of scenarios based on the Scottish retaliation that came late in 1523. These were centred on the Siege of Wark in the autumn of that year, in which the captain of the castle's garrison led, according to English accounts at least, a heroic sally forcing the attackers from the battered walls in panic.
The Siege of Wark, 1523
Following Surrey and Dacres raiding into Scotland in September 1523, http://camisado1500s.blogspot.com/2020/04/dacres-attack-on-ferniehurst-1523.html, the Scots struck back the same year, this quick response coming as something of a shock to the English. John Stuart, Duke of Albany, raised a large force, which some English spies estimated to be as high as 60,000, including around 3,000 French. Luckily for the unprepared English the presence of the French brought back too many memories of Flodden 10 years previously and the Scottish troops would not cross the Tweed. He despatched the French force with some Scottish support, most of which was artillery, under the borderer Dan Kerr to attack Wark Castle. They reached the bank opposite the castle on 29th October 1523.
Wark was no stranger to an assault. Having originally been a Motte and Bailey style fortification, it's position meant it had been besieged three times in the 12th century, being rebuilt in 1157. It was burnt in 1399 and had been bombarded into surrender by James IV on his ill fated journey to Flodden in 1513. Since then the castle had undergone a rebuild in 1517, the keep being turned into a 6 sided artillery tower 5 stories high. A great representation of how it may have looked in 1523 can be found here: http://www.pastperfect.org.uk/sites/wark/images/later.html. Opposing the three thousand Frenchmen and their Scots supporters was Sir William Lyle with around one hundred men. Following a bombardment by the Scots guns the French launched an amphibious assault on the outer wall using appropriated boats and makeshift rafts. Lyle was unable to prevent the French storming the outer defences of the castle.
Edward Hall's chroncile describes the action as such:
"The night before the Scottes had sent ouer the water into England. iii or iiii M. men to lay siege to a lytle castle called the Castle of Warke, whiche stadeth nere the border: the great ordinaunce of Scotland sore bet the castle, and Dan Car amd the Frenchemen whiche came out of Fraunce with the duke of Albany gaue to the castle a strong assaut: with the castle was sir Willia Lyle with a C. persones, but the Scottes were so many in nomber, that they got the vttermoste warde called the Barnkyns where the beastes and barnes were, whiche seyng, the capitaine sent in all hast to the Erle of Surrey aduerisyng him of their distres, which in all hast assembled his capitaines to reskue the castle, therby hopyng that Duke Ihon of Albany would enter into England. The Frenchmen and Scottes lay styll about the castle cotinually shotyng ordinaunce Sonday & Monday the fyrst and second day of Nouember, and then the Scottes thinkyng the place assautable, coragiously set on the castle and by strength entred the second warde. Sir Willya Lyle perceiuyng that the Scottes had gotten the false brayes and that nothing remained but only the inner warde or dogeon, sayd to his company, sirs for our honor and mahod let vs issue and fight with the proude Scottes and stately Frenchmen, for more shall our honor be to dye in fight, then to be murthered with gunnes, to whiche his company that were left agreed: for his C. men he had lost alomst xl. at the other assautes. Then they issued boldly and shot coragiously as men that shot for a vauntage, and with shotyng and fightyng they draue their enemies clene out of the place & slew of them & chiefly of the Frenchmen CCC whiche lay there dead in sight when the Erle came thither, beside suche as dyed of woundes & were drouned. Then the Scottes remoued their ordinaunce, in great hast ouer the water, and by that tyme was the Erle of Surrey come w v.M. men on horsebacke & all his great army folowed & was very sory that his enemies were gone, & muche praised sir Williyam Lyle for his valiauntnes."
Trapped in the inner ward of the castle the English garrison made the decision to sally out in a last ditch effort to push the attackers back. The fighting was at close quarters within the castle walls and the French were driven back leaving some three hundred dead. The news that the Earl of Surrey was on his way with a rapidly raised force of five thousand horse meant that the Scots gunners panicked and limbered up the guns ready to withdraw, rather than offering much support to the French. John Leslie in his "History of Scotland" from 1578, puts the defeat down to the terrible autumn weather as much as the ferocity of the English defence, his quite different account of events being as follows:
"And fra that the haill army passit to Caldstreame upoun Tweid, and send our the watter certaine great artailyerie, with ane cumpany of Frensche and Scottis men, and Dand Kar with thame, and laid siege to the castell of Wark, quhilk wes keipit be Sir Williame Lylle captaine thairof, with ane great cumpnay of Inglishmen being thairin, quhilk wes weill furneisset with all kind of provisioun and munitioune necessar. And at the first assault, the utter barmkin wes won, and the saide cumpany of Scottis and Frensche men lay within the same , pursewand the castell. In the meynteime the Erle of Surry, with xlm men, wes lyand at Anwyk nocht far fra the said castell, and send the Marques Dorset with ane greit cumpany to keip the toun of Berwyk, feiring the same suld haif bene seigeit alsua; bot the said Erle durst approche na nearrir the said army of Scotland. In the meyne tyme ane new assault wes givin to the inner barmkine, and wan the same; and tharfoire thay sett one the castell and pursewit it at ane parte, quhilk wes brokin with the artailyerie lyand on the Scottis syde of the watter of Tweid, and pressit to enter thairat, quhair thair wes great slauchter maide, and speciallie one thame quha wes within the house; and the assault lestit quhill the nycht, that thay wor constranit be mirknes to retire thairfra, purposeing the nixt day, being the feird of November to haif assailyeit the same of new; bot thair wes that nycht sic ane vehement storm of tempestious wooddar, qhairby thay weir constranit to leif thair interprice at that tyme , and to retire thame to thair army, lest be the ryseing of the watter of Tweid thay mycht haif bene cutt of be thair ennemies."
For both of the games Stuart played the English while I took command of the Franco-Scottish force. The photos are from the games and the captions underneath the photos will help in following the action.
 |
| A view of Wark from the artillery tower. The French hold the outer walls in the top of the photo while Sir William Lyle and his garrison will sally from the bottom right corner. |
 |
| A view of the whole castle. The French and Scots will enter from the gatehouse and the breach. Their objectives are to burn the barn and stable that can be seen in front of the inner wall and to attempt to reach the artillery tower at the top of the photo. The English will sally from the gap in the inner wall with the objective of throwing the French and Scots out of the outer ward. The Scots artillery could support from the side of the table with the breach and boats on it all the way up to the inner wall. |
The battle took place within the "Barnkyn" as Hall called it or the outer ward of the castle. The representation of the castle can be seen in the photo above. The outer ward has been enlarged to allow for more of a game to be able to take place within the area. The English deployed inside the inner ward and the French could place up to two units at the gate and breach otherwise they deployed oustide the walls.
Terrain
The castle gate could be moved through without penalty and the breach was half movement rate and rough terrain for combat. The inner ward of Wark on the hill did not incur a movement penalty or combat penalty.
"murthered with gunnes"
To represent the fact that the English were still in possession of a state of the art artillery tower and that the French had the support of the Scots guns across the water both sides could call on the support of the artillery during the game. Each player took 8 cards from a normal deck at the start of the game. At the start of their turn they could decide to use their artillery, expending a card. The English Player was able to target any enemy unit with 36" of the artillery tower as with a Culverin shot and the French and Scots Player was able to target any enemy with 24" of the far side of the outerward (see the photo above) with a Culverin shot. The Culverin range rules would apply but line of sight wouldn't. This reflected the fact the English gun tower was so tall and also the sheer volume of guns the Scots had accross the river.
The opposing player could try and prevent this artillery shot by also expending a card. Both players played one of the 8 cards and the highest would either get to make the shot if it was their turn or if the player attempting to "block" the shot played the highest card it wouldn't take place.
"where the beastes and barnes were"
If the French and Scots could reach the barn or stables positioned against the inner wall they could try and set fire to them to earn three honour points fo each objective. To try to set fire to a building they had to have at least one base from a unit in contact with it at the start of their activation phase. As an ordered activation, they could use that unit to try to set fire to the objective (instead of Moving, Attacking, or Shooting). If there were 7 or more models in the unit the fire started on a roll of 8+ on 2D6; if there were 6 or fewer models in the unit the fire started on a roll of 9+ on 2D6. The English would earn two honour points for each building if the barn and stables were not burnt.
Honour Points
Victory for this game was decided on honour points.
English
3 Honour Points if Dan Kerr was killed/routed.
2 Honour Points for each target building, being the Barn and Stables, that was not burnt down.
2 Honour Points for each unit that could reach the shore of the Tweed to drive back the French.
French
3 Honour Points if Sir William Lyle was killed/routed.
3 Honour Points each if the barn and stables could be destroyed.
2 Honour Points if a unit could reach the artillery tower in the effort to storm the fortress.
The retinues were as follows:
The Franco Scottish Attackers
1 Unit of Foot Knights (Dan Kerr retinue leader)
1 Unit of Foot Knights - French Captain
1 Unit of Garrison Bill (Kerr's dismounted Borderers)
1 Unit of French Halberdiers
2 Units of Aventuriers
2 Units of Francs Archer Bowmen
1 Unit of Picard Pike
The English Defenders
1 Unit of Foot Knights (Sir William Lyle retinue leader)
1 Unit of Foot Knights
2 Units of Garrison Bow
2 Units of Garrison Bill
1 Units of Shire Bow
1 Organ Gun
 |
| Dan Kerr and his Borderers accompany the French Captain and his archers and pikemen at the gate house while French halberdiers, aventuriers and more archers hold the breach. |
 |
| The French at the breach. A boat they have used to cross the Tweed can be seen in the background. |
 |
| The English Garrison under Sir William Lyle prepare to sally out "for more shall our honor be to dye in fight, then to be murthered with gunnes". |
 |
| The English charge out into the outer ward but some French aventuriers have already reached the stables. |
 |
| A view of the English sallying forth! |
 |
| The French captain engages with members of the garrison. |
This was a tense game where the balance swung back and forth a couple of times. Initially the French charged into the castle courtyard as the English charged out. One of the groups of aventuriers reached the stables and immediately set fire to them. The French and Scots who were in possession of the gate house charged forward to engage the garrison. Sir William Lyle "issued boldly" only to be instantly struck down by one of the French captains in the close quarters melee. The Franco-Scottish force had already achieved two of their objectives and looked to be heading towards a stunning victory but the morale of the rest of the garrison held and they fought on.
It was now the turn of the English archers to show what they were made of. While hand to hand fighting broke out around the gate house the archers defended the rest of the courtyard and routed the French halberdiers and aventuriers who were unable to put up with the storm of arrows. From the inner ward the garrison wheeled out a nasty surprise from their collection of ordnance; the organ gun was fired into the oncoming French and succeeded in momentarily checking their advance.
 |
| English archers unleash a hail of arrows at the attacking French. |
 |
| The fighting in the castle outer ward. |
 |
| The garrison of Wark have wheeled out one of castle organ guns and use it on the attacking French. |
 |
| Sir William Lyle is cut down in the early stages of the sally. The rest of the garrison do not falter. |
 |
| Kerr's borderers clash with the castle's veteran garrison. |
 |
| Their captain may have fallen but Lyle's retinue defend valiantly against the attacking French and Scots. |
A particularly mean band of Kerr's borderers, eager for revenge after the fighting in the woods around Ferniehurst, managed to drive the English back. Many of the garrison's billmen and archers were slain in the fighting and with more French pouring through the gate house and over the breach it looked as though, despite a fierce counter attack, the garrison were going to succumb to the superior numbers of the besiegers and be overwhelmed. French archers and more aventuriers, accompanied by Dan Kerr entered the outer ward and joined the fray.
Having lost most of their melee troops in the fighting the English drew back to the inner ward and formed a last line of defence. Still keeping up a constant rain of arrows they managed to slow the oncoming French and Scots, Dan Kerr went down and the attackers morale faltered. French aventuriers and archers still held the courtyard but they were no match for the handful of men at arms that formed part of Lyle's garrison. Now was the time that the Scot's artillery on the other side of the Tweed would have been able to lend valuable support but it was not to be. The fully armoured men at arms were able to lead a second sally and send the besiegers fleeing from Wark.
In the end the French and Scots achieved two of their objectives,slaying Sir William Lyle and burning down the stables. The English garrison gained more Honour Points as they prevented the barn from being destroyed, killed Dan Kerr and managed to have three units left who could make it to the banks of the Tweed and drive the attackers back. The artillery rules provided much entertainment despite the fact the guns never fired! I repeatedly attempted to fire shots into the courtyard in an effort to push back the English counter attack but they failed everytime.
 |
| The English line holds. |
 |
| Aventuriers, flushed by the success of burning down the stables, attempt to reach the barn. |
 |
| Following the fierce fighting the English form a defence line in front of the inner ward. |
 |
| Dan Kerr has fallen in the counter attack leaving some of the remaining English men at arms to throw the attackers out of the castle. The defenders may have been outnumbered but they successfully defended Wark in a bitter struggle. |
 |
| Fearful of the arrival of the Earl of Surrey and a relief force, part of Albany's Franco-Scottish force prepares to leave the castle. |
"and to retire thame to thair army, lest be the ryseing of the watter of Tweid thay mycht haif bene cutt of be thair ennemies."
For our second game we decided to combine a couple of the scenarios from the Lion Rampant rule book to represent the besieging Franco-Scottish force beating a hasty retreat from the border with the arrival of the news that the Earl of Surrey was on his way with a relief force. The armies would deploy as per the "Hammer and Anvil" scenario on page 55 of Lion Rampant. We wanted to include a representation of a battered Wark on the table which meant the Scots deployment zone was very narrow. Due to this the English player would roll a D6 on turn 3 and on a 1-2 they could bring troops on next turn, 3-4 after two turns and 5-6 after 3 turns. English units would be brought on via a "move" activation, not being able to attack or shoot on the turn they entered the game.
For the victory conditions and wagon rules we used those from "The Convoy" scenario on page 50 of Lion Rampant.
The retinues were as follows:
The Earl of Surrey's relief force
1 Unit of English Men at Arms (Thomas Howard, Earl of Surrey)
2 Unit of Demi Lancers
2 Units of Border Horse
1 Unit of Garrison Bow (dismounted archers)
1 Unit of Shire Bow (dismounted archers)
The Duke of Albany's retreating Scots
1 Unit of Men at Arms (The Duke of Albany)
2 Units of Border Horse
1 Unit of Shire Bow
1 Unit of Scots Pike
1 Unit of Borders (Garrison Billmen)
1 Unit of French Aventuriers
 |
| The surviving members of the English garrison watch from the artillery tower. |
 |
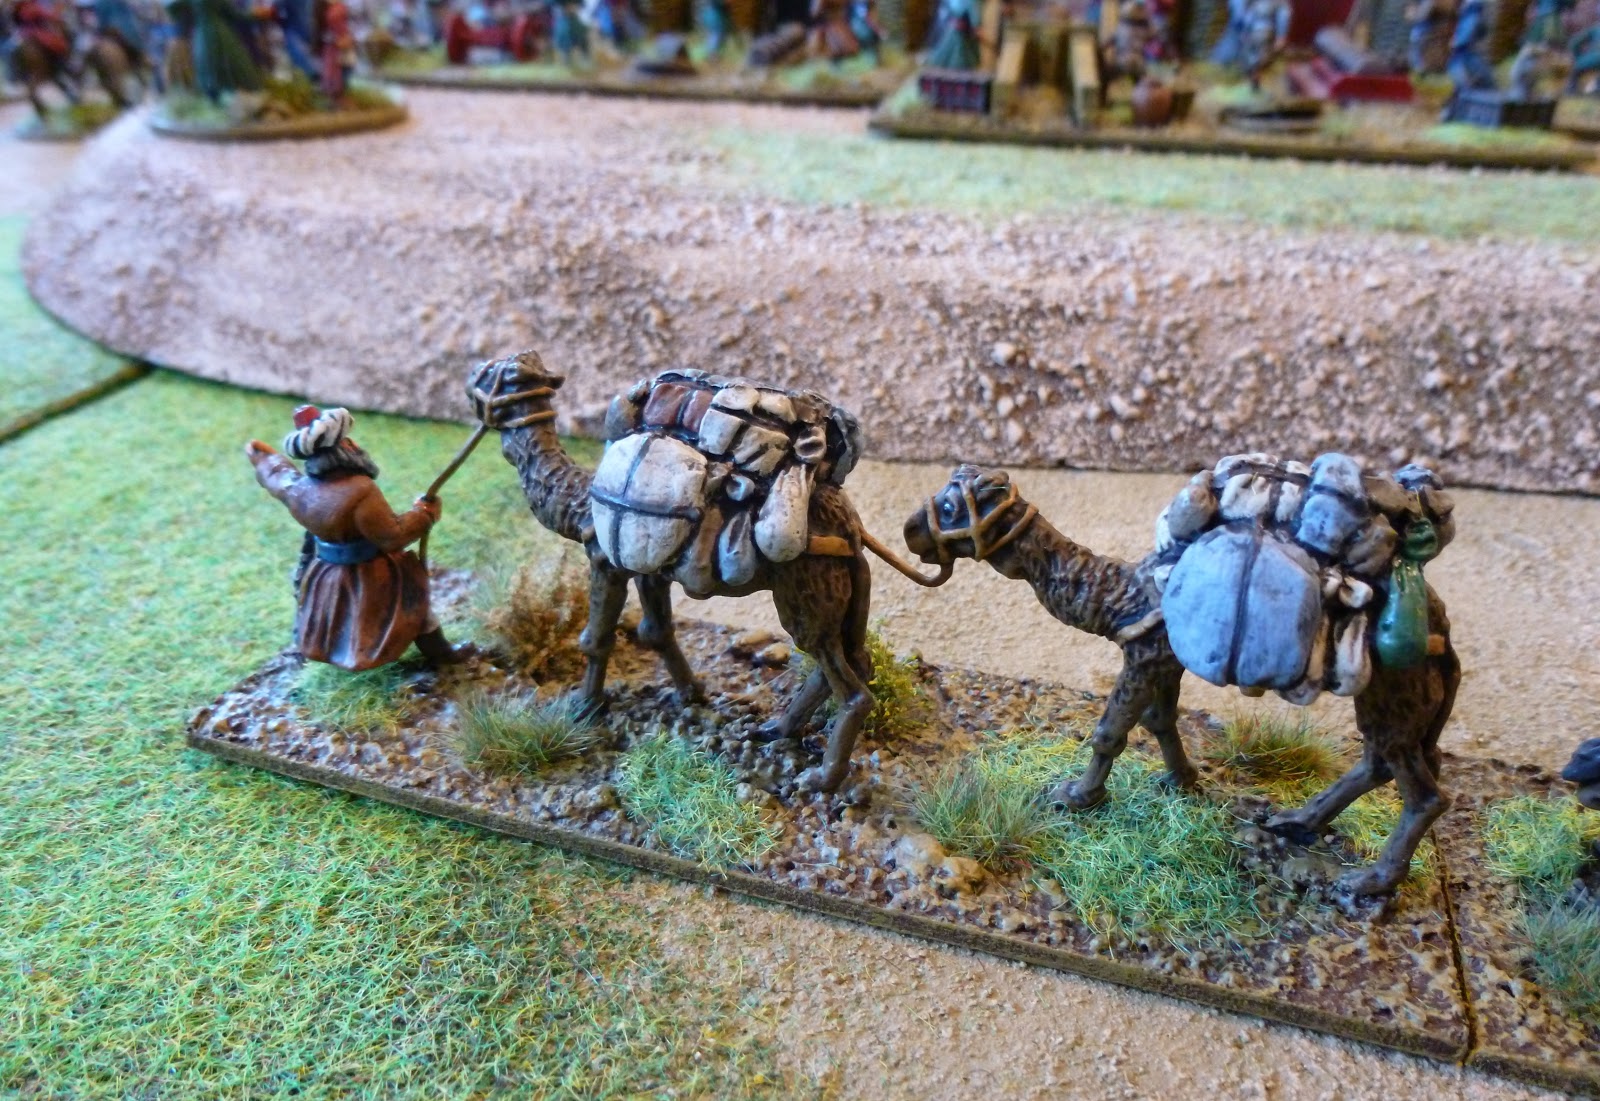
| The Scots army is on the move, they leave a battered but defiant Wark behind them. |
 |
| As the Scots leave a force of demi lancers and dismounted archers attempts to block their path. |
The second game was not quite as close. The Scots succeeded in heading off at a real pace with the units accompanying the wagons going first in an attempt to get away before the rest of the English cavalry arrived. They were met by a unit of demi lancers and a force of dismounted archers who formed a defensive line in an attempt to prevent the wagons from escaping. The demi lancers charged the borderers accompanying one of the wagons and managed to scatter them but they were a spent force after this and fled themselves.The dismounted archers blocking the Scot's escape route began to disrupt the oncoming column with a steady hail of arrows but they were too heavily outnumbered. As the Scots archers returned the compliment and their border horse rode up to harrass the English the archers broke leaving the escape route clear.
By now the rest of the English cavalry had arrived, save Surrey himself who was taking an age to appear. The English border horse gave chase to the column but some of the surviving French and a force of Scots border horse hung back and prevented them from catching the column which was already well on its way. As the remaining two wagons headed north the English had to be content that they had prevented one from getting away and that a battered but triumphant Wark had withstood yet another assault in its long history.
 |
| A fight breaks out on the river bank. |
 |
| The demi lancers charge the borderers and their baggage. |
 |
| The exhausted but relieved garrison look on from the castle walls. The demi lancers defeat the borderers and prevent one of the wagons from escaping. |
 |
| Some of Surrey's border horse arrive. |
 |
| Supported by more demi lancers the English border horse begin to harrass the retreating Scots, some of whom turn to fight back. The main part of the column has escaped. |
A fun couple of clashes on the northern border which, as always, left us with even more ideas for future games. From the 1523 campaigns alone the assaults on Jedburgh and Cessford Castle still stand out as notable actions that would be worthy of scenarios which I am sure we will get to at some point. We also managed to avoid any terrible hangovers which is always a bonus on any gaming weekend, now I guess I better get back to painting more Ottomans!


