

 |
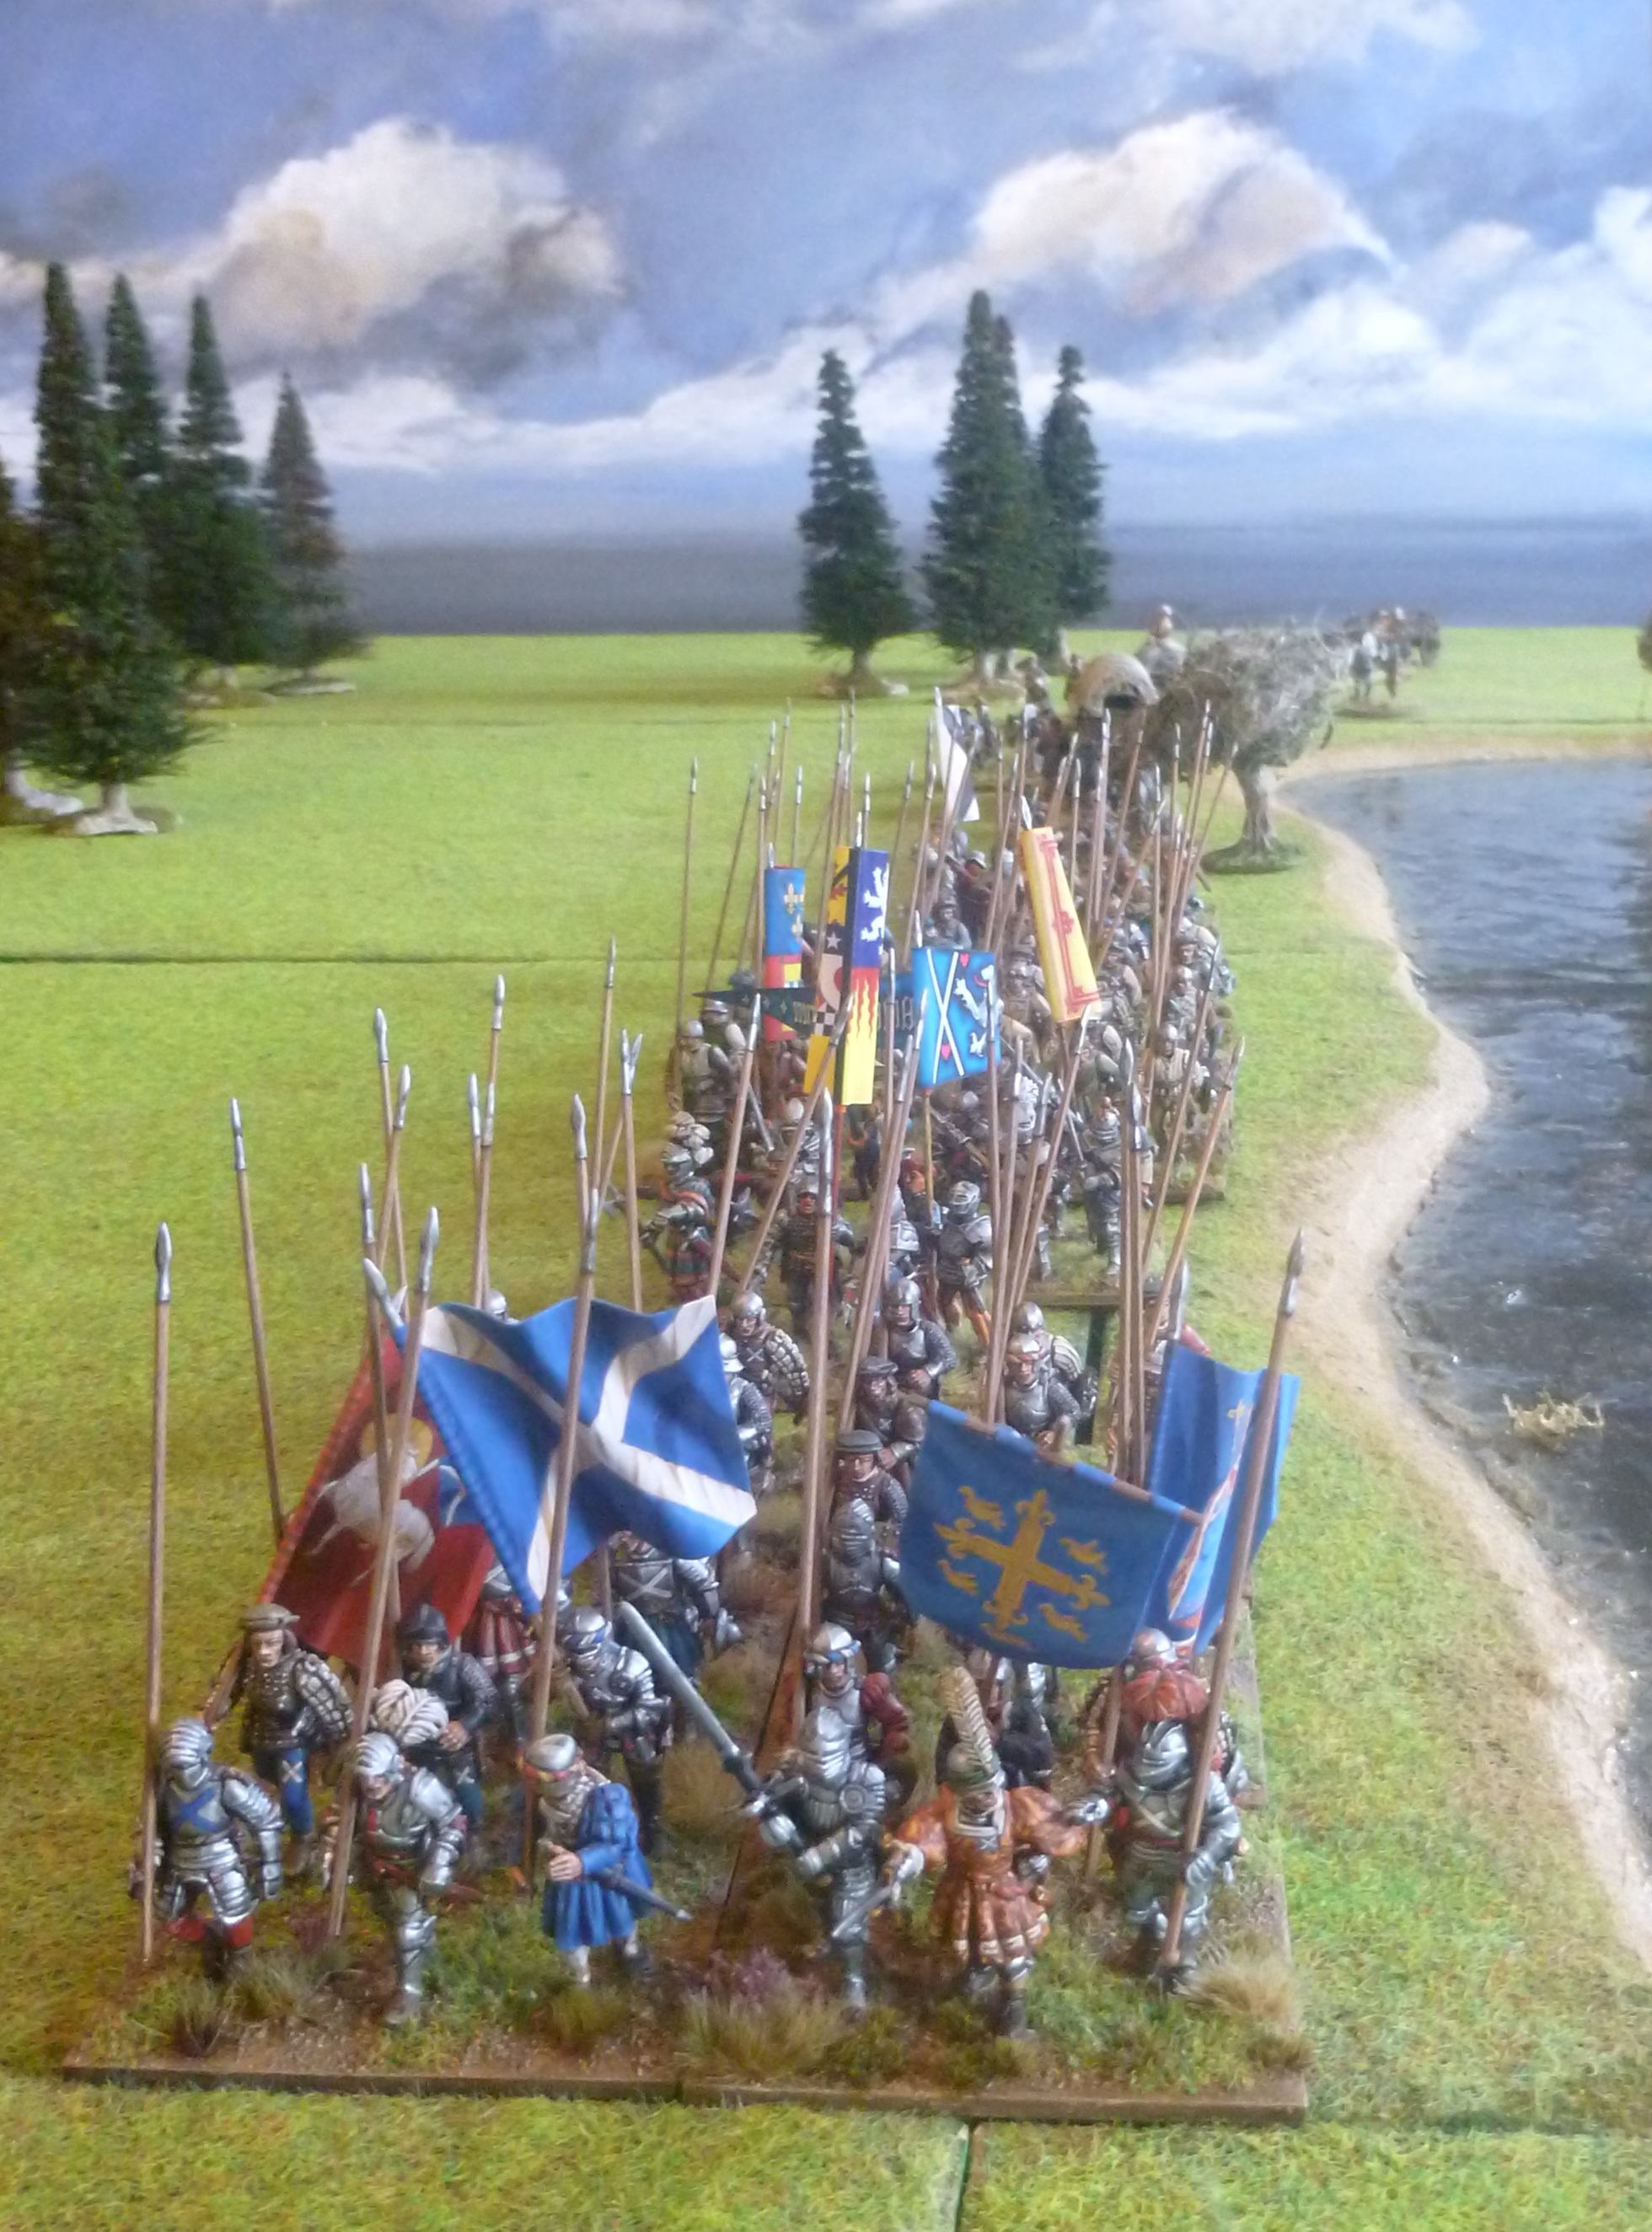
| A view down Edinburgh High Street towards the Netherbow Port, at present all seems calm. |
Cleanse the Causeway
The death of James IV at Flodden in 1513 meant a minor came to the Scottish throne in the shape of the young James V, only 17 months old at the time of his fathers death. Initially the young king's mother Margaret Tudor, sister of Henry VIII of England, acted as the young king's guardian but by July 1515 John Stewart, Duke of Albany, had been made regent. In 1516 Albany had travelled to France in search of a French bride for his young charge only to find himself detained for four years. A temporary cooling of hostilities between Henry VIII and Francis I led the French king to detain Albany at Henry's request. During this time Albany governed Scotland through his agents who included Antoine d'Arces, sieur de la Bastie and a council of senior Scots clergy and nobles.
Albany's absence lead to a power struggle as rival factions attempted to outmaneuver each other and gain control over the infant king. One faction was led by James Hamilton, Earl of Arran. A cousin of the late James IV, Arran had avoided a similar fate to his kinsman at Flodden due to his being in command of the Scottish Fleet at the time (see http://camisado1500s.blogspot.com/2019/05/the-raid-on-carrickfergus-1513.html). His rival was Archibald Douglas, Earl of Angus, who had married Margaret Tudor in the summer of 1514 seeing this as a perfect way to gain control over her son the young James V. He led the Angus faction of the Douglas, known as the Red Douglases. In 1517 Albany's agent Antoine d'Arces was murdered by Douglas allies, the Home family. Tensions heightened when the council governing in Albany's stead elected Arran to punish the Home's and seize their property.
1518 saw Margaret estranged from her husband Angus when she learnt of his affair with Lady Jane Stewart of Tranquair. She turned to Angus's rival, Arran, for aid against him and Arran was more than happy to help her and level accusations of treason against Angus. Angus refused to answer the allegations seizing his wife's estates and rental income. With her power base gone Margaret turned to her brother in England, Henry, for help but he refused to allow her to divorce Angus and so she was forced to return to her husband.
By 1520 Arran was fearful of Angus getting the upper hand over young James for good. He was set on gaining control over the young king and becoming regent himself. Under the pretense of talks to cool the tensions on 30 April he rode to Edinburgh accompanied by 500 armed men, his aim being to seize Angus and thus put an end to the power struggle. Unfortunately for Arran, Angus was no fool and was also surrounded by a strong armed retinue. To compound matters for the Hamiltons, Arran had been Lord Provost of Edinburgh since 1517 and in a dispute over a timber cargo in 1519 had sided with the merchants of Leith, a port over which the burgesses of Edinburgh had customs and trading rights. Disgruntled by this decision many of the Edinburgh townsfolk were more than willing to support Angus in a potential clash with Arran.
With Arran and his retainers having entered the city a tense stand off followed. Arran was based at the end of Blackfriars Wynd in the house of James Beaton, Archbishop of Glasgow, whilst Angus and his men were centered around his town house at the other end of the High Street. Knowing Arran was intent on his arrest Angus sent his uncle Gavin Douglas, Bishop of Dunkeld, to mediate. The Bishop of Dunkeld discovered that the Hamiltons were armed and ready to fight with even Beaton, Archbishop of Glasgow, wearing a mail shirt under his robes. Gavin Douglas returned to Angus to brief him of the situation.
As Angus formed up his men near the Netherbow Port, a city gate, at the top of Blackfriars Wynd it was Arran's half brother Patrick Hamilton of Kincavil, a renowned hot head, who attacked the Douglas faction, urged on by Arran's son, James Hamilton of Finnart. Patrick Hamilton was quickly killed and a bloody and chaotic street fight then ensued with the Douglases supposedly shouting "Cleanse the Causeway" as their battle cry. Sources contradict each other but it seems one of the factions had barricaded the side streets. As the Douglas overpowered the Hamiltons these barricades made any escape difficult with known Hamilton safe houses also being stormed in an attempt to hunt them down.
Perhaps as many as 80 Hamiltons were slain in the fight. Arran and his son James Hamilton of Finnart managed to escape by stealing a packhorse carrying coal and crossing Nor Loch, now the location of Princes Street Gardens. Angus and his men were left in control of the city and his trumpeters offered quarter to any remaining Hamiltons as long as they left Edinburgh. Beaton had hidden behind the altar in Blackfriars in an attempt to seek sanctuary but was found and dragged into the street by his captors. He was only saved from death by Gavin Douglas who proclaimed it was a sin to harm a bishop. James V had been in Edinburgh castle throughout the fight. Angus had won the upper hand for now but the cleansing of the causeway did not put an end to the factional fighting in Scotland which would only intensify a James V got older through the 1520s.
 |
| An overhead view of the table showing the starting positions of the Douglas and Hamiltons. The Hamiltons are quartered in the buildings around Blackfriars Wynd whilst the Douglas have gathered at the end of the Wynd around Netherbow Port, one of the city gates. More Douglas supporters are quartered along the High Street. The Hamiltons must attempt to get along the High Street and down the street to Nor Loch. Four of the side streets are barricaded. |
Scenario
The aim of this scenario was for Arran, his son James Hamilton of Finnart, his half brother Patrick Hamilton of Kincavil and James Beaton Archbishop of Glasgow to all escape from the city via the street to Nor Loch once the fighting with Angus had begun. Angus and the "Red Douglases" had to try and stop them. Victory would be determined by how many of the Hamilton Faction managed to escape. As always we used our ever evolving "Renaissance Rampant" rules. Stuart chose to take command of the Hamiltons and I took control of Angus and the Douglas.
Deployment
At the start of the game Angus and half of his units were deployed at the Netherbow Port at the top of Blackfriars Wynd with Patrick and James Hamilton deployed in Blackfriars Wynd at the other end with up to 2 other units (see the picture above). Arran and Beaton along with the rest of the Hamilton retinue started the game in the buildings along Blackfriars Wynd. The Hamilton Player had to write down which unit was in which building.
Similarly the other half of the Douglas units, which included angry citizens of Edinburgh could be deployed in buildings along the High Street. The Douglas Player had to write down which unit was in which building.
For the units starting in buildings during their turn they could exit the building with a shooting, attack or move activation. In the attack or move activation they would leave the building to carry out the action. If they shot they would also be placed outside of the building in the direction of who they were shooting at to represent them emerging from cover to shoot. If a unit failed an activation whilst hidden in a building it would be placed outside of the building in front of the direction it would have acted in before the other player took their turn. This represented the troops giving away their position but failing to act. Once out of a building a unit was committed to the fight and could not re-enter. A challenge could not be called from the buildings.
Challenges
Unlike a normal game of Lion Rampant all of the secular "characters" in the game (these being Arran, James Hamilton of Finnart and Patrick Hamilton of Kincavil for the Hamiltons and Angus for the Red Douglas) could call a challenge. Each character could only do this once in the game and only one character could call a challenge for their side per turn, so for example Arran and his son James Hamilton of Finnart could not both challenge Angus in the same turn.
As his force was more prepared Angus was only hit on a 6 in challenges having the "Duellist" ability from Pikeman's Lament.
The Barricades
To cross the barricades units had to be in contact with them at the start of their turn. To cross the barricade counted as a move activation and failing would end the turn. On a roll of 7+ on 2D6 they could successfully cross the barricade and were placed on the other side but could move no further that turn. Units could not attack across barricades. If a unit was in contact with a barricade it could shoot across, whilst a unit in contact with a barricade could be shot at but gained +2 armour. Units not in contact with the barricade could not shoot across at another unit not in contact.
The Edinburgh Mob!
Due to Arran's unpopularity with the Edinburgh populace if any of his units rolled a blunder instead of rolling on the blunder chart a unit of Bill (representing the armed citizens) would be placed anywhere on the High Street by the Douglas player. This unit would then join the Douglas retinue and act as part of it.
Consecrated Bishops
If the units of James Beaton, Archbishop of Glasgow, or Gavin Douglas, Bishop of Dunkeld, were attacked or shot at the player whose unit was being targeted could use their Bishop to prevent the attack in the name of God! The unit wishing to make the attack or shoot had to roll 7+ on 2D6. If they failed they could not attack but this did not count as an activation fail.
 |
| Another view from above showing Angus and his men, including Gavin Douglas, Bishop of Dunkeld, positioned outside the Netherbow Port whilst James Hamilton of Finnart and Patrick Hamilton of Kincavil are armed and arrayed along Blackfriars Wynd. Note the barricades along other side streets. |
 |
| The "Red Douglases" gather menacingly. |
 |
| James Hamilton of Finnart and Patrick Hamilton of Kincavil eye Angus and his men in a tense stand off. |
 |
| Further on up the High Street most of the citizens have no idea a vicious street fight is about to break out. |
The Retinues
The Hamiltons
1 Unit of Foot Knights (Retinue Leader James Hamilton, Earl of Arran)
1 Unit of Retinue Foot (James Hamilton of Finnart)
1 Unit of Bill (James Beaton, Archbishop of Glasgow)
1 Unit of Retinue Foot (Patrick Hamilton of Kincavil)
1 Unit of Arquebusiers
1 Unit of Archers
2 Units if Bill
The Red Douglases
1 Unit of Foot Knights (Retinue Leader Archibald Douglas, Earl of Angus)
1 Unit of Bill (Gavin Douglas, Bishop of Dunkeld)
3 Units of Retinue foot
1 Unit of Arquebusiers
2 Units of Archers
1 Unit of Bill
Due to the close quarter nature of this fight it was a fairly quick and brutal game with the fighting starting immediately. A brief summary follows whilst the captions under the photos are a good way to follow the action.
 |
| The first move is made by the Hamiltons with Arran's son, James Hamilton of Finnart, leading his armed men towards Angus whilst arquebusiers and archers emerge from their lodgings to attack the Douglas faction. |
.jpg) |
| The Hamilton's send a volley of shot into the Douglases whilst... |
 |
| ...their archers send a storm of arrows across the High Street. |
 |
| Angus leads his men in a charge against the Hamiltons. |
As the two opposing retinues gathered in the streets of Edinburgh the tension mounted. Angus and his men formed up around the Netherbow Port whilst James Hamilton of Finnart and Patrick Hamilton of Kincavil with a smaller band of armed men gathered in Blackfriars Wynd. In the end it was the Hamilton's who broke the peace first as arquebusiers and archers emerged from the buildings facing onto the High Street and sent a hail of shot and arrows into the Douglas forces. Despite being initially shocked by this surprise attack and having taken casualties Angus quickly called his men to action and the Red Douglas forces charged into the fray.
As Gavin Douglas, Bishop of Dunkeld, tried to stop the Hamilton arquebusiers from firing another lethal volley Angus led his own personal bodyguard into the fighting. He clashed with Arran's son, James Hamilton of Finnart who was felled as he charged out of Blackfriars Wynd. To cries of "Cleanse the Causeway" the High Street became the scene of a pitched battle and the muddy streets were bloodied as the rival factions fought.
 |
| Amidst the chaos Gavin Douglas, Bishop of Dunkeld, attempts to stop the fighting and persuade the Hamilton arquebusiers to lay down their guns. |
 |
| Further on up the street some of the Hamiltons have emerged on the other side of Blackfriars Wynd and attempt to cross the barricades and escape. Douglas retainers with bows block their path. |
 |
| At the top of Blackfriars Wynd Archibald Douglas and his well armed retainers clash with James Hamilton of Finnart and his men. |
 |
| Calls of "Cleanse the Causeway" can be heard from the Douglas retainers as fighting breaks out along the High Street. |
 |
| Edinburgh High Street has suddenly become a battlefield. |
 |
| The fight between Archibald Douglas and James Hamilton goes back and forth... |
 |
| ...but Douglas gets the better of James Hamilton and he is brought down in the High Street. |
 |
| Eager to bring down more of his factional rivals the Earl of Angus enters Blackfriars Wynd... |
 |
| ...the notorius hot head and Arran's half brother Patrick Hamilton of Kincavil engages in personal combat with Angus. Neither of the well armed men are able to hurt each other but as the fight spreads Angus's men slay Patrick Hamilton and his supporters. |
Having prevented Arran's son from escaping Angus then turned his attention Arran's brother, Patrick Hamilton of Kincavil. The two men briefly fought one on one in the street but as soon as it became clear that Angus would not be able to defeat Patrick on his own his Douglas thugs joined the fray killing Patrick Hamilton and his band of hot heads. But yards away the Hamilton ally, James Beaton, Archbishop of Glasgow, attempted to make good his escape. He clambered over a barricade only to be confronted by a mob of angry townsfolk. His attempts to stop them and let him pass in peace were in vain. Beaton was captured, the Edinburgh citizens hoping he would lead them to riches hidden in Edinburgh's ecclesiastical buildings.
Whilst things had gone badly for the Hamiltons around Blackfriars Wynd further up the High Street the Earl of Arran and another band of retainers attempted to reach safety. The Hamilton men managed to breakthrough the barricades and see off a force of Douglas archers who patrolled the shop fronts. As Arran made for the street that led down to Nor Loch he was horrified to see more heavily armed Douglas retainers emerging from houses along the High Street. He charged them and a savage melee ensued but Arran was unable to break through. The brief murderous clash was over and none of the Hamiltons had made it out of the city.
The Earl of Angus was not intimidated as he and his men dismounted and prepared to face the thousand or so Scott and Elliott borderers who lined the hill. How had they known when and where to strike in such numbers, he wondered? Something was definitely amiss. Such thoughts would have to wait as within moments the Scotts charged down the hill towards the small Royal bodyguard. Lord Maxwell attempted to delay them, charging forward with his retainers and a force of arquebusiers.
Whilst Maxwell and his men caused casualties amongst the borderers and protected the Royal left flank the Royal forces could do little to prevent their right being overwhelmed. Scott had kept his right wing mounted and these horsemen rode around the Royal lines forcing a block of Edinburgh pikemen to break and flee as they came under constant skirmish attacks from the border horse. They attempted to cross the Tweed in their panic some being drowned as they fled.
Before long Angus and the Royal bodyguard were under attack from all sides. Maxwell was slain in the fight whilst Scott's mounted men got behind the Royal lines causing panic amongst the beleaguered Royal troops. Angus was relieved to hear the sound of a trumpet call heralding the arrival of Lord Home and Andrew Kerr. As Home dismounted to join the fray Kerr and his borderers rode headlong into the confused melee. His borderers had success in chasing off most of the mounted Scotts and Elliotts but Andrew Kerr himself was unhorsed and slain as he charged into the mass of dismounted borderers.
Home had arrived too late to save the disintegrating Royal force. He remounted and rode off deciding not to throw in his lot with Angus and the Douglas. Lennox, only too happy to let the King be "captured" by the Scotts decided now was the time to flee, his plan having worked perfectly. The young James V was left on the field to be escorted away by Sir Walter Scott whilst Angus was captured as he yelled "Treachery" and vowed to take revenge!
These were such evocative games that really captured the plotting and feuding of this period well. Both the events we covered were great for wargames scenarios. It was fun to see our figures representing the bands of armed retainers, fighting it out in the streets of Edinburgh, and then using them to represent a small Royal bodyguard and a motely crew of rugged borderers. These games have also set the scene perfectly for when we game Linlithgow Bridge. Of course a trip to a couple local pubs accompanied the games. Luckily Stuart and myself did not have to pile into the streets to fight out any local feuds ourselves, that was saved for the tabletop!
Whilst things had gone badly for the Hamiltons around Blackfriars Wynd further up the High Street the Earl of Arran and another band of retainers attempted to reach safety. The Hamilton men managed to breakthrough the barricades and see off a force of Douglas archers who patrolled the shop fronts. As Arran made for the street that led down to Nor Loch he was horrified to see more heavily armed Douglas retainers emerging from houses along the High Street. He charged them and a savage melee ensued but Arran was unable to break through. The brief murderous clash was over and none of the Hamiltons had made it out of the city.
 |
| Further up the High Street a fierce fight between Hamilton and Douglas supporters is taking place in the shop fronts. |
 |
| James Beaton, Archbishop of Glasgow, tries to escape but is captured by some of the Edinburgh mob, citizens who have taken to the streets to join in the fight. |
 |
| The Hamilton leader, James Hamilton, Earl of Arran is still at large and he attempts to break through the Douglas lines so he can make his escape across Nor Loch... |
 |
| ...but Arran is unable to break out and, like his son and half brother moments earlier, he too is felled on the city streets. |
 |
The Battle of Melrose, 1526
The bloody events in Edinburgh were followed by further upheaval in the struggle for control over James V. Albany returned to Scotland with French backing and Angus was ousted from power and exiled. Albany's close links with France pushed Scotland into war with its southern neighbour and led to Surrey's 1523 campaign, (see http://camisado1500s.blogspot.com/2021/05/the-english-attack-on-jedburgh.html and http://camisado1500s.blogspot.com/2020/04/dacres-attack-on-ferniehurst-1523.html) with Albany recruiting French forces, striking back and faltering at Wark in October that year (see http://camisado1500s.blogspot.com/2020/08/the-siege-of-wark-1523.html). The failure to successfully lead an army over the border and attack England saw Albany sail to France in an attempt to raise further support but he was never to return to Scotland. He would lead a French force in an attempt to strike Naples in Francis I's second expedition to Italy, 1524-1525. The French king's disaster at Pavia meant Albany's troops never reached Naples, only getting as far as the Papal states.
Following Albany's departure control over the King briefly fell to his mother Margaret once again allied to Arran but they were ousted from their position when Angus, who had been in England, returned north in 1524 and staged an coup in Edinburgh. In February 1525 he persuaded the Scots parliament to agree to a system whereby different noblemen would look after the King for four months at a time. Angus would head the first group with Arran heading the second and Beaton and the Earl of Argyll heading the third. It was thought that this would end the feuding between the rival factions. The result was the opposite with Angus refusing to surrender his position of authority when his allotted time was up. Arran, Margaret and the Earl of Moray attempted to raise an army to take on the Douglases but their forces melted away when Angus placed the young king at the head of an army and marched against them in January 1526.
Margaret's position was weakened even further when she married Henry Stewart, master of the artillery, in March 1526. This angered Arran to such an extent that he defected to his former rival Angus. Angus now attempted to shore up his position for good by declaring that James had reached his majority, an age at which he could rule in his own right. Of course to Angus's mind this simply meant that he would be the power behind the throne and would be shielded from any attack by the fact that the King was nominally in charge. With his new found "independence" James grew closer to the Earl of Lennox, a relative to the young monarch. John Stewart, Earl of Lennox was keen to oust both the Douglas, led by Angus and the Hamiltons, led by Arran. He allied with Margaret and plotted for an opportunity when James V could be freed from Douglas control.
July 1526 saw the raiding across the borders reach such a level that James had to leave Edinburgh and travel to Jedburgh to bring justice and punish the lawless reivers. Of course Angus accompanied him with a strong bodyguard. Lennox informed Sir Walter Scott of Buccleuch of the King's movements. Scott was a rival of the Kerrs and Homes, Douglas allies who formed much of the bodyguard. This was his chance to seize the King and shift the power balance in Scotland once again.
On 26 July 1526 the King made his way back to Edinburgh along the Tweed and was about to cross at a bridge near Melrose. He was accompanied by troops from Edinburgh along with Angus, Maxwell and Lennox, who was all to aware of what may happen. Scott attempted to ambush this force with perhaps as many as 1,000 men, mostly borderers. The King's or perhaps more accurately Angus's force became aware of the Scott force and the King was quickly sent to nearby Darnock Tower accompanied by Lennox and Angus's brother George Douglas. As Scott's forces charged down the hillside a fierce fight ensued but the Douglas ally Home arrived on the field with 400 horse. Walter Scott, wounded in the fighting, fled with his men.
The Kerrs in Angus's force began a vigorous pursuit of Scott's fleeing borderers, chasing so far from the main body of Royal troops that some of Scott's men were able to turn and kill Andrew Kerr of Cessford at a place now known as "Turnagain" and still marked by a large stone. As an older man Sir Walter Scott of Buccleuch would be brutally murdered in a revenge attack by Kerrs on Edinburgh High Street in 1552. Up to 400 men may have been killed in this encounter at Melrose and Lennox's failure to join the fight and aid Angus served to rouse the suspicions of the Douglas faction leading Lennox to flee the Royal court. Within a few months a much larger clash would take place at Linlithgow Bridge.
 |
| Following a demonstration of the King's authority and justice on the lawless borders the Royal party make their way back to Edinburgh along the banks of the River Tweed... |
 |
| ...the young James V is present, accompanied by Lords Angus, Maxwell and Lennox. The Royal troops dismount as a force of borderers becomes visible on the sky line. |
 |
| Sir Walter Scott of Buccleuch and his force of Scotts and Elliotts are lying in ambush, they wish to prevent the Royal party from the crossing the Tweed at Melrose and "free" the King. |
Scenario
For this game the Scott's were deployed along the top of a hill line whilst the Royal force deployed along the Tweed at the foot of the hill. James V had not been hurried to Darnock Tower, as happened in the real clash, but was instead with the dismounted Royal forces. The Scotts had to try and seize him before the Home reinforcements could arrive.
Victory would go to whichever force ended up with control of the young King. Stuart took command of Angus and the Royal bodyguard whilst I took command of Scott and his force of borderers.
Victory would go to whichever force ended up with control of the young King. Stuart took command of Angus and the Royal bodyguard whilst I took command of Scott and his force of borderers.
James V
James was in a unit of retinue troops that included Lennox and George Douglas. If the retinue unit that included James was involved in hand to hand combat the Royal player had to role a D6, regardless of casualties taken. On a 5+ James was freed in the melee and was now with the unit that had attacked or been attacked. A token would be placed to show this. James counted as an extra character and was not part of the 12 forming the unit.
If the freeing unit was subsequently attacked then James would be "recaptured" by any Royal bodyguard unit on a roll of 4+ on a D6. If the freeing unit was destroyed in combat or routed then James could be rescued or recaptured either by the victorious unit or by a unit that moved to the James counter if the unit holding him had routed and abandoned him.
A blunder by the Royal bodyguard player would also mean that Lennox had managed to overpower George Douglas and control of the King's unit would then fall to the Scott player. The King could still be recaptured by the bodyguard player in the manner described above.
The Homes
On the 4th Turn the Royal bodyguard player could start to roll to see in the Home reinforcements arrived. On the first roll (at the start of turn 4) an 11+ on 2D6 would herald the arrival of the Home contingent. The following turn a 10+ would mean they could arrive and the following turn a 9+ and so on. The reinforcements would not arrive from the other side of the Tweed but rolled a D6 for the other 3 table edges as potential arrival points, including behind the Scott forces. The Home reinforcements would deploy via move activations. They could only enter the table via a move activation and couldn't shoot, attack or skirmish when first arriving. On arrival these troops would form part of the Royal bodyguard retinue.
 |
| As the Scott forces surge down the hill, Robert Maxwell with some of his men and a force or arquebusiers attempts to delay the attack. |
 |
| Archibald Douglas, the Earl of Angus organises a defence around the young James V. Douglas knows that Kerr and Home forces are nearby and sends men to fetch support. |
The Armies
Sir Walter Scott of Buccleuch
1 Unit of Demilancers (Retinue Leader Sir Walter Scott of Buccleuch)
2 Units of Border Horse
5 Units of Borderers on foot
1 Unit of Archers
James V, Archibald Douglas, Earl of Angus and the Royal Bodyguard
1 Unit of Foot Knights (Retinue Leader Archibald Douglas, Earl of Angus)
1 Unit of Retinue Foot (The unit including James V and Lennox)
1 Unit of Retinue Foot (Lord Maxwell)
2 Units of Scots Pike
1 Unit of Arquebusiers
Lord Home and the reinforcements
1 Unit of Foot Knights (Lord Home dismounted)
1 Unit of Demilancers (Andrew Kerr of Cessford)
2 Units of Border Horse
 |
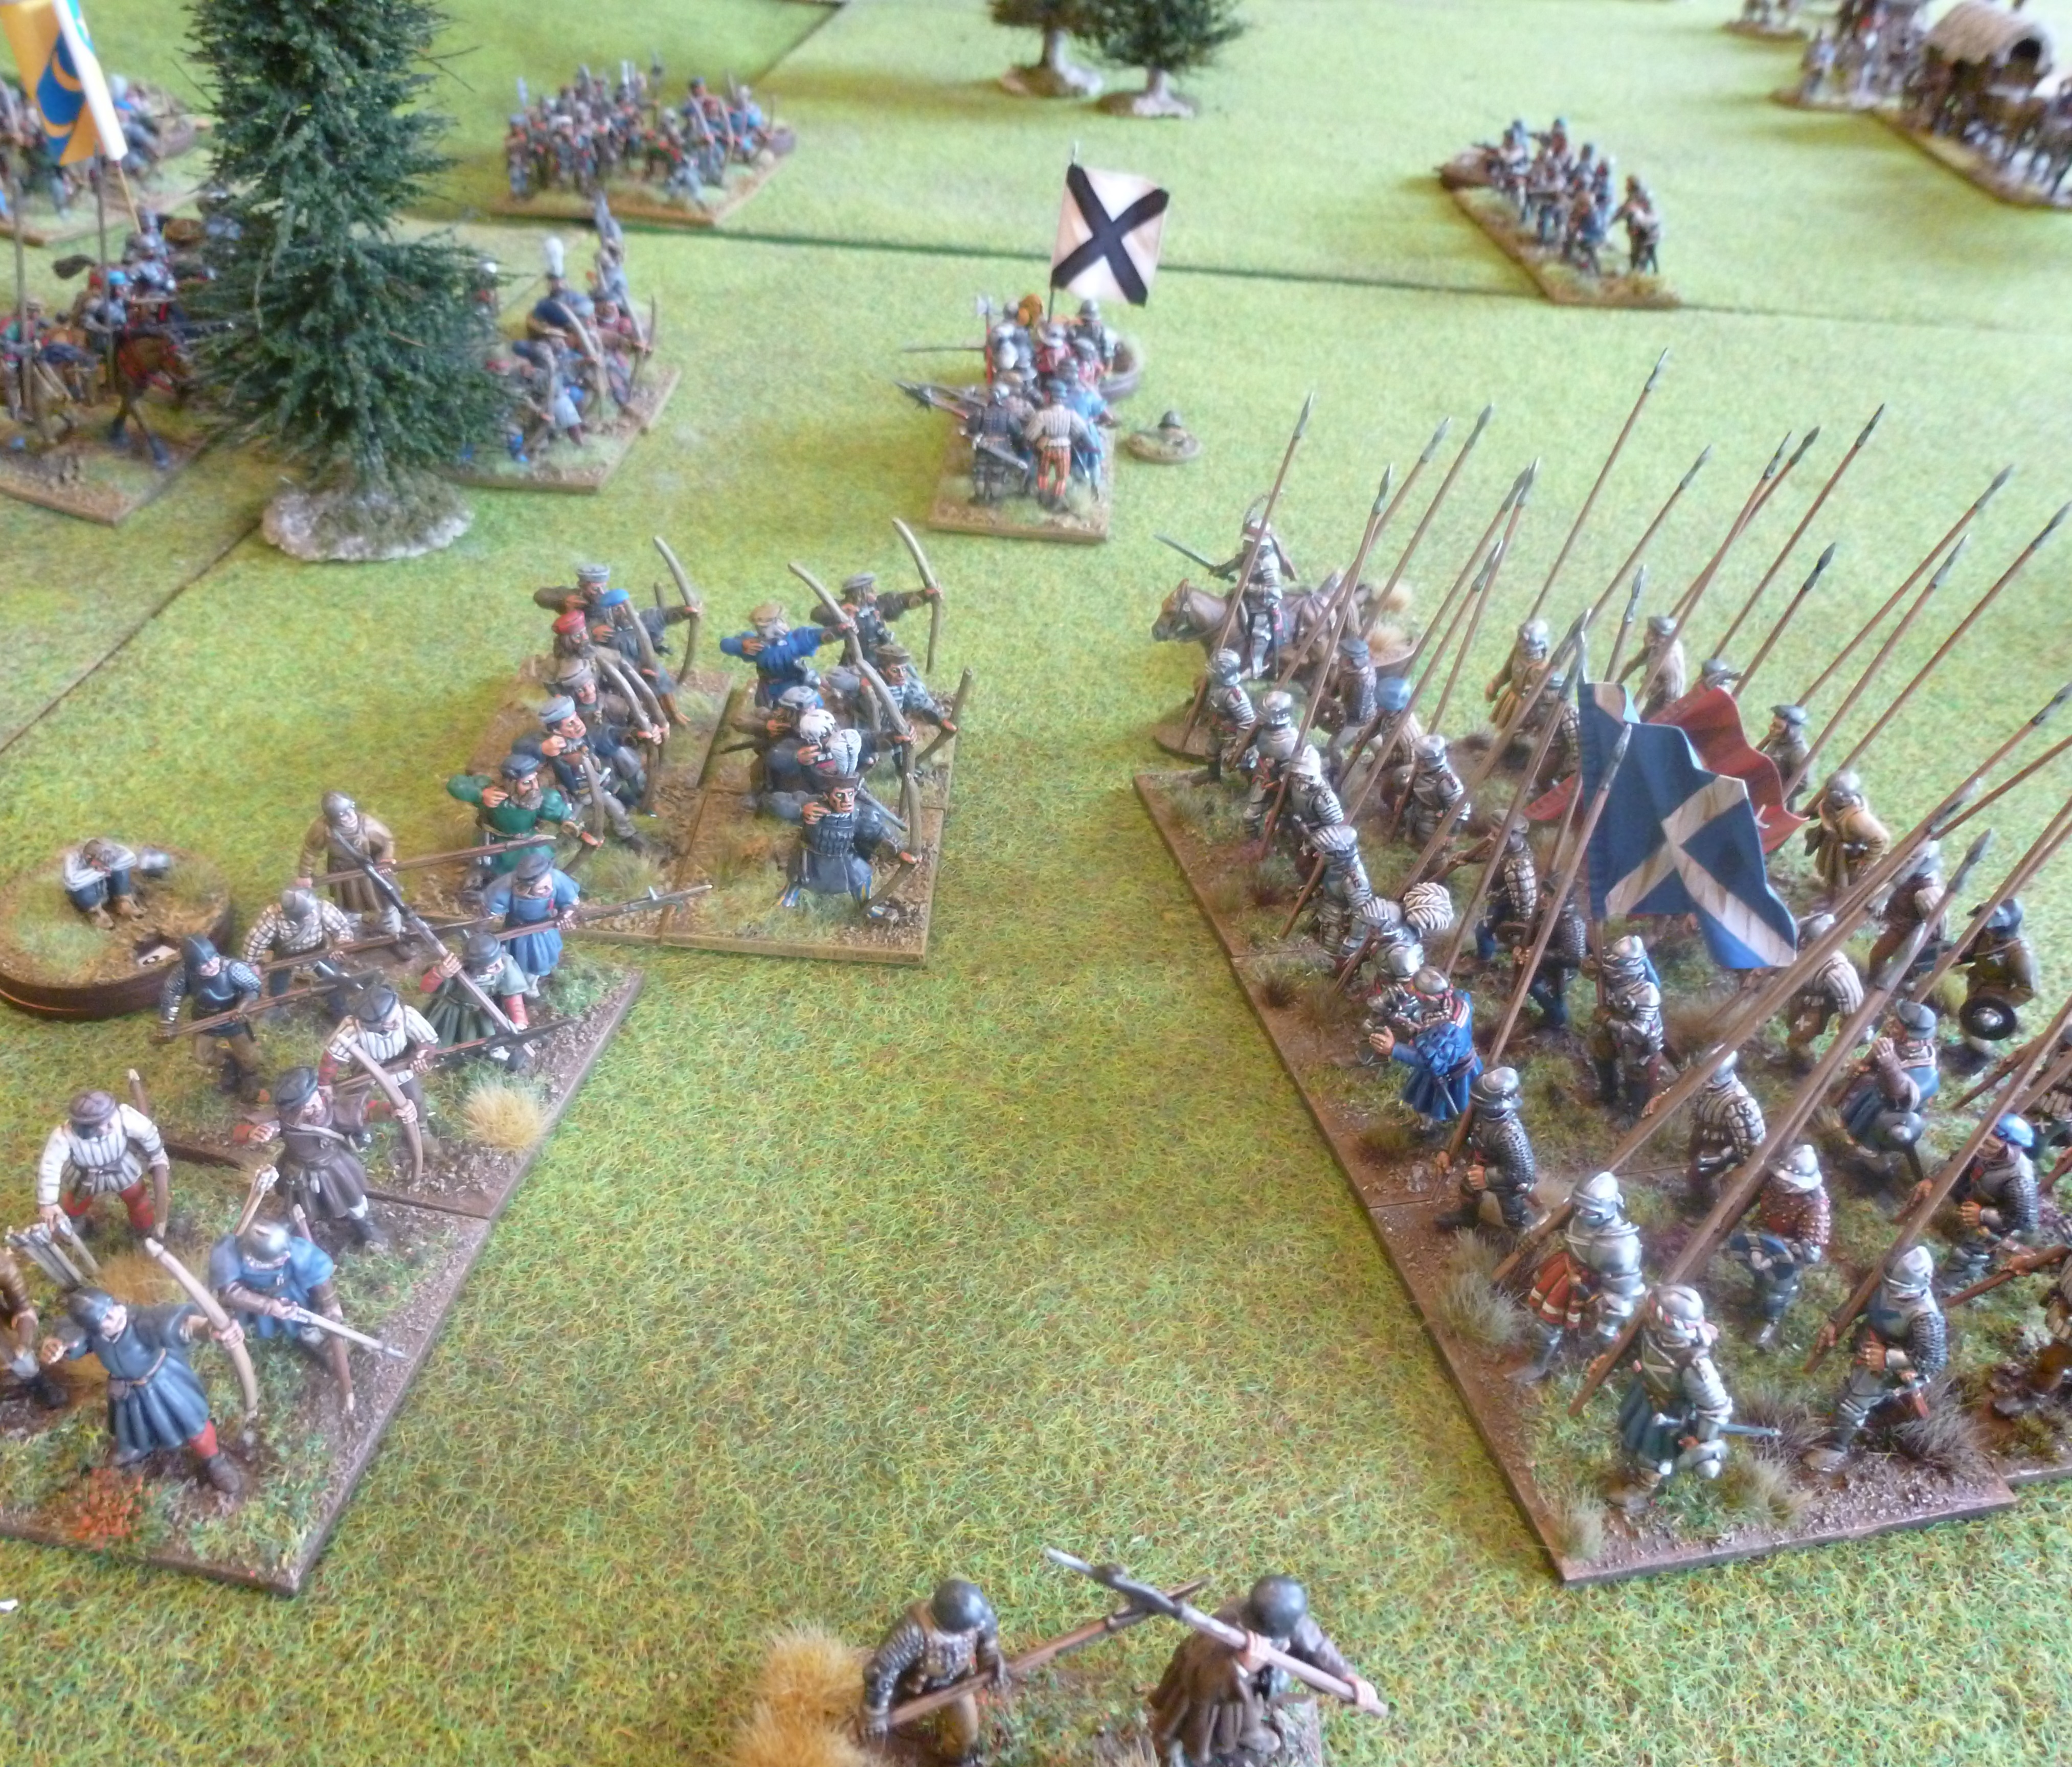
| Things are looking bleak for the Royal party as the Scotts and Elliotts swoop in. On his right flank Sir Walter Scott has kept his borderers mounted and they begin to launch skirmish attacks on the King's Edinburgh troops. |
 |
| Sir Walter Scott himself has remained on horseback with his armoured bodyguards, in case the ambush goes wrong and he has to make a quick escape. |
 |
| Lord Maxwell and his men attempt to drive the borderers back. |
 |
| Whilst Maxwell leads the Royal troops in the centre, the King's right flank has fallen back after repeated attacks by the border horsemen. |
 |
| The Scott and Elliott borderers outnumber the Royal bodyguard. |
The Earl of Angus was not intimidated as he and his men dismounted and prepared to face the thousand or so Scott and Elliott borderers who lined the hill. How had they known when and where to strike in such numbers, he wondered? Something was definitely amiss. Such thoughts would have to wait as within moments the Scotts charged down the hill towards the small Royal bodyguard. Lord Maxwell attempted to delay them, charging forward with his retainers and a force of arquebusiers.
Whilst Maxwell and his men caused casualties amongst the borderers and protected the Royal left flank the Royal forces could do little to prevent their right being overwhelmed. Scott had kept his right wing mounted and these horsemen rode around the Royal lines forcing a block of Edinburgh pikemen to break and flee as they came under constant skirmish attacks from the border horse. They attempted to cross the Tweed in their panic some being drowned as they fled.
 |
| A view of the fighting from above. Some of the Edinburgh troops have fled across the Tweed. |
 |
| Uneasy allies John Stewart, Earl of Lennox and Archibald Douglas, Earl of Angus attempt to defend the King. Angus has suspicions over the loyalty of Lennox. |
 |
| A fierce fight is taking place in the centre of the field as the King's troops attempt to hold back Scott's forces. |
 |
| Scott's border horse ride into the Royal lines causing chaos. |
 |
| Reinforcements have arrived for Angus and the King in the form of Lord Home and Andrew Kerr of Cessford. |
 |
| The Kerr and Home border horse chase off the mounted Scott horse... |
 |
| ...but it looks as if they may be too late. The battlefield is a scene of chaos. |
Before long Angus and the Royal bodyguard were under attack from all sides. Maxwell was slain in the fight whilst Scott's mounted men got behind the Royal lines causing panic amongst the beleaguered Royal troops. Angus was relieved to hear the sound of a trumpet call heralding the arrival of Lord Home and Andrew Kerr. As Home dismounted to join the fray Kerr and his borderers rode headlong into the confused melee. His borderers had success in chasing off most of the mounted Scotts and Elliotts but Andrew Kerr himself was unhorsed and slain as he charged into the mass of dismounted borderers.
Home had arrived too late to save the disintegrating Royal force. He remounted and rode off deciding not to throw in his lot with Angus and the Douglas. Lennox, only too happy to let the King be "captured" by the Scotts decided now was the time to flee, his plan having worked perfectly. The young James V was left on the field to be escorted away by Sir Walter Scott whilst Angus was captured as he yelled "Treachery" and vowed to take revenge!
 |
| Andrew Kerr of Cessford is slain as he charges some of Scott's dismounted borderers. |
 |
| The late arrival of the reinforcements has meant the Royal bodyguard has already disintegrated. |
 |
| Confirming Angus's suspicions Lennox "abandons" the young James V to the Sir Walter Scott and his borderers and flees, leaving the furious Archibald Douglas on the field to meet his fate! |
These were such evocative games that really captured the plotting and feuding of this period well. Both the events we covered were great for wargames scenarios. It was fun to see our figures representing the bands of armed retainers, fighting it out in the streets of Edinburgh, and then using them to represent a small Royal bodyguard and a motely crew of rugged borderers. These games have also set the scene perfectly for when we game Linlithgow Bridge. Of course a trip to a couple local pubs accompanied the games. Luckily Stuart and myself did not have to pile into the streets to fight out any local feuds ourselves, that was saved for the tabletop!

Fantastic to see the history of Scotland being wargamed. It's such a fascinating period and all the major players appear to be absolute pricks! Great stuff! Can't wait for the next instalment!
ReplyDeleteCheers Whiskey Priest, it really is a fascinating era of Scotland's history - the lead characters certainly liked to swap sides and play to their own interests! We hope to do some Isles and Highland clashes in the future.
DeleteGreat looking and evocative games, Ollie!
ReplyDeleteThe amount of political manicuring, murder and mayhem involved in medieval power struggles makes even todays politics seem almost tame!
I am glad you enjoyed them Peter - they were indeed brutal times, you can see where Game of Thrones got a lot of inspiration from!
DeleteSplendid stuff! I really enjoyed reading not just about the games but also the background and the scenario design.
ReplyDeleteThank you Codsticker - I enjoyed looking into the background of these games, it really helped to make thm more fun to refights a lot of fun.
DeleteMust agree, you guys always put on such fantastic looking and reading games, and it reminds me of all the Nigel Tranter books I read about twenty years ago! I have to agree with Whiskey Priest - a lot of the people involved were total bastards - I came out of watching Saoirse Ronan in Mary Queen of Scots feeling quite sad and sorry for how badly the poor girl had been let down by all the men in her life!
ReplyDeleteThank you rross, it was great to be able to recreate these two clashes on the tabletop, hopefully more Scots battles to come in the future
DeleteAnother excellent post chaps - and nice to see a streetfight as a game
ReplyDeleteCheers Stuart - we do love setting up all our buildings and attempting to recreate various towns and cities for some street clashes
DeleteHey man. Fantastic stuff! Have you been to Edinburgh before? I kept looking up some of the spaces you mentioned (Blackfriars wynd/ the High Street which is now the Royal Mile) and it's nice to be able to visualise where it all took place. Was wondering how accurate the architecture is as well? From the pics some of the buildings look classic early Tudor but I wasn't sure if that was the case in Scotland as well (maybe it was!) Anyway, excellent stuff and do send through the next engagement
ReplyDeleteCheers Scott, yes I went to the Festival with Jeremy once. I did exactly the same thing as you when preparing for this game and had a look a what it is like now. The Netherbow Port is now the name of a cafe where the gate must once have been.
DeleteWith regards the Tudor buildings have a look at this University of St Andrews project on recreating a virtual Endinburgh c.1544. It does all seem to have been made of either stone or timber framed style buildings: https://news.st-andrews.ac.uk/archive/new-technology-reveals-old-edinburgh/
I am beginning to think that you could compile your posts, chronologically and publish them in a book- A 'Wargamers Guide to.." ...I would buy a copy! As always your posts set a standard in detail ( historical and game-wise) that set the standard!
ReplyDeleteThank you John, I'm really glad you enjoy the background and the posts. Stuart and I have talked about the possibility of doing a Tudor or British Isles 16th century wargaming book, I just wonder if it would be a rehash of the blog though.
DeleteA rehash of the blog? I don't see that as a downside! If it was organised with the historical chronology, then the game replays, painting tips etc etc..it would be worth buying!
DeleteIt would be good to have all the events in a chronological order I agree - definitely something worth thinking about.
DeleteYes that last comment about a campaign book would be an excellent idea. Again as the 500th approaches of Lin Brig this would be good opportunity to link any publication with the festivities in town. Love the images of Edinburgh.
ReplyDeleteCheers Jon, these games were lots of fun to do. It's always great to try and represent a 16th century city on the tabletop.
Delete