

I recently visited Stuart to continue our series of wargames covering Tudor warfare in the early 16th century. Stuart had new terrain he was keen to use along with a superb and unique new unit of mounted archers whilst I was keen to get my new unit of borderers, made up of figures from Pete's Flags, on the table. A couple of games set on the Anglo-Scots border perfectly accommodated all of this and the scene was set, we decided to refight the "Ill Raid", the border clash that took place a month before Flodden, and the death of the Bastard Heron, another border clash that happened 11 years later in the summer of 1524.
The "Ill Raid", August 1513
Storm clouds gathered over the Anglo-Scots border in the summer of 1513. With the English King, Henry VIII, in France at the head of his "Army Royal", his brother-in-law James IV of Scotland was preparing for an attack on northern England to honour the "Auld Alliance" with the French. As a precursor to James invasion, the border magnate Lord Home led a force of around 7,000 borderers into Northumberland on 5 August 1513 , raiding local farmsteads and seizing goods and livestock.
In response Sir William Bulmer, sheriff of the Bishopric of Durham, raised around 1,000 cavalry, comprised of 200 mounted archers with the rest predominantly locally levied border horse. This mounted force overtook the returning Scots raiders who were laden with loot and driving livestock back across the border. At Millfield Bulmer set an ambush with his archers dismounting and using the thicket to conceal themselves. As the Scots passed through they were enfiladed at close range, around 500 being killed in the arrow storm. This precipitated a rout as the ambushed raiders desperately attempted to flee. Home's standard was captured in the flight along with a further 300 Scots including Lord Johnstone and Lord Home's brother, George Home.
This disastrous raid soon came to be known as the "Ill Raid" as Hall describes below:
"After that syr William bulmer was come to the borders, one daye in August, the lorde Chamberlayne and warden of Scotland with. vii. or viii. M. men with banner displayed entered into England, and brent & haryed a great praye in Northumberland : that hering syr William bulmer, called to hym the gentelmen of the borders with his archers, and all they were not a thousand men. And when they were nere assembled, they brought them selfes in to a brome felde, called Mylfeld, where the Scottes should passe. And as the Scottes proudely returned with their pray, the Englishmen brake oute, and the Scottes on fote like men them defended, but the archers shotte so holy together, that they made the Scottes geue place, and. v. or. vi. hundred of them were slayne, and. iiii. hundred and more taken prisoners, and the pray reskued beside a great nuber of geldinges that were taken in the countrey, and the lord Hume, lord Chamberlayne fled & his banner taken. This was the fyrst open token of warre, shewed by the Scottes, whiche call this journey the yll Roade."
 |
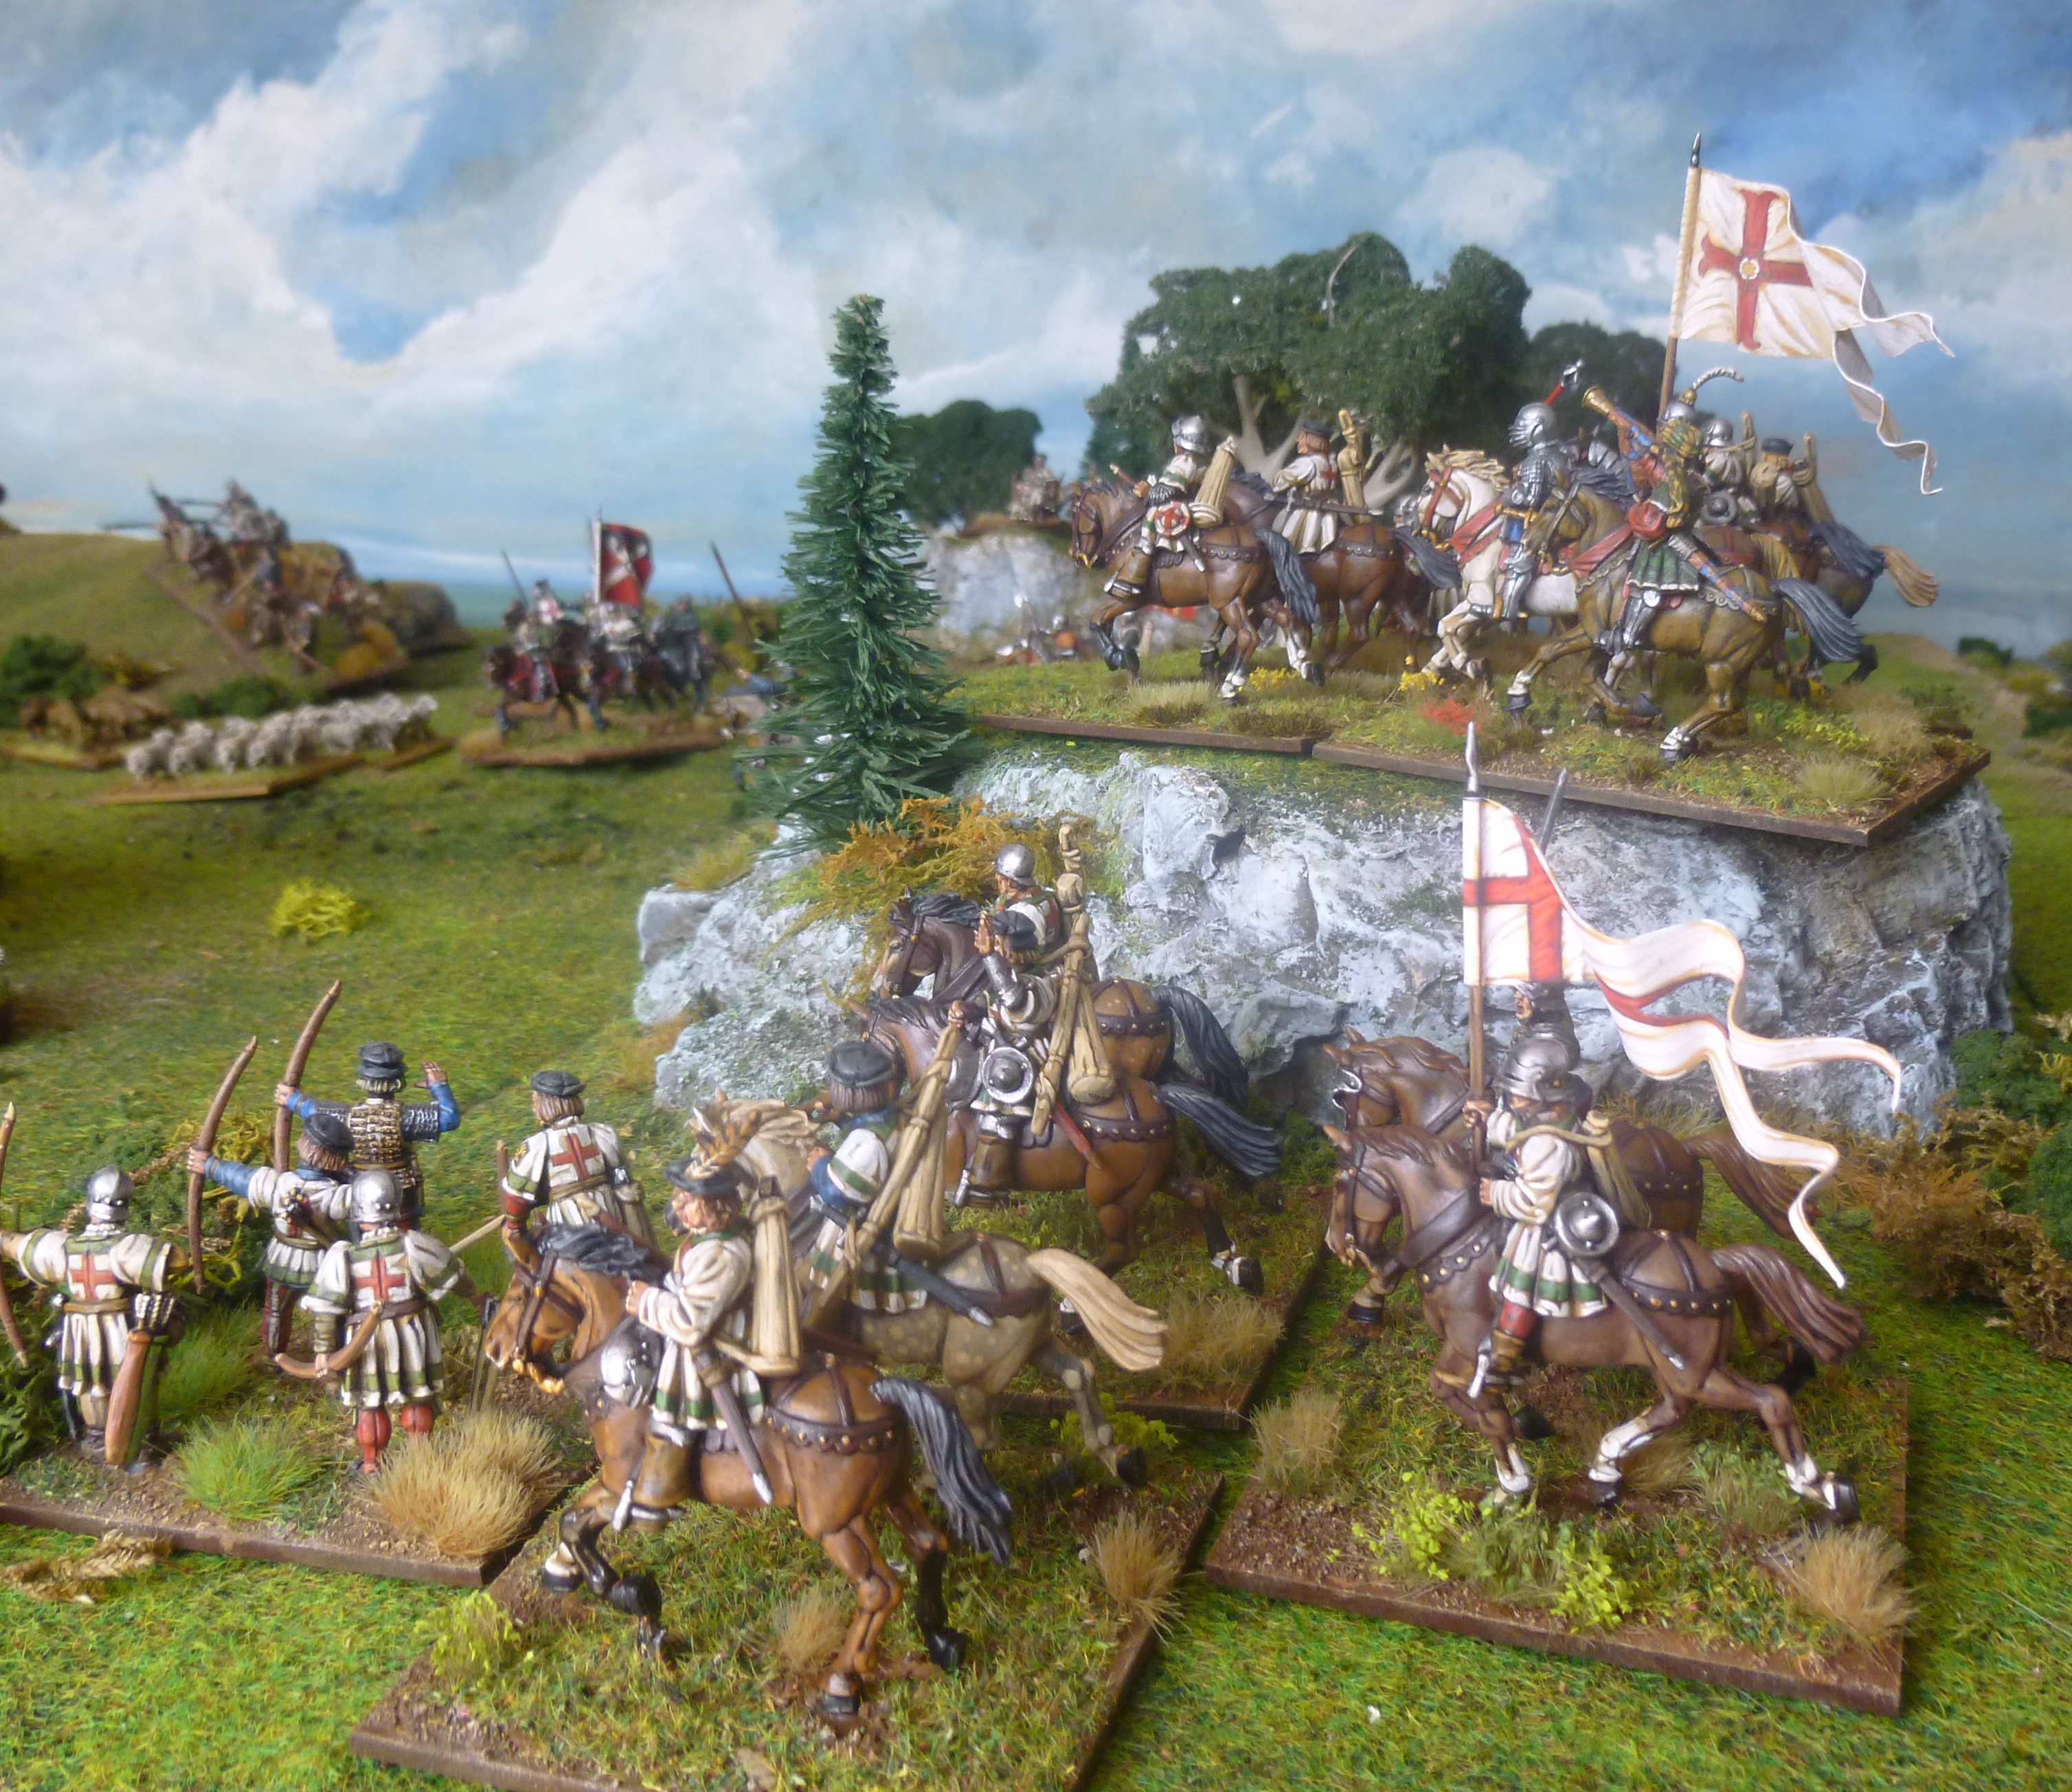
| Sir William Bulmer, sheriff of the Bishopric of Durham, leads his 200 mounted archers into Millfield to set his ambush for the returning Scots raiders. |
 |
| Lord Home and his 7,000 borderers return from the raid into Northumberland driving the livestock they have taken and laden with booty. |
 |
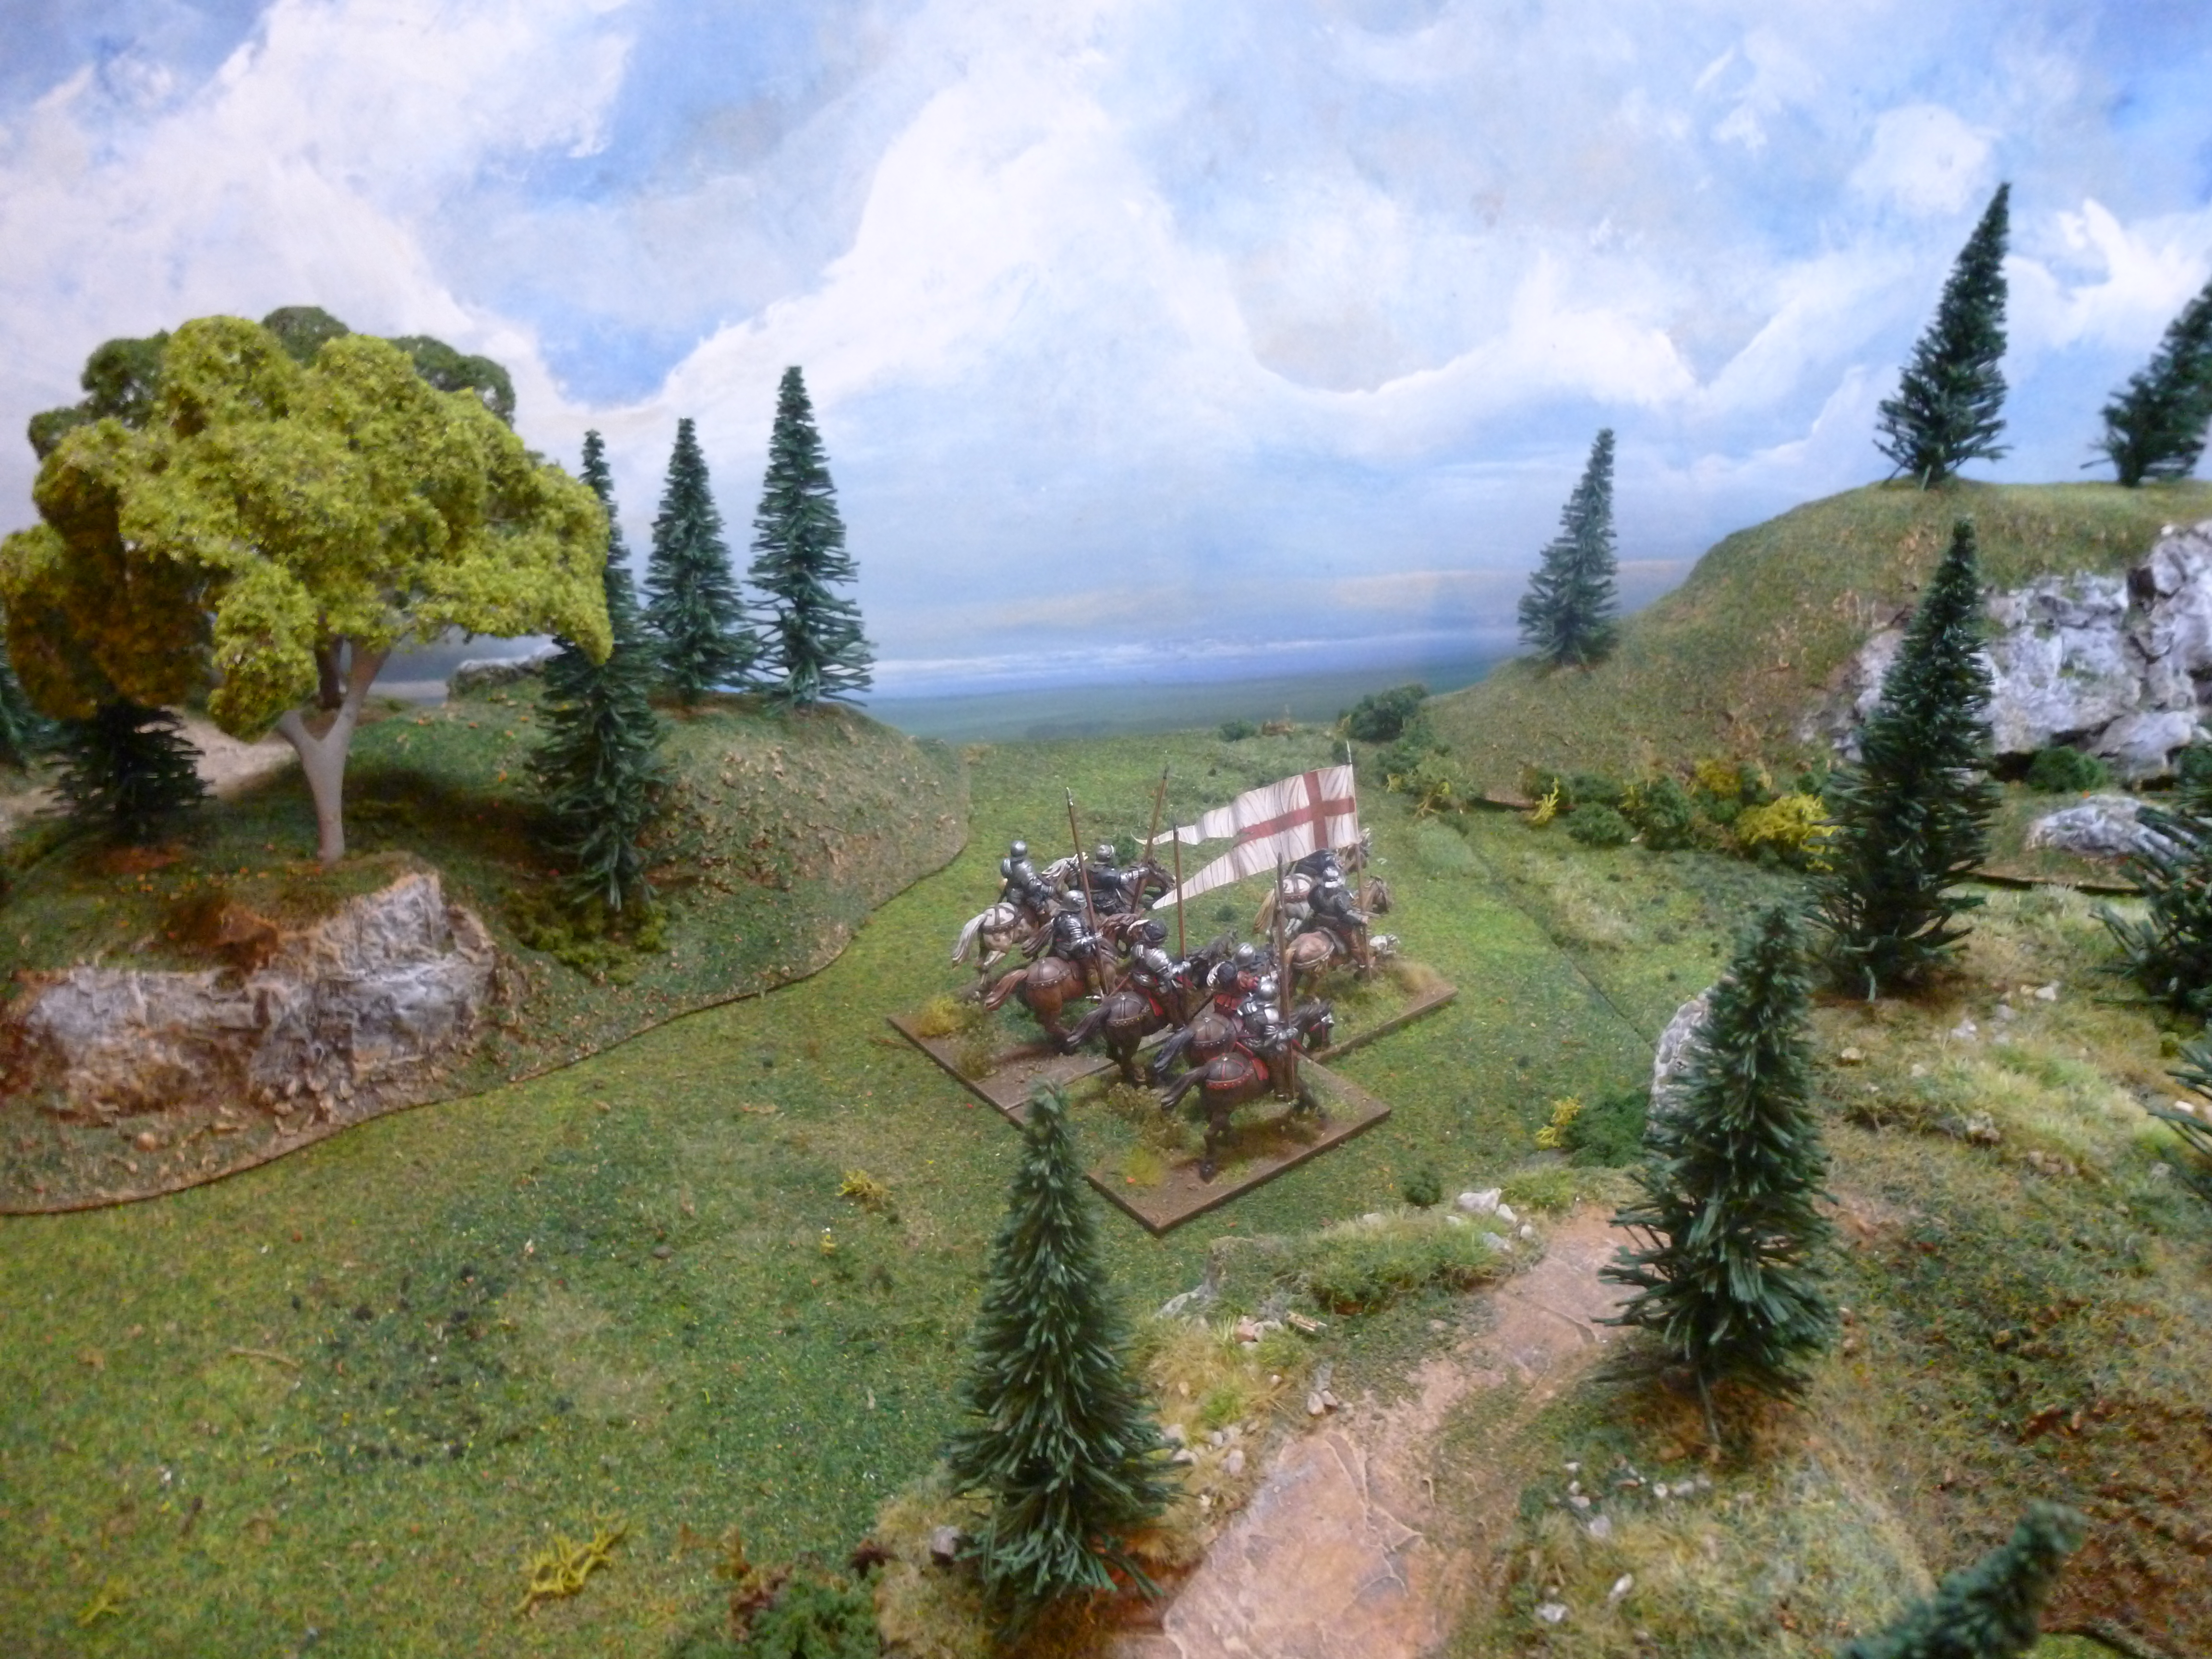
| Unaware of the English ambush, the Scots enter Millfield. |
 |
| Dismounted archers lay in wait of the unsuspecting Scots. |
 |
| Lord Home and his borderers, many of whom have dismounted to drive the livestock and carry their spoils of war. |
The Scenario
The scenario centered around the English ambush of Home's force as it returned from the raid into Northumberland.
The Scots had to travel from one end of the table to the other, past the village of Millfield, and attempt to get as many units and livestock off the other side. The English aim was to disrupt this as much as possible.
Victory was based on whoever achieved the most victory points in the game.
The game was played using our heavily modified Renaissance Rampant rules. Stuart took command of the English whilst I took command of the Scots.
The game was played using our heavily modified Renaissance Rampant rules. Stuart took command of the English whilst I took command of the Scots.
Ambush
To represent the English laying in wait “battered” markers were used to represent each English unit, with Stuart writing down in secret which unit each marker was for. 3 "Dummy" counters were also allowed that didn't represent any units. A unit was revealed either by a Scots unit attacking or shooting it once it was within 8” of the marker or by a Scots unit simply moving within 3” of it. The English Retinue leader, Bulmer, could not apply his morale bonus until he had been revealed and all the markers could "move" activate on a 6+ and move 6” until they were revealed. If English units wanted to “reveal” themselves earlier, for example if Bulmer wanted to give his leadership benefit, they could do so by declaring this when they activated. Once “revealed” units would remain revealed for the rest of the game.
No Scots started on the table but they could enter from their table end via a move activation.
The Livestock
The Scots started the game with 4 Livestock counters allotted to 4 units (mounted or on foot). These units could move a maximum of 6" per turn and would loose the "livestock counter" if they were defeated in combat or battered. They could not attack whilst still holding the counter but could shoot whilst they had control of the livestock. English or Scots units could pick up "lost" livestock by moving into base to base contact with the counter. They were then considered to have picked it up and could move with it.
Lord Home's standard
If Lord Home's unit was attacked in hand to hand combat (not a challenge involving Lord Home) the English player had to role a D6, regardless of casualties taken. On a 5+ Home's standard was captured in the melee and would then belong to the unit it was in combat with.
If the capturing unit was then attacked the standard could be recaptured by any Scots unit on a roll of 4+ on a D6. If the unit was destroyed in combat or routed the standard could be reclaimed either by the unit destroying them or by a unit that moved to the location where they were routed.
The standard could only initially be captured in combat. If Lord Home's unit was defeated in combat and a 5+ was not rolled or routed the standard was simply considered to be lost in the chaos.
Victory Points
As stated above, victory in this game was based on victory points. These were awarded as follows:
The Scots
The Scots
3 Points if Lord Home escaped.
3 Points if William Bulmer was killed.
2 Points if Lord Johnstone escaped.
2 Points if George Home escaped.
1 Point for every Scots unit that escaped (that wasn't a character unit as those above).
3 Points for every livestock counter the Scots escaped with.
The English
3 points if Lord Home was killed
3 Points if Lord Home's banner was captured
2 Points if Lord Johnstone was killed
2 Points if George Home was killed
1 point for every Scots unit that was prevented from escaping
The Armies
Alexander Home, 3rd Lord Home and his raiders
1 Unit of Foot Knights (Alexander Home, 3rd Lord Home retinue leader. This unit included his standard, see the scenario above)
1 Unit of Border Horse (Lord Johnstone)
1 Unit of Border Horse (George Home)
1 Unit of Border Horse
2 Units of Borderers
1 Unit of Scots Pike
2 Units of Retinue Foot
and 4 Livestock Counters.
1 Unit of Border Horse (Lord Johnstone)
1 Unit of Border Horse (George Home)
1 Unit of Border Horse
2 Units of Borderers
1 Unit of Scots Pike
2 Units of Retinue Foot
and 4 Livestock Counters.
Sir William Bulmer and his ambush party
1 Unit of Demilancers (Sir William Bulmer retinue leader)
2 Units of Mounted Archers
3 Units of Border Horse
1 Unit of Garrison archers
1 Unit of Shire archers
2 Units of Borderers
A brief write up of the game follows, as always the photos and captions are the best way to follow the action.
 |
| English border horse spring the ambush. |
 |
| Lord Johnstone makes a rush for safety across the border. |
 |
| The Scots raiders realise that a trap has been sprung! |
This game started with the Scots all arriving together, passing through the village of Millfield. The Scots borderers who had remained mounted rode on ahead, being veterans of many raids they were wary of an ambush or pursuit. As the mounted borderers rode forward the English sprung the trap with their own border horse emerging from hiding and chasing down Lord Johnstone and George Home. Johnstone rushed for safety, and nearly made it, but was brought down by the English border horse as he attempted to cross a shallow brook. George Home also attempted to out ride the surrounding English but seeing the ambush closing in on all sides he rode back to aid his brother, Lord Home, and the main body of raiders.
Bulmer had timed the ambush perfectly and, as the mounted element of the Scots party was blocked off by Bulmer's border horse, his dismounted archers and borderers sprung from the rocks and thicket to enfilade the advancing Scots. As panic spread amongst Home's men Sir William Bulmer led his mounted bodyguards in a charge into the Scottish ranks. He rode into a body of Scots pike and, having already been weakened by the volleys of English arrows, they fled in his wake. Home then entered the fray clashing briefly in an inconclusive duel with Bulmer. Bulmer's men struggled to rip Home's standard from his retainers but were driven off by the skirmishing attacks of Home's brother, George. Moments later George was slain by a counter attack from Bulmer's border horse.
 |
| Lord Johnstone is stopped as he tries to escape over the brook with his men. |
 |
| Hoping to avoid being captured and ransomed, or worse killed, Lord Home's brother George Home attempts to ride through the ambush as more of the dismounted archers emerge from hiding. |
 |
| Dismounted English borderers send volleys of arrows into the Scots. |
 |
| The returning raiders are now being assailed from all sides. |
 |
| Sir William Bulmer leads his personal retainers into the Scottish ranks and panic spreads. |
 |
| English borderers and dismounted archers launch volleys from the rough terrain as Bulmer charges into the fray. |
 |
| Bulmer and his men attempt to snatch Lord Home's banner. A brief personal combat between Bulmer and Home follows. Bulmer is then chased off when George Home, having been unable to escape, rides back to his brothers aid. Moments later George Home is unhorsed and slain. |
 |
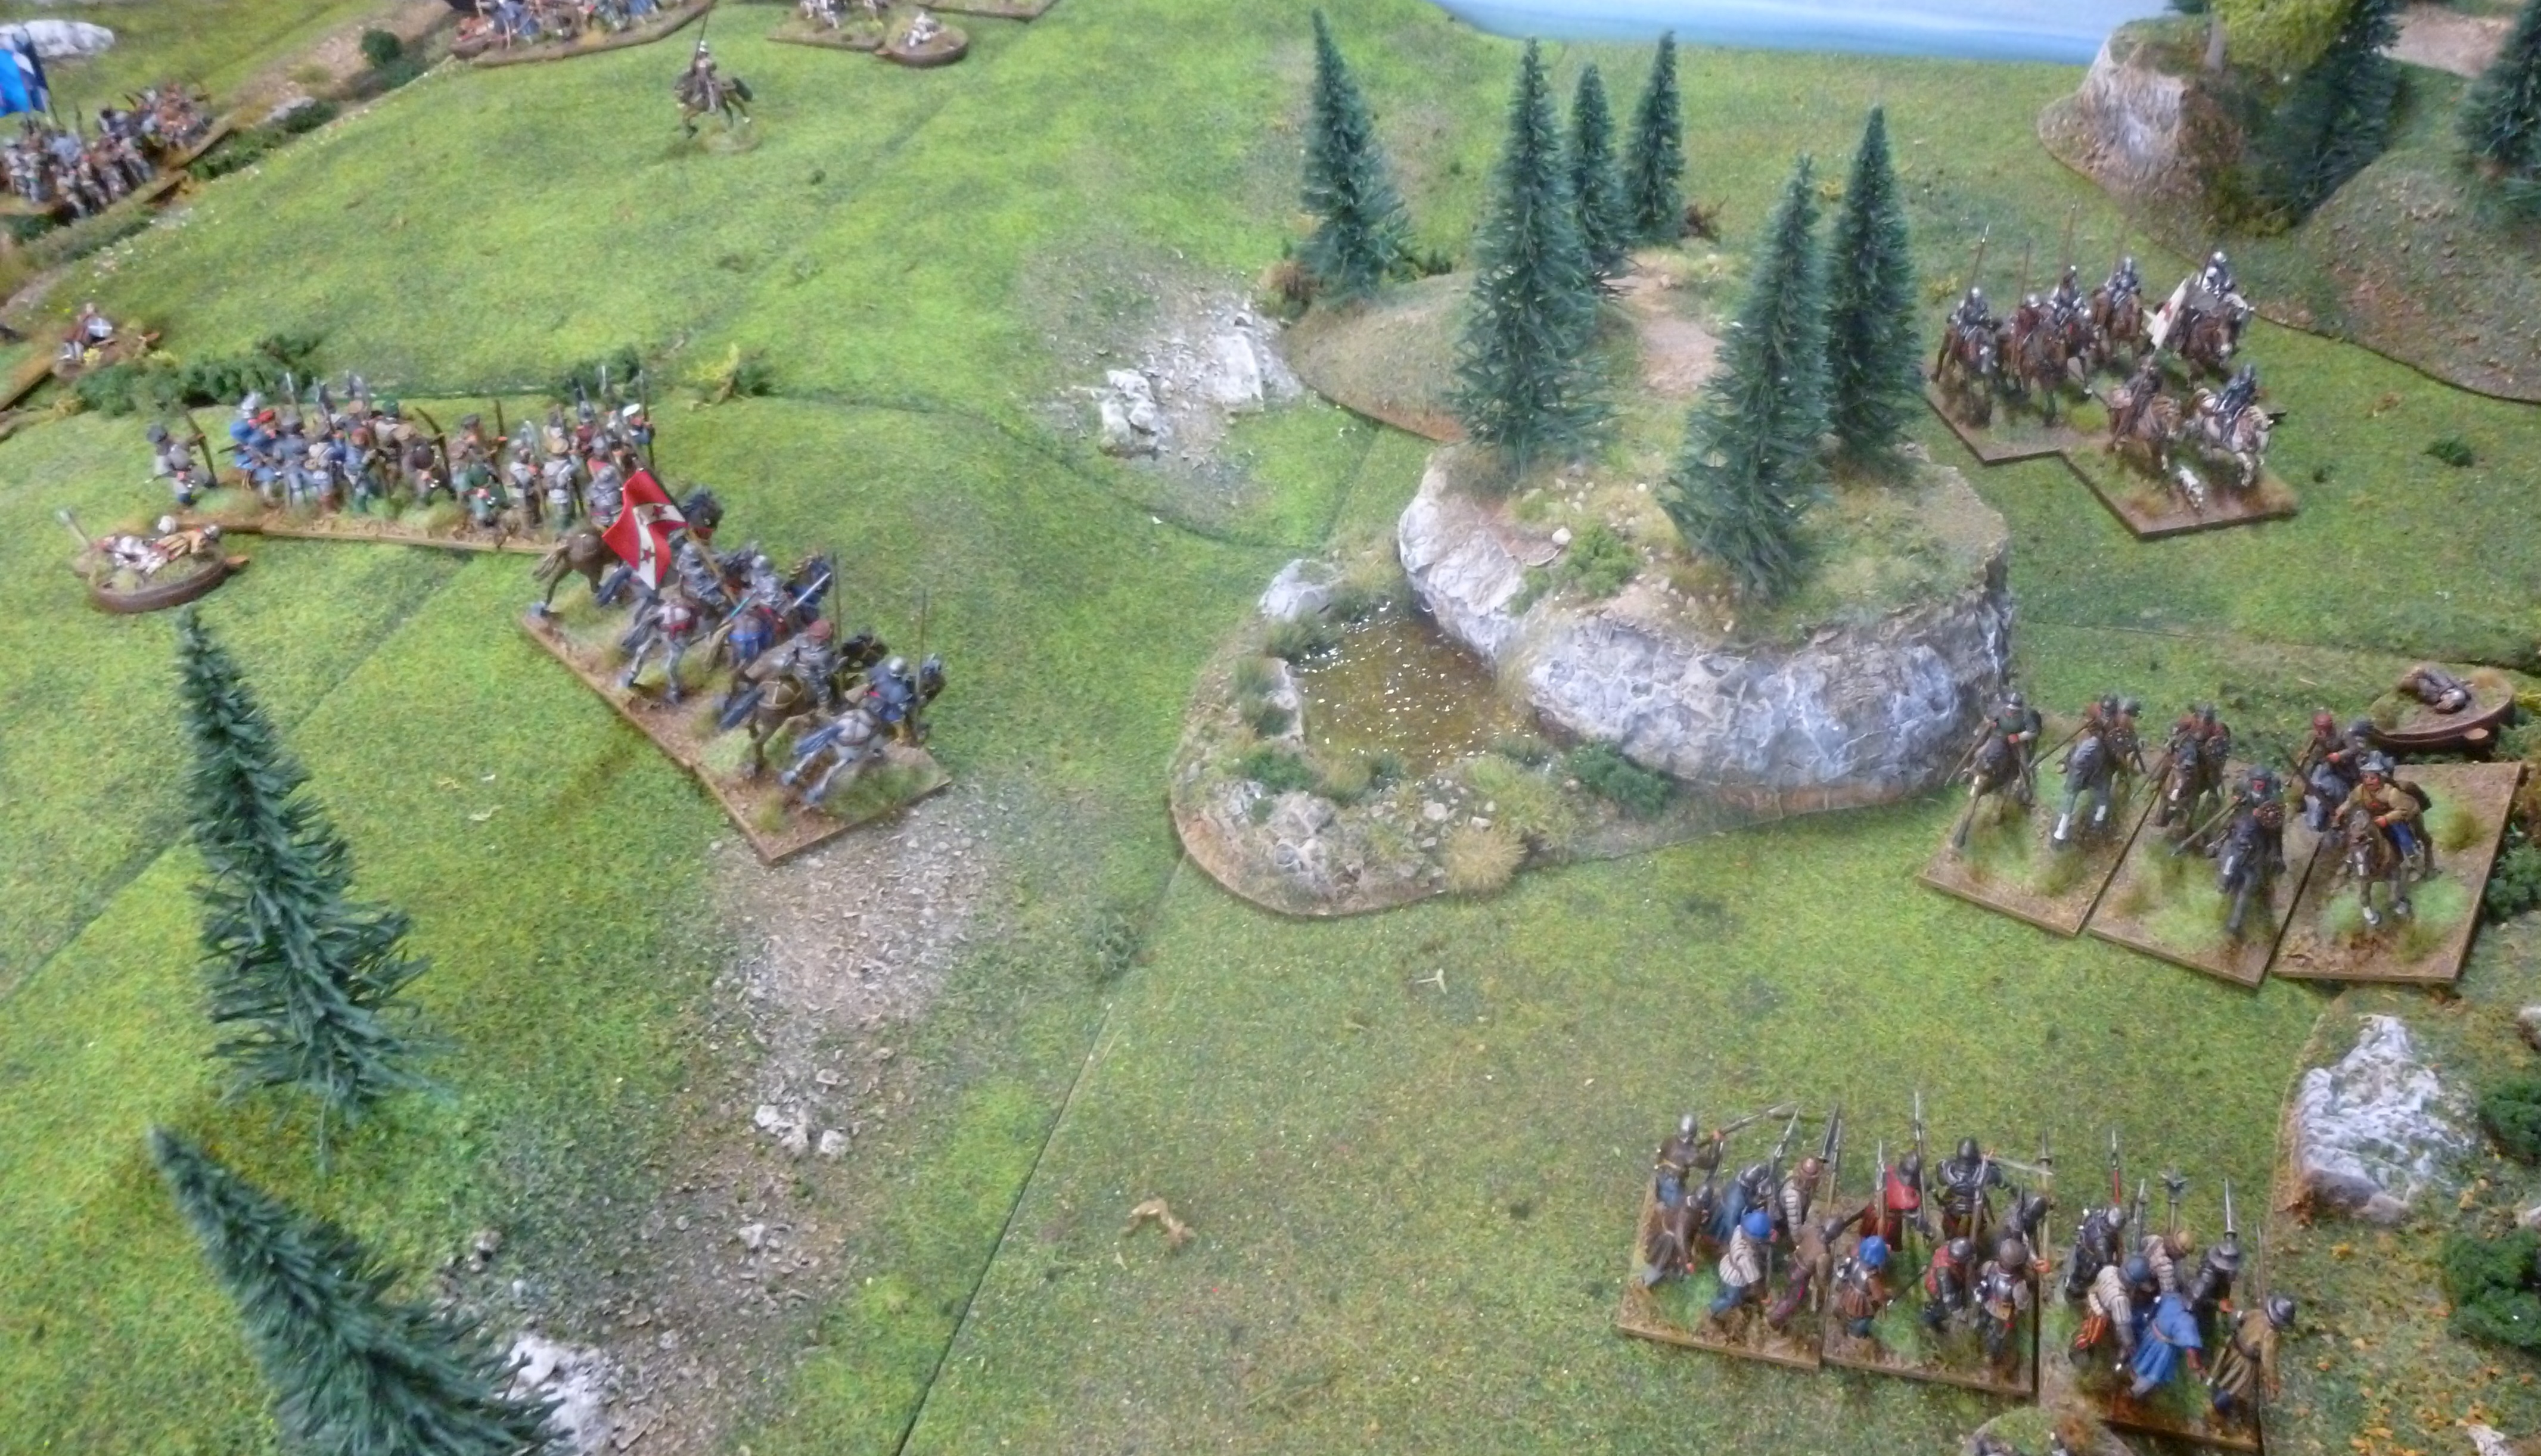
| A view of the field. As the Scots attempt to press forward they are blocked by the English. |
 |
| Sir William Bulmer supported by English border horse continues to press his attack. |
 |
| Bulmer has been fought off but the constant rain of arrows from the English is slowing Lord Home's troops. |
 |
| Bulmer's two hundred archers keep up the pressure on the Scots. |
 |
| Having fought off some of the dismounted archers Home's men attempt to take shelter from the rest of the English. |
 |
| Casualties are mounting amongst Home's borderers as they attempt to drive the livestock through the ambush. |
 |
| A group of veteran Scots borderers charge the dismounted archers... |
 |
| ...and send them back in brief but fierce clash. |
Home may have seen off Bulmer's charge but things were not looking good for his men. Arrows continued to pour into their ranks with more units of English archers dismounting and joining the battle. Whilst those in Home's ranks who had bows sent their own volleys back the English had the advantage of surprise and cover. The Scots borderers, many of them still keen to hold onto the livestock they had rustled, tried to get into the cover of the rocks and thicket themselves.
The fighting became desperate with groups of Scots attempting to push through the ambush and send back the English ambushers. Some of the English were slain in these savage clashes in the wild terrain but the initial volleys from Bulmer's men combined with the element of surprise had disorganised Home's force. His raiding party fell apart as the fighting continued with Alexander Home himself finally being brought down in a clash with members of a rival border clan. They seized his banner and held it aloft in victory. It had indeed been and "Ill Raid" for the Scots!
 |
| Despite the arrows the Scots are still attempting to drive the cattle across the border. |
 |
| Still attempting to escape Lord Home is brought down in a clash with some of the rival English borderers. His banner is captured and Bulmer's small ambush party is victorious. |
The death of the Bastard Heron, July 1524
Following the English campaigns into Scotland in 1523 (see http://camisado1500s.blogspot.com/2021/05/the-english-attack-on-jedburgh.html and http://camisado1500s.blogspot.com/2020/04/dacres-attack-on-ferniehurst-1523.html) and the subsequent French attack on Wark in the autumn of that year (see http://camisado1500s.blogspot.com/2020/08/the-siege-of-wark-1523.html) the disruption on the border continued into 1524. In a letter to Cardinal Wolsey, dated 8 July 1524, Lord Dacre explained how on Tuesday 5 July he sent his brother Sir Philip into Scotland, with Sir Rauf Fenwick, Leonard Musgrave, Edward Aglyonby, John Tempest and John Heron the Bastard. The force totaled around 1,000 men. They burnt the town of Smailholm which had not been burnt for many years. On their way home, with much cattle and plunder they, by chance, crossed paths with a 2,000 strong party of Scots raiders, "men of Tevidale and the Marshmen", who intended to make a raid into England.
Seeing the returning English party the Scots dismounted and prepared to fight. The English also dismounted and put the Scots to flight, chasing them and killing about 30 whilst taking 300 prisoners and three standards. In the confusion of the fight and subsequent Scots flight part of the Scots force, set upon the English rear while they were scattered, killing John Heron the Bastard, and six others, and taking Sir Rauf (Ralph) Fenwick, Leonard Musgrave, and about 20 other prisoners, besides rescuing some of the Scots prisoners. When the remainder of the English heard this, they returned, and chased the Scots off the field. They brought 200 prisoners home with them, but the Scots carried away Sir Rauf Fenwick and Leonard Musgrave. Of the Scots captains Andrew Kerr, warden of the Middle Marches of Scotland (also known as "Dand" Kerr), and Mark Kerr, his uncle, were so hurt so that it was thought they would not live long.
Hall, in his chronicles also describes this encounter which, whilst differing in some details, matches well with Dacre's description of the clash:
"After this the. v. daie of luly, sir Jhon a Fenwicke, Leonard Musgraue, and bastard Heron, and diuerse other, gathered together, ix. C. men and entred into Scotland, in the countrey called the Marche, & robbed and spoyled all the countrey, and by chaunce the same season the Scottes had assembled two thousande men, to inuade England, and none of these knew of other, till they by auenture met together. Then began a strong medley, for the Scottes fought valiauntly a great while, and the Englishemen them hardeli assailed, and at the last by fine force, caused theim to leaue the grounde and flie, and in the flight wer taken. CC. Scottes, and many slain of the which prisoners diuerse wer gentleme sir Raufe of Fanwicke, Leonard Musgraue, and bastarde Heron with. xxx. other Englishemen wel horssed, folowed so farre the chace, that they were paste rescues of their compaignie, which perceiuyng the Scottes sodainly returned, and set on the Englishemen, whiche oppressed with multitude, weresone ouercome, and there was taken sir Raufe a Fanwicke, Leonard Musgraue, and sixe other, and bastarde Heron, and seven other slain, the remnant by chaunce escaped : the other Englishmen with their two hundred prisoners, returned safely into Englande: the slaying of the Bastard Heron, was more pleasure to the Scottes, then the takyng of the two hundred was displeasure, thei hated hym so."
The death of the John Heron the Bastard was a source of particular joy to the Scots, especially the Kerr border family. He was the half brother of William Heron, Lord of Ford Castle. John Heron, along with two other men murdered Sir Robert Kerr, Warden of the Scottish Middle March, in 1508. John Heron had then disappeared and keen to maintain the peace Henry VII gave John's brother William over to the Scots. The unfortunate William was imprisoned until his wife negotiated his release. Rumours spread that John had died of plague but James IV was unconvinced. His scepticism was well founded. When war broke out in 1513 the Bastard of Heron emerged from hiding and was to be found amongst Dacres border horse. He had been the man who had saved Lord Edmund Howard in command of the vanguard at Flodden. As Howard was about to be overwhelmed Lord Dacre's border horse made a timely intervention and Heron fought his way to Howard and prevented his death or capture. Although the Scots were beaten in this clash, just over a decade later, it seems the death of Heron made the defeat much easier to swallow.
 |
| Having pursued some of the fleeing Scots too far in the clash near Smailholm, Sir Rauf Fenwick, John Heron the Bastard and Leonard Musgrave find themselves outnumbered and vulnerable. |
 |
| Sensing a chance to avenge the death of his kinsmen, Sir Robert Kerr, Sir Andrew or "Dand" Kerr, prepares to attack the outnumbered English borderers. |
 |
| Sir Andrew Kerr, Scots Warden of the Middle Marches, and his troops. |
The Scenario
This game represented the moment of the clash when the Bastard Heron, Sir Rauf Fenwick and Leonard Musgrave found themselves outnumbered by the Scots as they had pursued the enemy too far and become separated from the rest of their raiding party.
The English objective was simply for the three units representing the Bastard Heron, Sir Rauf Fenwick and Leonard Musgrave to escape the field by getting past the Scots force and leaving from the opposite table edge. They started the game facing the Scots pursuers under the Kerrs, which was deployed in the centre of the table. An English relief force would arrive from a random table edge to aid their escape.
The relief force arrived from turn two if a 9-12 was rolled on 2D6, from turn three on an 8-12, from turn four on a 7-12 and so on. The table edge the relief force arrived from was diced for on a D6. On 1-2 it arrived on the right flank of the Scots, 3-4 behind Heron, Fenwick and Musgrave and 5-6 from the left flank of the Scots. The relief force would enter via move activations so they could not skirmish, shoot or attack on the first turn they arrived on the field. The relief force formed part of the same retinue as Heron, Sir Rauf Fenwick and Leonard Musgrave.
The Scots would get 4 victory points for killing or routing John the Bastard Heron, 3 for killing or routing Sir Rauf Fenwick and 2 for killing or routing Leonard Musgrave.
The English would get 4 victory points if John the Bastard Heron escaped, 3 for Sir Rauf Fenwick escaping and 2 for Leonard Musgrave making good his escape.
We stuck with the same sides for this game with Stuart again leading the English and myself taking command of the Scots. As with the first game this was played using our modified Renaissance Rampant rules.
We stuck with the same sides for this game with Stuart again leading the English and myself taking command of the Scots. As with the first game this was played using our modified Renaissance Rampant rules.
The Bastard Heron
To represent his hardiness John Heron the Bastard's unit was a Border Horse unit that had armour of 3 rather than 2.
The Armies
The English
The English
Starting on the table and attempting to escape:
1 Unit of Demilancers (Sir Rauf Fenwick, retinue leader)
1 Unit of Border Horse (John Heron the Bastard, see special rule above)
1 Unit of Border Horse (Leonard Musgrave)
The relief force, starting off the table and arriving from a random table edge:
2 Units of Mounted Archers
1 Unit of Border Horse
2 Units of Borderers
The Scots
1 Unit of Demilancers (Sir Andrew or "Dand" Kerr, Warden of the Middle Marches)
2 Units of Border Horse
2 Units of Borderers
2 Units of Retinue Foot
A brief description follows.
 |
| Sir Sir Rauf Fenwick and and Leonard Musgrave both lead their horsemen in different directions in an attempt to evade the Kerrs. Musgrave is instantly caught and unhorsed by the vengeful Scots. |
 |
| John Heron the Bastard attempts another escape route but immediately comes under a hail of arrows from the Scots. |
 |
| It looks as through Sir Rauf Fenwick may have found a route to safety. |
 |
| Before the Kerrs can get their hands on John Heron English reinforcements arrive. |
 |
| Heron attempts to ride to safety but is slain by an arrow as he retreats. |
 |
| Sir Rauf Fenwick finds his escape route blocked. |
 |
| Although Heron and Musgrave have been slain the fighting in still fierce and some of the Scots border horse seek a temporary respite from the battle. |
 |
| English border horse force back the dismounted Kerr retainers. |
 |
| Dand Kerr and his men move to block Fenwick's escape. |
This game turned out to be similarly as bloody as the "Ill Raid". Caught off guard and initially outnumbered by the vengeful Kerr clan the Bastard Heron, Sir Rauf Fenwick and Leonard Musgrave all led their bands of horsemen in different directions, riding as hard as they could to avoid being caught by the Scots. Musgrave was particularly unlucky being immediately caught by a band of Scots border horse and slain. Sir Rauf Fenwick headed off into the hills in an attempt to evade pursuit whilst Heron rode out in the other direction, only to ride into a hail of arrows from some dismounted Scots borderers.
As Heron fell back from the arrows it looked as if he was going to be caught but relief arrived from the main English force. More English borderers and archers arrived and Heron was quick to take shelter within their ranks. This only worked momentarily. As the Scots borderers closed in John Heron was killed by an arrow, much to the cheers of the Scots borderers who saw his standard fall.
This left Sir Rauf Fenwick. It had looked as if he would be able to outwit his pursuers but the Scots were wise to his trick and headed off his escape through the rocks. A series of fierce clashes followed as Fenwick accompanied by his retainers and more border horse drove back the dismounted Scots who tried to trap him. Briefly his escape route was clear but Fenwick had not counted on Dand Kerr who, spurred on by the success of seeing John Heron slain, had ridden back in to stop Fenwick. The personal retinues of the two Captains clashed and they dueled with one another on horseback. Fenwick was slain by Kerr but his victory was short lived as he too was then slain in a charge by some English border horse. Small clashes between the rival border clans continued across the field but the battle was over. Neither John Heron the Bastard, Sir Rauf Fenwick or Leonard Musgrave had been able to escape, but it had come at a heavy cost to the Kerrs and their men.
 |
| Supported by some mounted archers who have ridden to his aid Sir Rauf Fenwick presses forward... |
 |
| ...he charges Dand Kerr and a vicious melee takes place between the two men and their personal bodyguards. |
 |
| Fenwick is brought down in the fighting. All of the English captains have been slain. |
 |
| The fighting continues as old feuds play out on the field. |
 |
| Dand Kerr's victory is short lived as moments later he too is killed in a clash with some of Heron's cut throats. It has been a bloody day on the borders! |
These were two particularly savage encounters on the tabletop, with both of the armies in both games taking heavy casualties. Amusingly Stuart scored the maximum victory points possible for the English in the "Ill Raid", achieving all of his objectives, whilst I did the same for the Scots in the "death of the Bastard Heron" scenario. Despite the victory points showing these results I think the games themselves told a different tale with a real feeling of back and forth action in them. Stuart's new terrain represented the Anglo-Scots border perfectly and the borderers, both mounted and dismounted, from our collections made these very evocative wargames. Of course the new terrain would also be perfect for a clash in Gaelic Ireland which I feel has to be next...
What a fantastic pair of Reiver games, outstanding figures and scenery too!
ReplyDeleteCheers rross, I felt these games really captured the feel of the borders!
DeleteSpectacular pictures, gorgeous terrain, armies...and games!
ReplyDeleteThank you Phil, I am glad you enjoyed the write up.
DeleteAnother fantastic post, with a well thought out mechanism for dealing with the ambush!
ReplyDeleteCheers Stuart, yes the ambush was a lot of fun to play out - it really did go badly for the Scots though!
DeleteWonderful reports in every way. I particularly enjoy reading the original reports. Having lived and worked, as well as holidayed, in the Borders I find it all evocative of this great part of the world.
ReplyDeleteStephen
Thank you Stephen, I am glad you felt it captured the feel of the Anglo-Scots border. I agree Hall's descriptions really help to set the scene and take the reader back into Tudor times.
DeleteGreat pair of games, lots to think about, after looking at the wonderful photos.
ReplyDeleteThank you pancerni I am glad you enjoyed the photos and write up. It was fun coming up with the scenarios for these two border clashes.
Delete