
.jpg)
Last weekend Stuart visited and once again we delved into the politics of 1520s Scotland with the struggle for control of the young King James V. We played a refight of the Battle of Linlithgow Bridge to complete a series of games we started in December. As such this post forms a second part to the games covered here: http://camisado1500s.blogspot.com/2022/12/cleanse-causeway-edinburgh-1520.html.
Linlithgow Bridge, 1526
Following the failed attempt to rescue King James V from his step father, Archibald Douglas, Earl of Angus, at Melrose in July of 1526 , John Stewart, Earl of Lennox, left the Royal court for Stirling Castle. The following month at the head of 200 horsemen he attempted to rescue James from Edinburgh but the arrangements for the King's escape were discovered and the plot was foiled. With the failure of these two attempts Lennox decided his only option was to raise a much larger force in an attempt to free the King. The remaining borderers who had attempted to rescue James at Melrose continued to support Lennox whilst he rallied men from his own vassals and allies in the west. Support from James Beaton, the Chancellor, brought in lairds from Fife and Forfarshire. The Cunninghams, under the Earl of Glencairn, rallied to Lennox along with Lords Lindsay of Byres, Ross of Halkhead, Semple, Lyle and Avondale. Whilst the Earls of Cassillis and Argyll may have been favourable to Lennox's cause modern sources seem to differ on whether they provided any military support. Ken Edmond in his "The Minority of James V", argues Cassillis kept his support tacit having no charges pursued against him after the battle whilst Argyll was only mentioned by later sources as having been a Lennox supporter.
Sources also differ on the numbers both Lennox and Angus were able to raise for the subsequent clash. Ken Edmond argues that the numbers were probably around 3,000 a side as Angus stated Lennox raised 3,000 men whilst he only took 300 to the field, although this is obvously a case of Angus playing down his own forces. Jonathan Cooper in "The Heart and the Rose, the Battle of Linlithgow Bridge" relies on the slightly later chroniclers, Pitscottie and Drummond, to suggest Lennox rallied between 9,000 to 12,000 men whilst Arran mustered around 2,000-3,000 and Angus, supported by the Homes and Kerrs, brought a further 2,000-3,000 to the field. Whatever the actual numbers it does seem that Lennox was able to raise a larger force with which he headed from Stirling towards Edinburgh.
On the 4th September 1526 as Lennox's forces marched towards Edinburgh, James Hamilton, 1st Earl of Arran, now allied to Douglas despite their fierce clash in Edinburgh some 6 years before, fortified a bridge across the river Avon, a couple of miles from the town of Linlithgow. Arran's main force deployed on Pace Hill (apparently so named after "peace" was made there at the end of the battle) giving his troops a good view of the routes into the town. Jonathan Cooper's above mentioned book on the battle gives various theories on how events unfolded. It seems the most likely course of the battle, and the one Cooper includes in the Osprey volume on Scottish Renaissance Armies, is that seeing the route over the bridge being blocked by the Hamiltons, Lennox left a smaller force and some of his guns on the other side of the river before marching upstream to a ford at Manuel Convent. Here Lennox's men crossed the Avon and formed up into two battles, one being led by Lennox and the other by Cuthert Cunningham, Earl of Glencairn. The two earls led their respective divisions up hill against the Hamilton forces, their forces breaking when Angus arrived on the field supported by the warlike borderers the Kerrs and Homes.
Whilst Glencairn was wounded in the fighting Lennox was killed on the field under circumstances which fascinated later chroniclers. It seems that Lennox was either wounded and captured or was forced to surrender before possibly being murdered by Arran's son, Sir James Hamilton of Finnart. Hamilton of Finnart was one of the hot heads who had sparked the violence in Edinburgh during the "Cleanse the Causeway" affray. The tale of his murder of Lennox spread soon after the battle to such an extent that 5 years later when Matthew, son of the dead earl, and the Hamiltons, now under the 2nd Earl of Arran, made a contract of amity, in a bid to bury the hatchet between the families, Hamilton of Finnart was specifically required to deny that he had personally been responsible for the death of Lennox.
Although Angus had demonstrated that he could not be dislodged militarily from power the battle also taught the young King James V a valuable lesson. He realised he would have to make his own plans to escape from Angus and the Douglas. Circumstance allowed this in 1528, with James managing to escape from Edinburgh and reach Stirling. Angus was slow in his attempt to recapture the King allowing James to rally support and force Angus into exile after a siege of the Douglas fortress of Tantallon.
 |
| A view of the battlefield from the Hamilton position. The bridge over the Avon is on the right whilst the Earl of Glencairn's troops with the Earl of Lennox and some of his men can be see at the top left. |
 |
| James Hamilton, Earl of Arran, stands behind his guns and observes Lennox's army. |
The Scenario
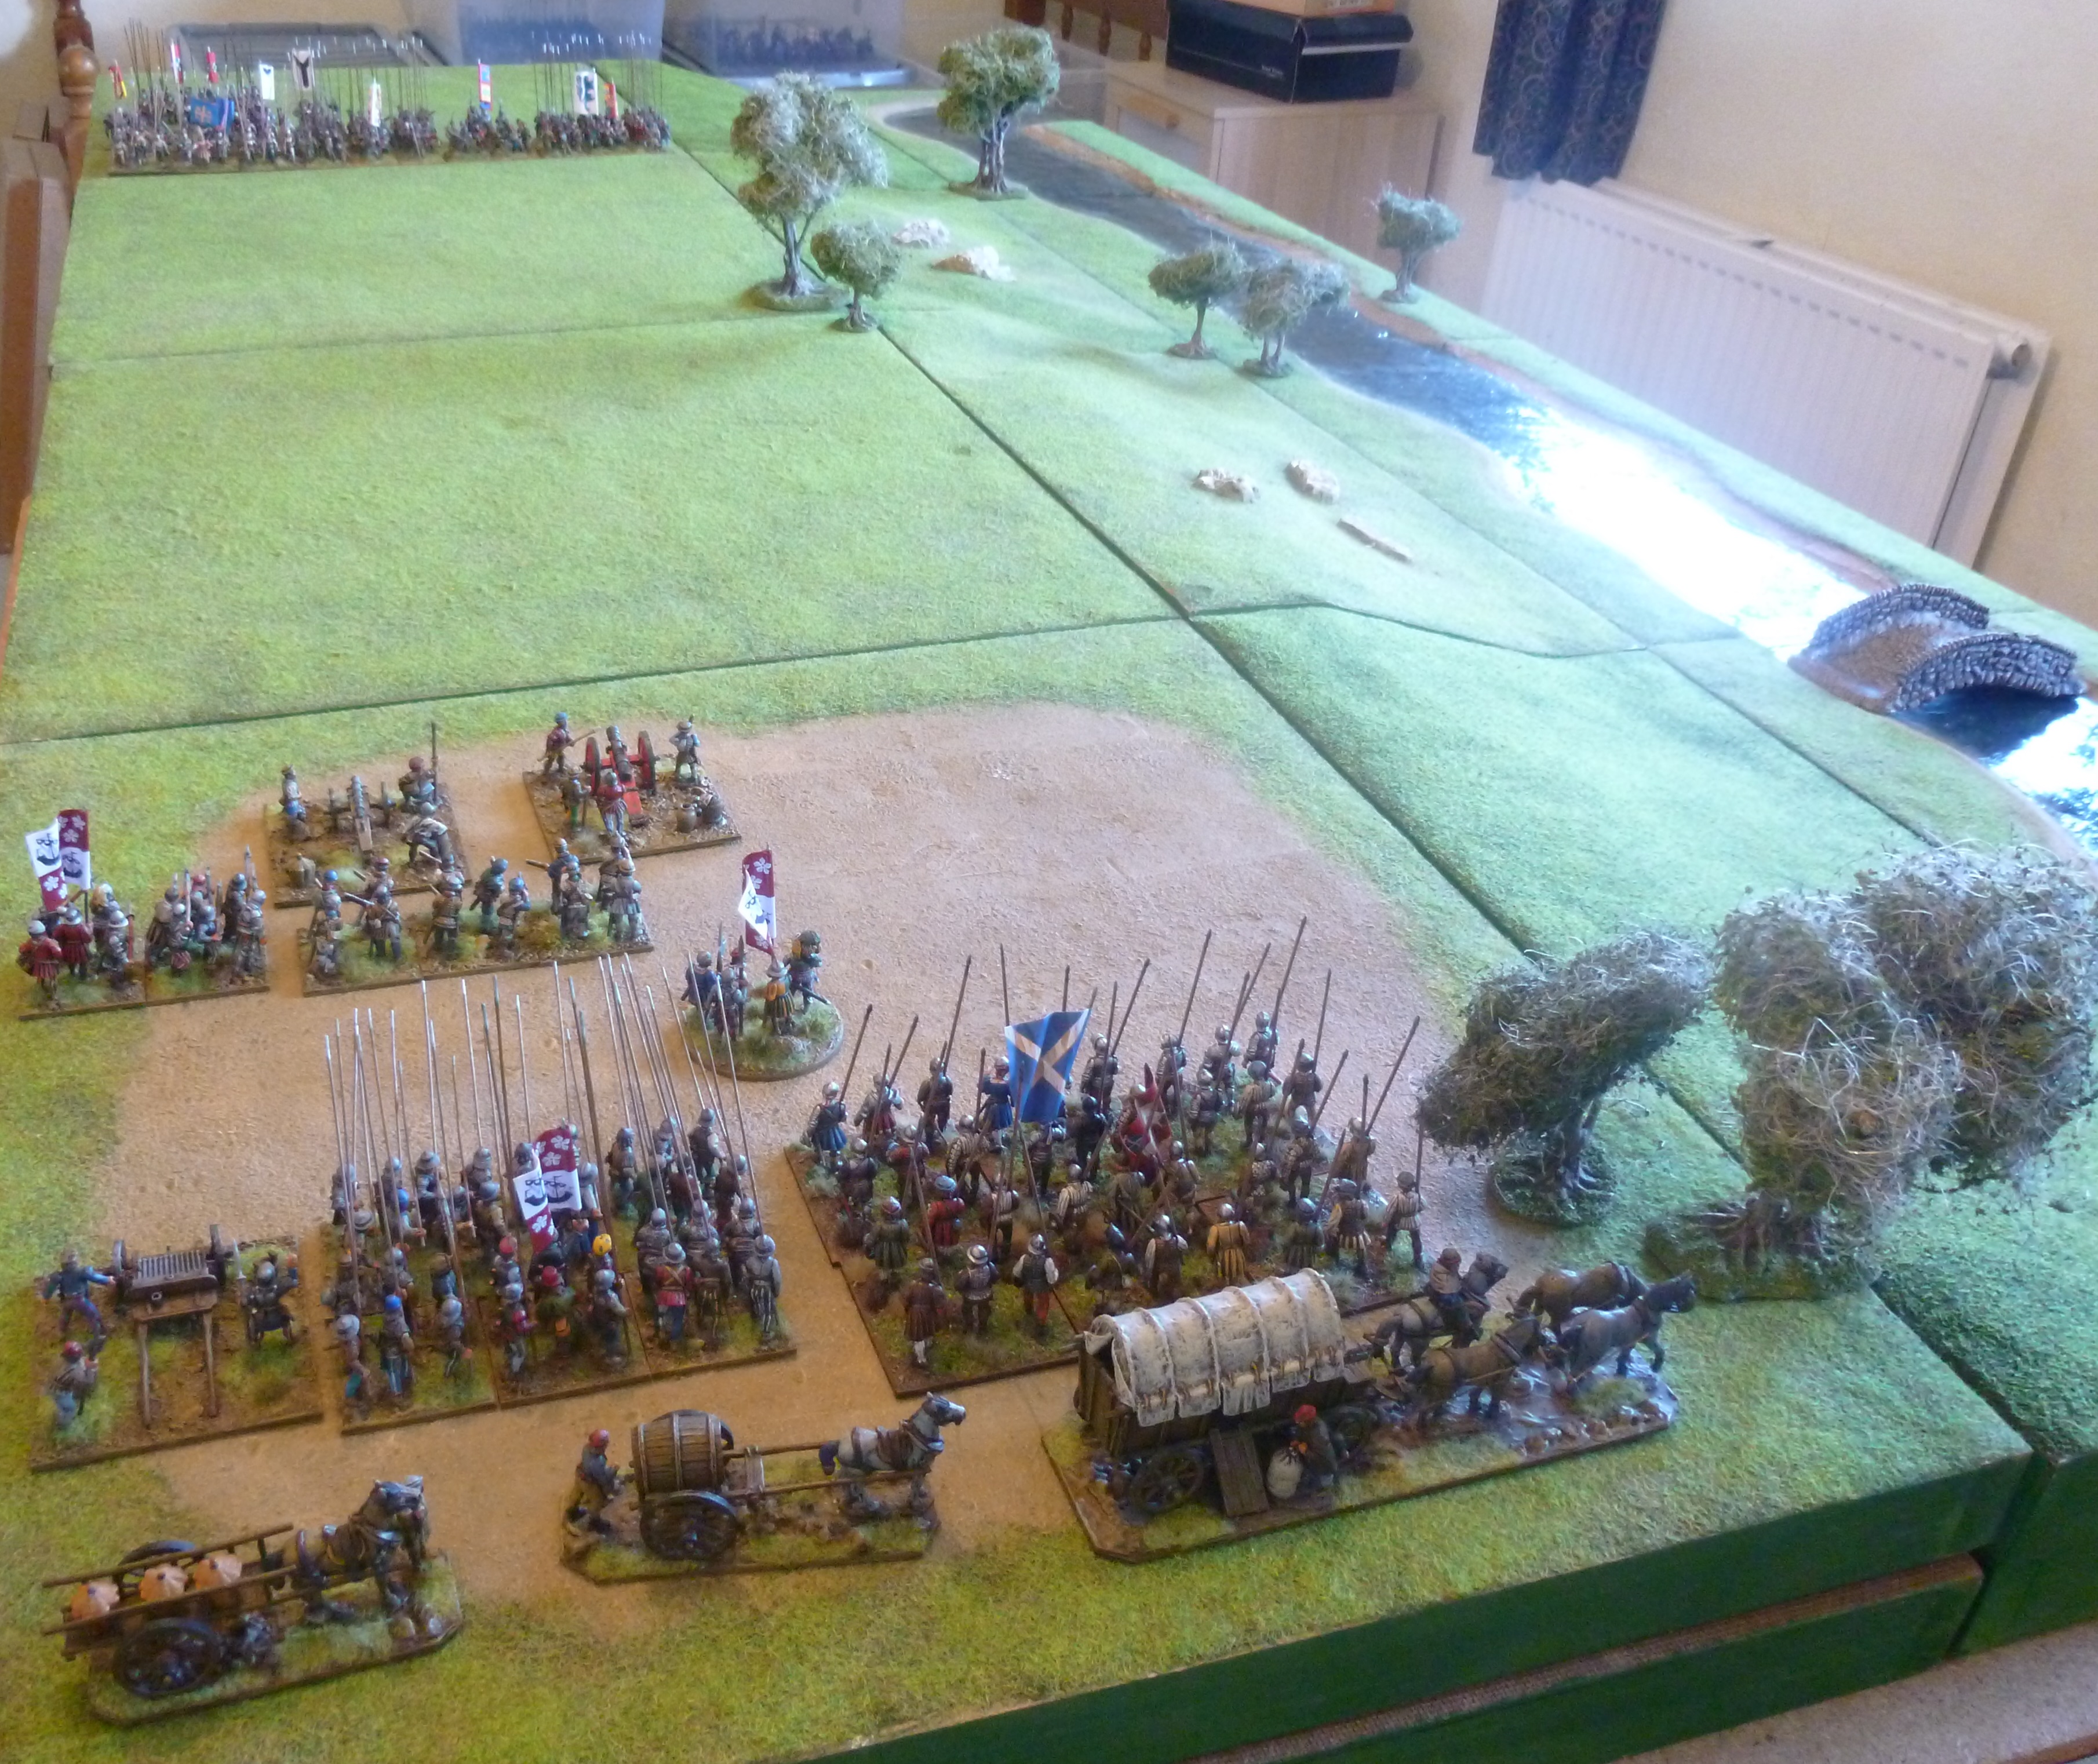
As always the game was played using our modified "Renaissance Rampant" rules. Each player was in control of two retinues. Lennox's army had retinues led by the earls of Lennox and Glencairn whilst the Douglas faction was led by the earls of Angus and Arran.
At the start of the game Arran's retinue was deployed in full at one end of the table with the bridge on its right flank with Glencairn's retinue and some of Lennox's opposing it at the other end. Most of the Lennox force was assumed to have already crossed the Avon at Manuel Convent.
At the start of the game the Lennox player wrote down which units from the Lennox retinue he wanted to enter from the other side of the bridge. At a minimum both of his guns had to arrive from this table edge but he could assign as much of the Lennox retinue as he wanted to enter at the bridge, apart from Lennox's own Foot Knight unit.
The river could only be crossed at the bridge and the hill tiles counted as difficult terrain for movement and combat.
Angus's Arrival
The Douglas player could roll to see if Angus arrived after the first hand to hand clash had taken place. On the turn after the first clash an 11+ on 2D6 would herald the arrival of Angus's retinue. The following turn a 10+ would mean Angus would arrive and the following turn a 9+ and so on. Angus's retinue would enter via the left flank of Arran's deployment area up to the midway point of the table. As soon as the correct roll was made the Douglas player had to bring at least three units on, one of which had to be Angus's unit of foot knights.
Victory Conditions
The Victory Conditions in this game were simple. The Lennox army had to slay or rout Angus and Angus and the Douglas army had to slay or rout Lennox. As soon as one of these retinue leaders was slain or routed from the table the game would end.
 |
| Highlanders and borderers from Lennox's army advance over Linlithgow Bridge. |
The Armies
The Lennox Faction
John Stewart, Earl of Lennox
1 Unit of Foot Knights (John Stewart, Earl of Lennox, retinue leader)
2 Units of Lowland Pike
1 Unit of Retinue Foot
2 Culverins
2 Units of Border Foot (Scotts and Elliotts)
1 Unit of Highlanders
1 Unit of Caterans
Cuthert Cunningham, Earl of Glencairn
1 Unit of Foot Knights (Cuthert Cunningham, Earl of Glencairn, retinue leader)
1 Unit of Foot Knights (John Lindsay, 5th Lord Lindsay)
1 Unit of Retinue Foot
2 Units of Lowland Pike
1 Unit of Scots Arquebusiers
The Douglas Faction
Archibald Douglas, Earl of Angus
1 Unit of Foot Knights (Archibald Douglas, Earl of Angus, retinue leader)
1 Unit of Foot Knights (George Home, 4th Lord Home)
2 Units of Lowland Pike
3 Units of Border Foot (Homes and Kerrs)
James Hamilton, Earl of Arran
1 Unit of Foot Knights (James Hamilton, Earl of Arran, retinue leader)
1 Unit of Retinue Foot (Sir James Hamilton of Finnart)
2 Units of Lowland Pike
1 Unit of Scots Arquebusiers
2 Culverins
1 Organ Gun to assign to 1 unit
We diced to see who took control of each army which resulted in Stuart taking control of the Douglas faction with me in command of Lennox and his supporters. A brief write up of the game follows and as ever the photos and captions are a good way to follow the action.
 |
| A view of the battlefield from above. The Hamilton force is in the top right with Lennox and Glencairn's troops advancing towards them in the centre right of the picture. The bridge can be seen in the top left with the highlanders and borderers advancing across it. |
 |
| Scott and Elliott borderers, veterans from the clash a couple of months earlier at Melrose, and highlanders in support of Lennox surge up Pace Hill to attack the Earl of Arran's position. |
 |
| The Hamilton guns open fire... |
 |
| ...and the highlanders flee back down the hill. |
 |
| Sir James Hamilton of Finnart leads his retainers down Pace Hill and is slain in a fierce melee with the Scott borderers. |
The day started with a surprise for Lennox and his captains. They discovered that the bridge over the River Avon had not been closely guarded by the Earl of Arran's men. Taking advantage of this Lennox sent his contingent of highlanders and the Scott and Elliott borderers across the bridge on Arran's right flank. Lennox also deployed his guns at the bridge, there was no time for them to be dragged upstream to the ford at Manuel Convent.
As Lennox's highlanders and borderers advanced up the banks of Pace Hill the Hamilton artillery opened fire. Unused to such terrifying engines of war and taking casualties from the guns the highlanders lost their nerve and temporarily fled back down the hillside. The Scotts and Elliotts continued to advance leading Arran's bastard son, and notorious hot head, Sir James Hamilton of Finnart to charge down the hill with his retainers. Hamilton of Finnart was slain in the melee that followed.
 |
| As the Lennox forces begin to surround the Hamiltons... |
 |
| ...Angus arrives with his Douglas forces, accompanied by the Homes and Kerrs. |
 |
| Archibald Douglas, Earl of Angus, takes to the field with reinforcements for the beleaguered Hamiltons. |
.jpg) |
| The Lennox forces push forward. |
 |
| A view of the field. The Hamilton and Douglas forces are in the left hand corner with the army of Lennox and Glencairn attacking from the right hand side and the top of the photo. |
 |
| The Cunninghams under the Earl of Glencairn advance into the fray. |
 |
| The battle is in full swing! |
 |
| There is heavy fighting at the crest of Pace Hill as the highlanders and Scott and Elliott borderers attack the Hamiltons and Douglas. |
 |
| Reinforced by Angus's borderers Arran's men hold the attackers back. |
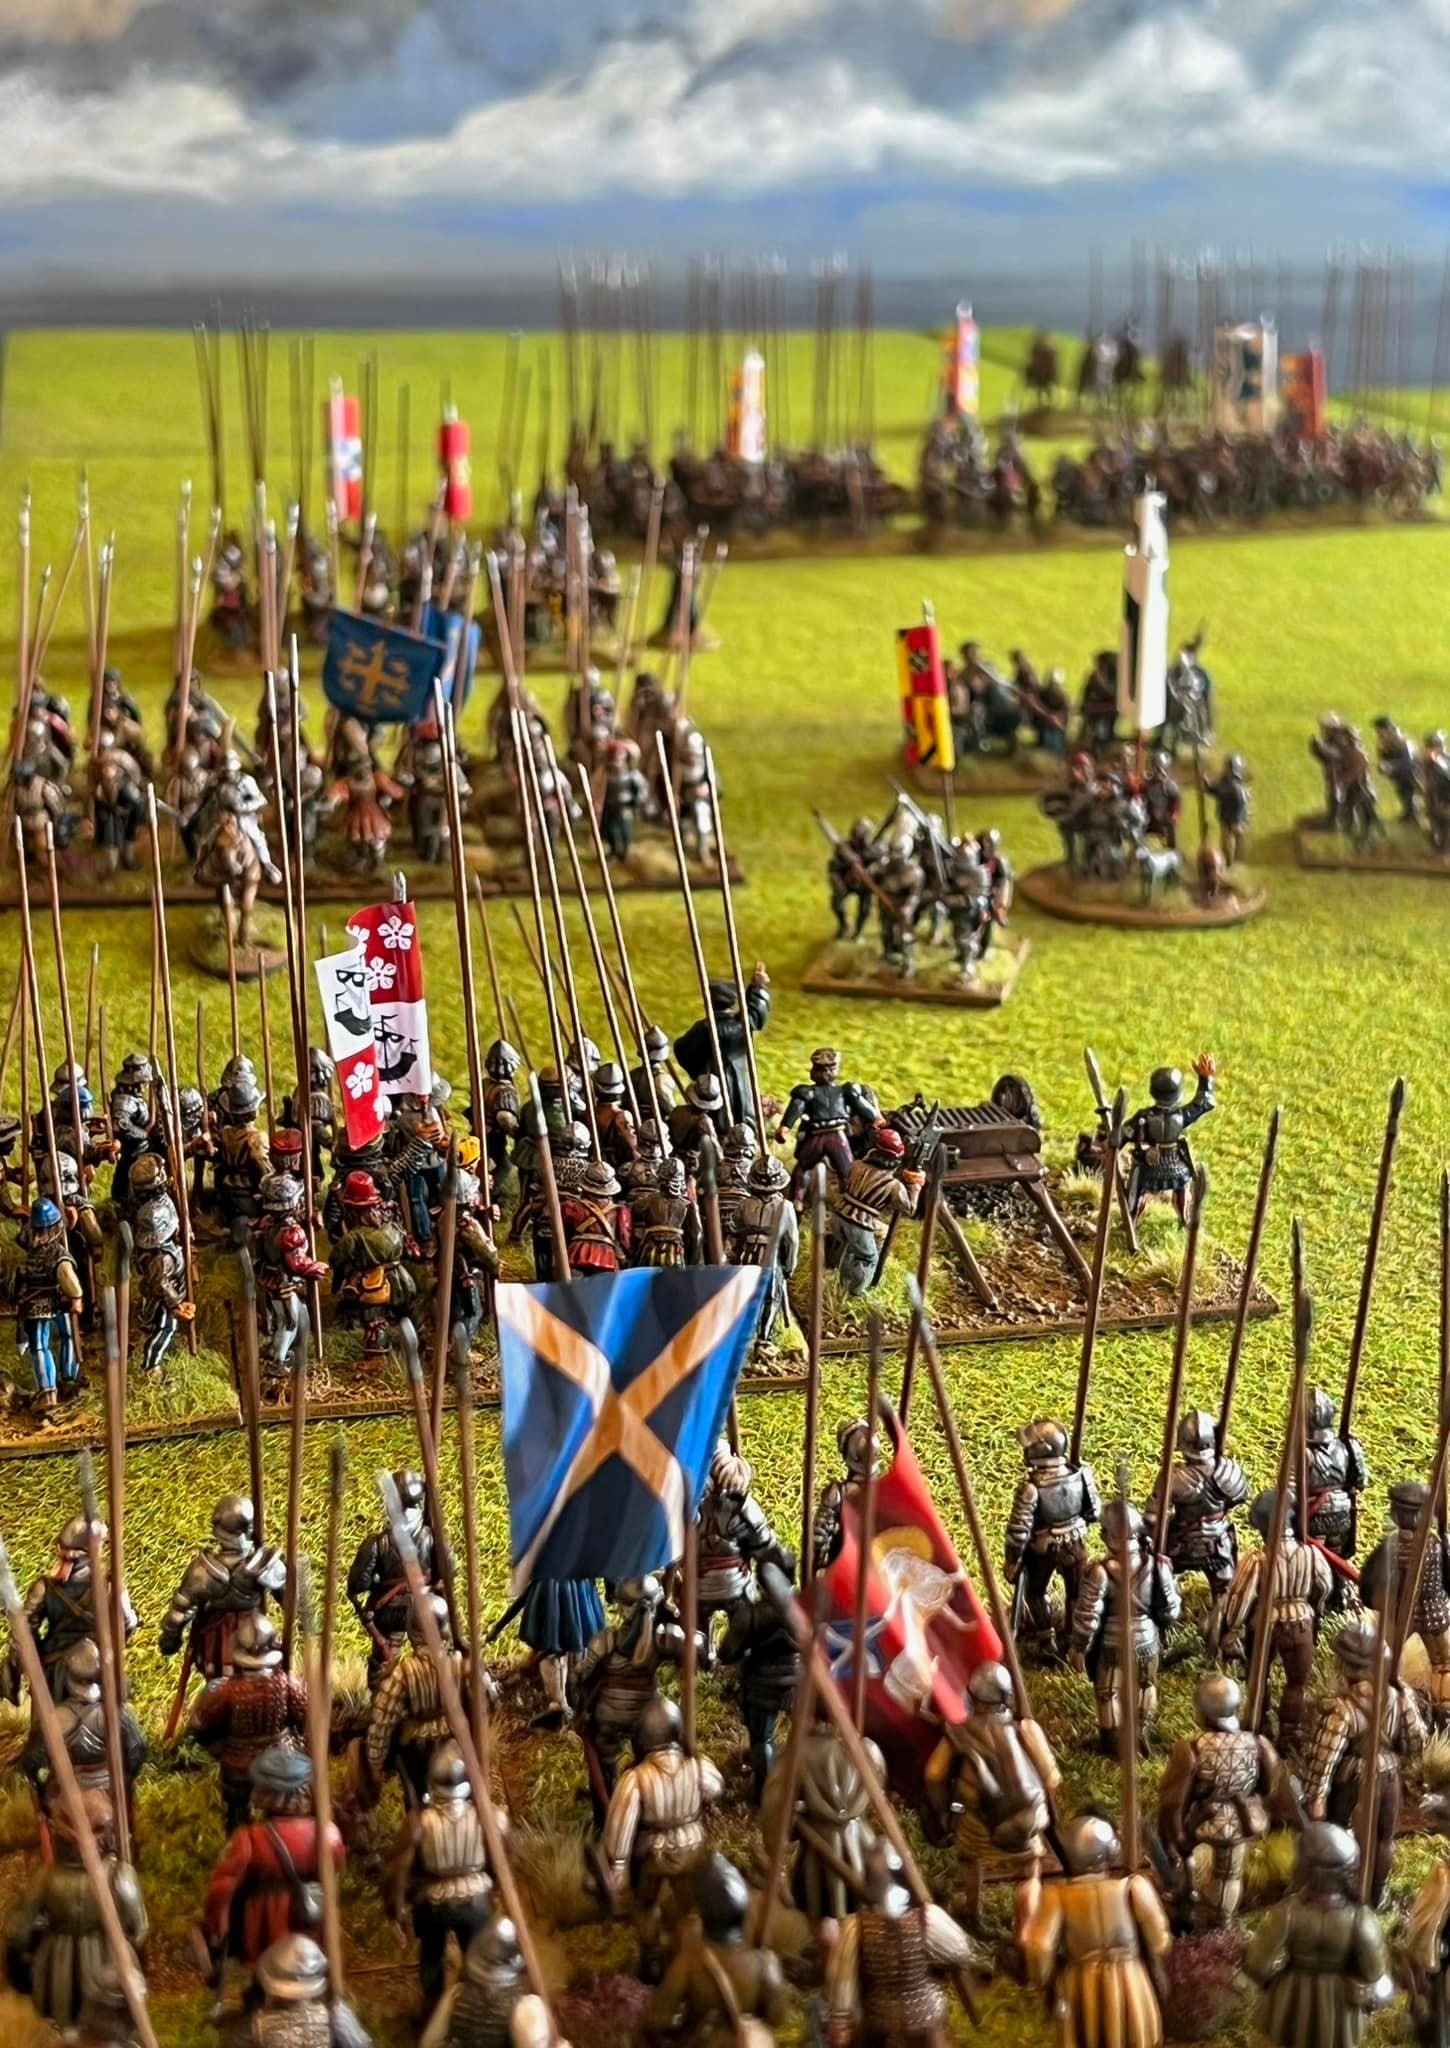
Hamilton of Finnart may have been slain but his attack on the Lennox contingent crossing the bridge bought time for the rest of his father's force. As Lennox's highlanders and borderers crested Pace Hill they were dismayed to see that Angus had arrived on the field with his supporters. Amongst the Douglas army were the Homes and Kerrs, borderers who had scores to settle with the Scotts and Elliotts, chief of these being the slaying of Andrew Kerr only a couple of months earlier at Melrose. The borderers of both sides engaged in a back and forth fight but the Scotts and Elliotts were slowly beaten back despite the supporting archery of the highland contingent who continued to shoot into the Douglas and Hamilton forces.
Whilst this fight was taking place the Earl of Glencairn, supported by Lord Lindsay, advanced with his pike blocks in an attempt to defeat the Hamilton pike before all of Angus's forces could arrive. Lennox was more cautious and held back with his "battle" seeming unwilling to commit himself to the fight when the outcome was far from certain. The Hamilton forces did not advance to meet Glencairn as they knew more reinforcements were on the way and that their guns would be more effective if Lennox's army was forced to advance into them.
 |
| Troops under the Earl of Glencairn and Lord Lindsay advance on the Hamilton and Douglas position. |
 |
| John, 5th Lord Lindsay, leads the attack. His men are met by a hail of shot from the Hamilton artillery. |
 |
| After some fierce fighting the highlanders and Scotts of Lennox's army have been unable to gain any ground. |
 |
| Glencairn and Lindsay continue to lead the assault... |
 |
| ...whilst Lennox himself advances behind them with Lords Avondale and Crichton. |
 |
| A view of the field showing the pike block fighting in the top left whilst to the right Douglas's border allies push back Lennox's highlanders and Scotts and Elliotts who crossed the bridge at the start of the battle. |
 |
| John, 5th Lord Lindsay, enters into a melee with the Hamilton pikemen. |
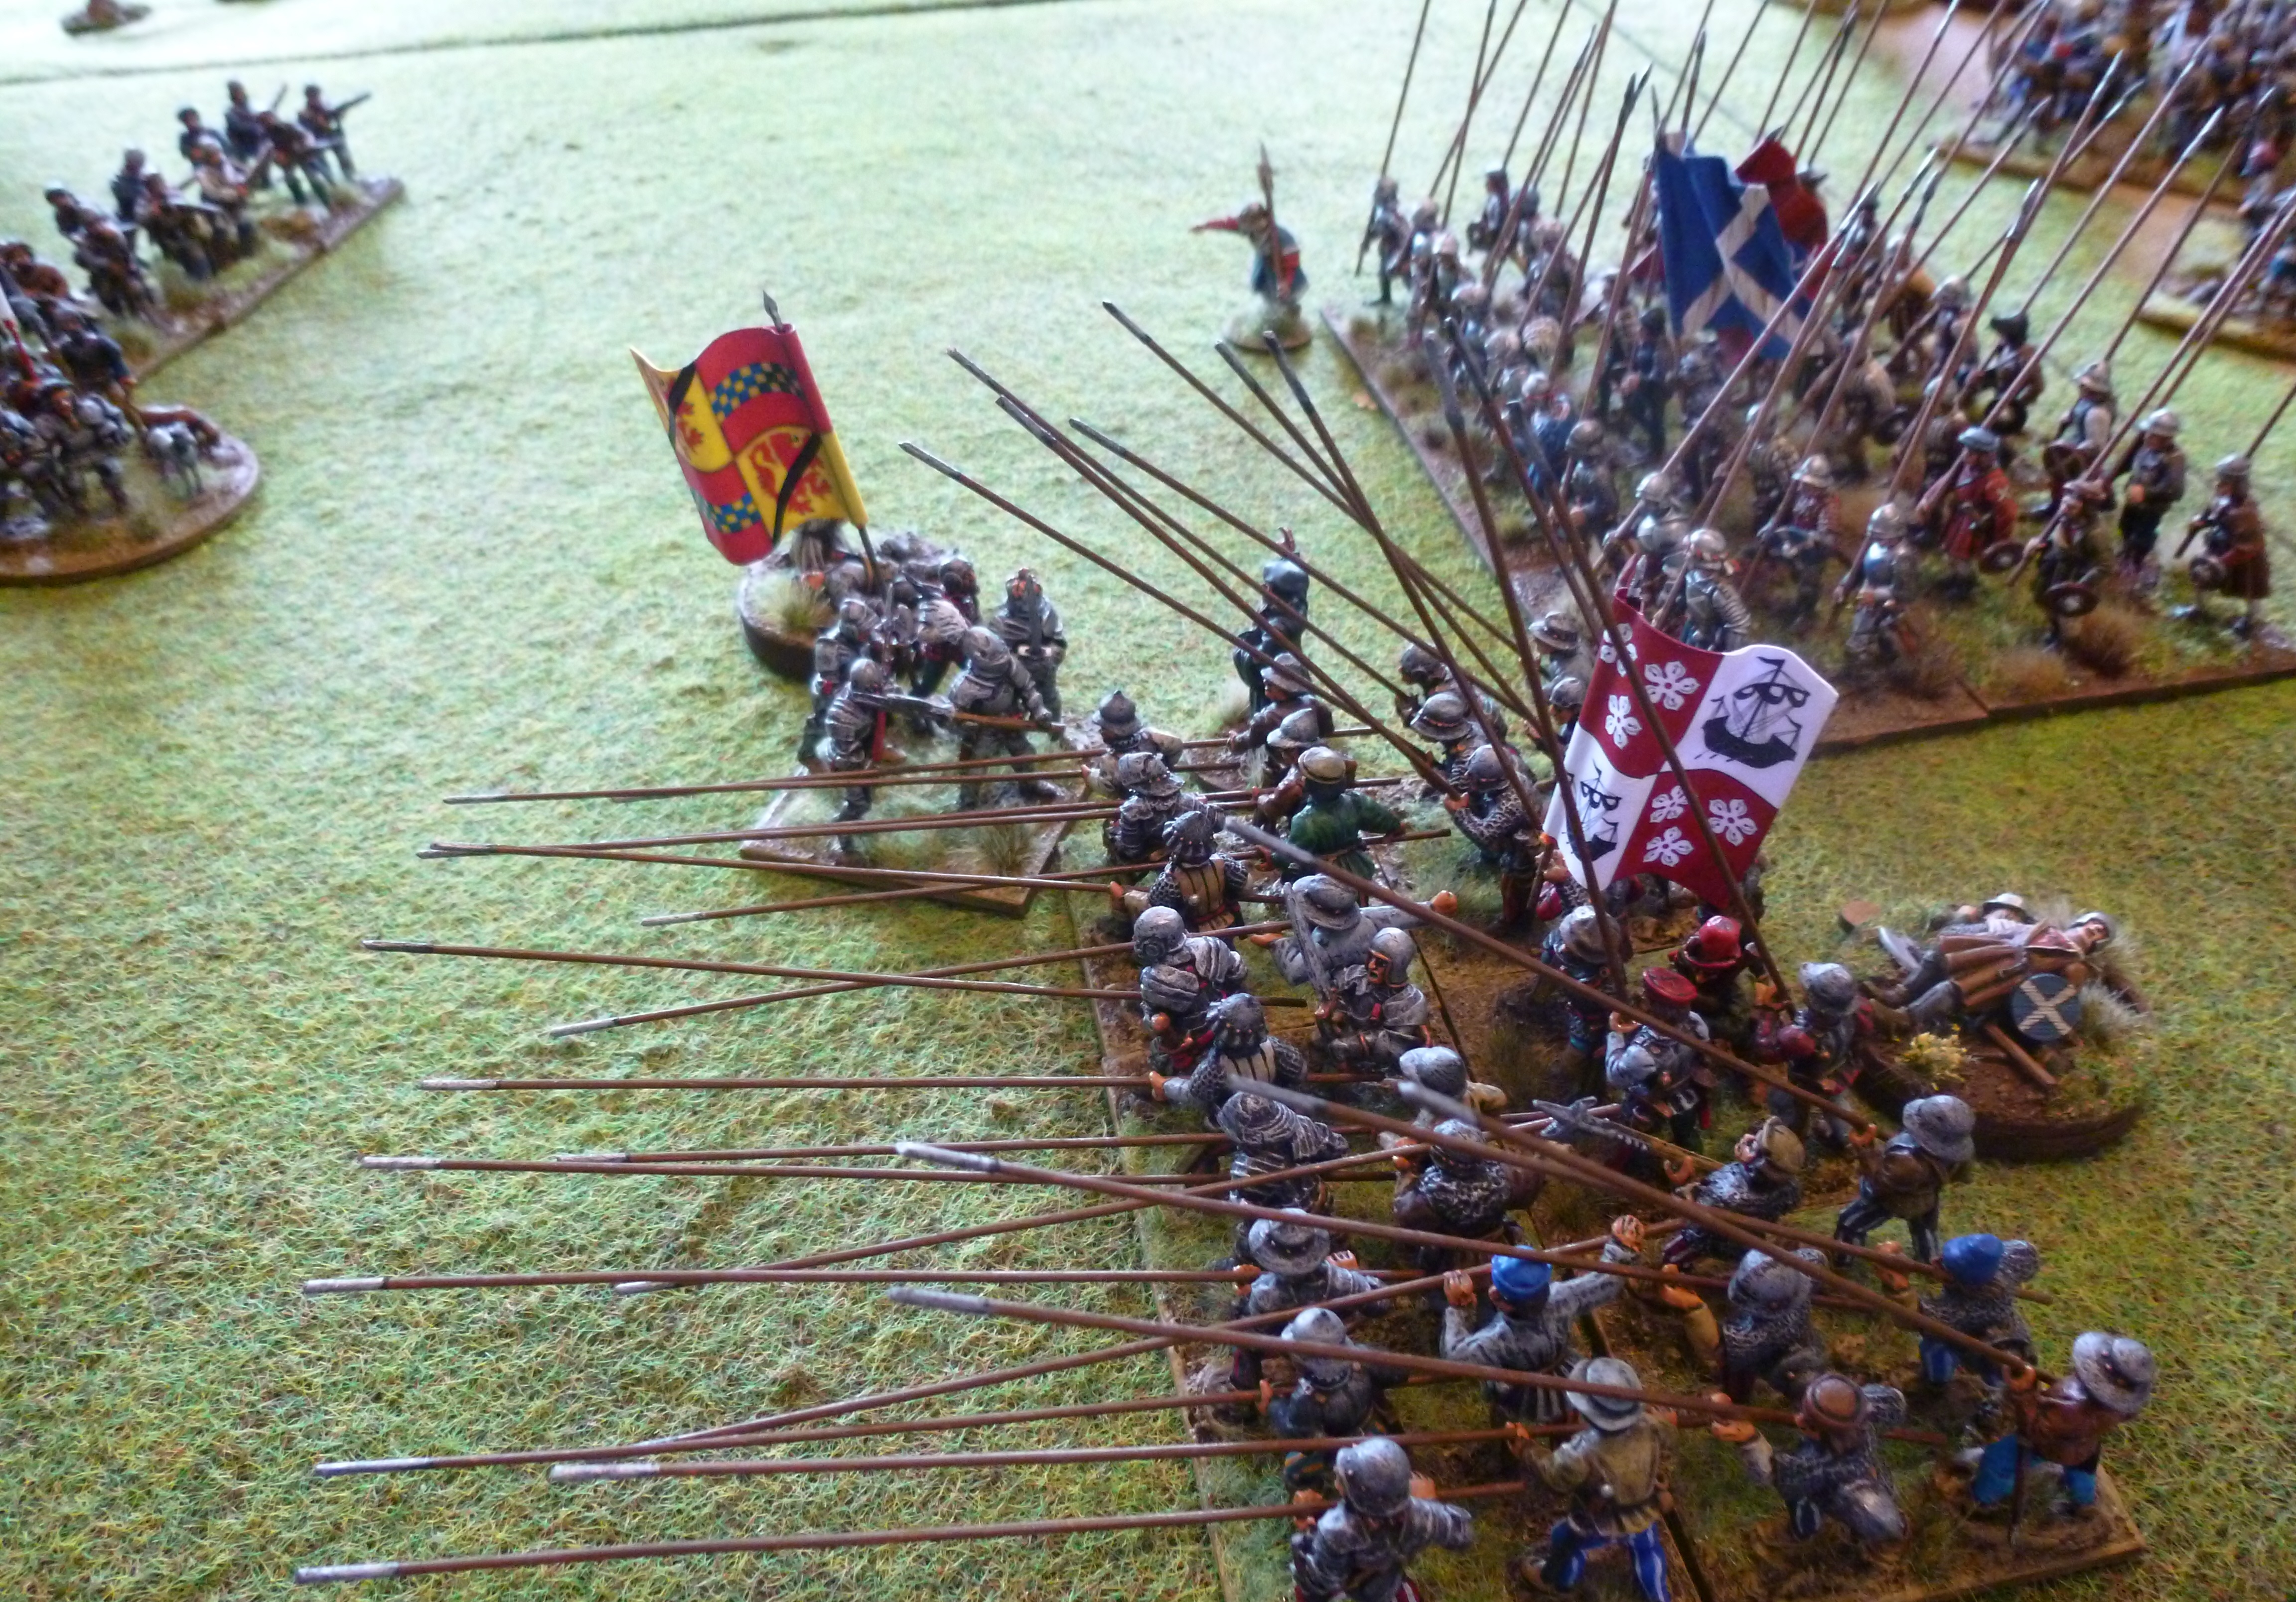
The heaviest fighting of the day now took place with the Earl of Glencairn and Lord Lindsay leading their men from the front in an attack on the Hamilton pike blocks. The Hamilton artillery pieces wrought havoc on the advancing pikemen and John, Lord Lindsay, was cut down in the confusion of the melee. Glencairn pressed the attack but as more of Angus's troops arrived on the field he too was slain.
Seeing Glencairn's men in difficulty John Stewart, Earl of Lennox, finally committed his remaining forces and entered the fray. For a while the outcome hung in the balance with pike blocks crashing into each other. The Earl of Arran was cut down by Lennox's retainers and the Earl of Angus pushed into the fight in an attempt kill Lennox. Angus's personal intervention backfired. He did find Lennox but was defeated in the fight between him and his bodyguards. The battle was over. Despite appalling losses, Lennox had won the day meaning James V would be free from Douglas control.
 |
| Lord Lindsay is slain in the fighting... |
 |
| ...to be followed shortly by the Earl of Glencairn who is bested in a fight with Home and Kerr pikemen from the borders. |
 |
| James Hamilton, Earl of Arran, chastises a prisoner as the fighting continues around him. |
 |
| Lennox and Crichton's men prepare to engage with the Earl of Angus's men. |
 |
| The "push of pike" between the rival forces. |
 |
| Arran is cut down by Lennox retainers... |
 |
| ...before Lennox himself is defeated by Angus. It has been a fiercely contested battle with heavy casualties on both sides. |
This was a really hard fought and entertaining game. A great way to end our series of games set during James V's minority. Even though we didn't have any campaign style rules interconnecting the games, playing them in the correct order of "Cleanse the Causeway", the attack at Melrose and then the final battle at Linlithgow Bridge was a great way to build up the narrative. We tried to have the correct banners for the families who took part in the battle rather than lots of St Andrews saltires, This helped to create the right feel for this internecine clash. It was interesting to have two 16th century Scots armies facing each other on the table, with border and highland contingents present.
We stuck to the Scots theme and followed this tabletop clash with our latest 16th Century game to date, the assault on Leith in 1544 which I will cover in another post.
Awesome looking game and the background was first rate. Thanks for the AAR'S.
ReplyDeleteCheers Pancerni, I really enjoyed doing the write up for this game.
DeleteIt looks splendid and, as you say, it's unusual to see two Scottish armies take the field. The armour on the command stands in particular are quite something. Unfamiliarity with this bit of history made me struggle to remember who was who and what side they were on, but the same can happen to me with the Wars of the Roses or the French Wars of Religion - I just have to pay more careful attention. I look forward to your next report.
ReplyDeleteStephen
Thanks Stephen and you are not wrong it is bloody confusing. Even the books I have read on the subject disagree over who gave military support to Lennox as I mentioned in the post above.
DeleteThen to make matters worse in 1520 Arran and the Hamiltons were deadly enemies of Angus and the Douglas yet by the time of the battle they are allies.
Fantastic looking table and figures, as always, but despite being a Scot in exile, I have to agree with The Duke above....I can never keep track of the family names in these periods, and who us on what side etc! All the various standards and coats of arms do look stunning though.
ReplyDeleteThank you rross, as I have replied to Stephen above it is certainly confusing.
DeleteI dont think the fact that the Earl of Angus was head of the Douglas, the Earl of Arran the head of the Hamiltons and the Earl of Glencairn the head of the Cunninghams helps much either - there are lots of names to remember.
A fascinating and turbulent period though and I really enjoyed doing the reading for it - it did help make it less confusing although I am not sure I achieved much clarity in the write up!
Great looking game with a victory which was "just and proper" as well as narrow! (well, after all the Macfarlanes were clients of Lennox)
ReplyDeleteCheers Ross - it was a hard fought game! I love the family connection - I wonder if there were Macfarlanes in the Lennox ranks in 1526? Seems possible if they were Lennox supporters.
DeleteCould be. My brother sent me an excerpt from an old book (temporarily awol) which mentioned the Macfrlanes' role at Langside. It described the Macfarlanes as mailed, armed with bows and 2 handed swords, and speaking both English and Irish (ie gaelic something I have only dabbled in). Arriving late (a family trait that I often uphold) they attacked the Queen's party in the rear and tipped the balance. I'm willing to take that on face value and not look too deep. :)
DeleteSo they fought armed in the highland/islemen style, that's interesting. If they were supporters at Langside they could well have been present at Linlithgow.
DeleteLovely looking game great AAR on a confusing bit of history!
ReplyDeleteBest Iain
Thank you Iain, it was a turbulent time of Scots history - and with all the different Earls and Lords it certainly did become complicated!
DeleteGreat retelling..good info.
ReplyDeleteCheers artourious, I am glad you enjoyed the write up.
DeleteExcellent Oli - Lovely figures. Yep hyper confusing history and lots of questions still to address. Folk in Linlithgow are now in the planning phase for the 500th Anniversary of the battle. Would you be able to stage you wargame as part of their events ?? If so I can put you in touch with the organisers
ReplyDeleteThanks Jon I am pleased you enjoyed the write up. I tried to explain the events clearly but the changing allegiances do make it difficult!
DeleteI am flattered by the request to stage the game for 2026 and will have a chat with Stuart about it but I fear the logistics would be too much.